

Hey there! Have you ever wondered what a deadbolt is and why everyone talks about it when it comes to home security? I sure did when I moved into my first house. I kept hearing about deadbolts being the best way to keep my doors safe, but I wasn’t sure what made them special. After installing a few myself and learning the ins and outs, I’m excited to share everything I know with you! A deadbolt is more than just a lock—it’s like a superhero for your door.
In this guide, I’ll break down what a deadbolt is, how it works, and why it’s a must-have for your home. Whether you’re a homeowner, renter, or just curious, I’ll keep it simple and fun so you can understand it all. Let’s dive in and unlock the secrets of deadbolts together!
What Exactly Is a Deadbolt?
Let’s start with the basics. A deadbolt is a type of lock that you manually operate with a key or a thumb turn. Unlike a regular spring lock, which pops open with a quick twist, a deadbolt has a solid metal bolt that slides into the door frame. I learned this when I compared the lock on my old apartment door to the deadbolt on my new house. The deadbolt felt so much sturdier!
The bolt is the key part—it’s a thick, strong piece of metal that makes it hard for someone to force the door open. When I first locked my deadbolt, I could feel how secure it was. It’s designed to resist picking, prying, and even brute force. That’s why deadbolts are a go-to for keeping your home safe.
How Does a Deadbolt Work?
Understanding how a deadbolt works helped me appreciate it even more. When you turn the key or thumb turn, the bolt slides into a strike plate on the door frame. I took a close look at mine, and it’s like the bolt becomes part of the frame, making the door super tough to break through.
There are two main types of deadbolts I’ve come across:
- Single-cylinder deadbolt: This has a keyhole on the outside and a thumb turn on the inside. I use this on my front door because it’s easy to lock and unlock from inside.
- Double-cylinder deadbolt: This needs a key on both sides. I installed one on a door with a window nearby to prevent someone from breaking the glass and reaching in.
The bolt’s strength comes from how far it extends into the frame—usually about an inch. I checked mine with a ruler, and that solid inch makes all the difference.
Why Are Deadbolts Important for Home Security?
When I moved into my house, I noticed the old locks were flimsy. A friend told me a deadbolt could make my home much safer, and they were right. Deadbolts are tougher than standard locks because they don’t rely on a spring. A spring lock can be jimmied open with a credit card, but a deadbolt? No way.
I learned that deadbolts are a top choice for exterior doors because they resist forced entry. Burglars often try to pry or kick doors open, but a deadbolt’s solid bolt makes that really hard. After installing one, I felt so much better leaving my house for the day. It’s like having a guard dog for your door!
Types of Deadbolts
I was surprised to find out there are different kinds of deadbolts. Each one has its own perks, and I’ve tried a few to see what works best. Here’s what I’ve learned:
- Single-Cylinder Deadbolt: This is the most common. I put one on my front door. You use a key outside and a thumb turn inside. It’s super convenient for everyday use.
- Double-Cylinder Deadbolt: I used this on my back door, which has a small window. It needs a key on both sides, so no one can unlock it by breaking the glass. Just keep a key nearby for emergencies.
- Keyless Deadbolt: I tried a keyless deadbolt with a keypad on my garage door. You enter a code instead of using a key. It’s great for when I’m jogging and don’t want to carry keys.
- Smart Deadbolt: This is a high-tech version I installed on my side door. It connects to my phone, so I can lock or unlock it remotely. It’s pricey but so cool for tech lovers.
Each type has its place, depending on your door and needs. I love my keyless deadbolt for convenience, but the single-cylinder is my go-to for most doors.
Choosing the Right Deadbolt for Your Door
Picking a deadbolt can feel overwhelming with so many options. I made a few trips to the hardware store before I figured out what to look for. Here’s what I check:
- Door thickness: Most deadbolts fit standard doors (1-3/8 to 1-3/4 inches thick). I measured my door to make sure the bolt would fit.
- Backset size: This is the distance from the door’s edge to the center of the lock hole. Mine was 2-3/8 inches, which is common, but some are 2-3/4 inches.
- Security grade: Deadbolts are rated by ANSI (American National Standards Institute). I chose a Grade 1 deadbolt for my front door because it’s the strongest.
- Finish: I picked a brushed nickel deadbolt to match my door handle. They come in bronze, brass, and more to suit your style.
I spent about $30 on a good single-cylinder deadbolt, but prices range from $15 to $100 depending on features. Check your door’s specs before buying to avoid returns like I did!
Tools and Materials for Installing a Deadbolt
Installing a deadbolt is easier than it looks, and I did it myself with basic tools. Here’s what I used:
- Deadbolt lock kit: Includes the bolt, strike plate, and screws. I got mine for $25.
- Drill and bits: A 2-1/8-inch hole saw for the lock and a 1-inch bit for the bolt. I borrowed a drill from a neighbor.
- Screwdriver: A Phillips screwdriver tightens the screws. I used a cordless drill to save time.
- Chisel: For carving out space for the bolt and strike plate. I bought a $10 chisel.
- Measuring tape and pencil: To mark where the lock goes. I already had these.
- Level: To ensure the lock is straight. My $5 bubble level worked great.
- Optional: Lock installation kit: This has templates to make drilling easier. I used one for $15 and it saved me time.
My total cost was about $50 since I owned some tools. You can rent or borrow a drill if you don’t have one.
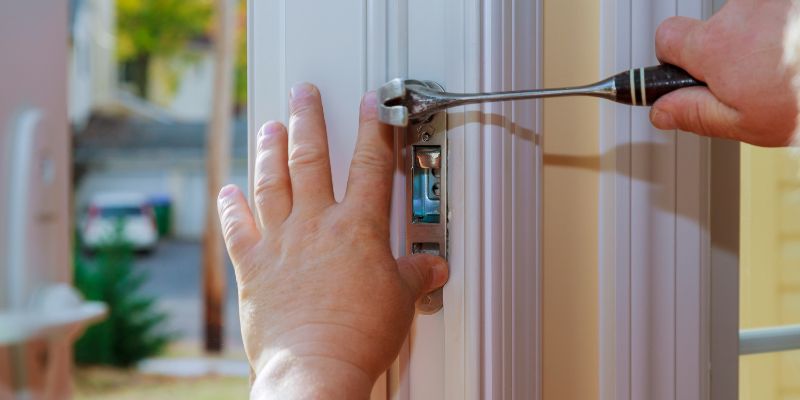
How to Install a Deadbolt
Installing a deadbolt was one of my proudest DIY moments. It took me about an hour, and my door felt so secure afterward. Here’s how I did it:
- Mark the spot: I measured 40 inches from the floor (standard height for deadbolts) and marked the door’s edge with a pencil. I also marked the frame for the strike plate.
- Drill the holes: Using a 2-1/8-inch hole saw, I drilled a hole through the door for the lock. Then, I used a 1-inch bit to drill a hole in the door’s edge for the bolt. I went slowly to avoid splintering.
- Chisel the recesses: I traced the bolt and strike plate with a pencil and chiseled out shallow recesses so they’d sit flush. This took some patience, but made the lock look clean.
- Install the bolt: I slid the bolt into the edge hole and screwed it in place. I made sure it was level.
- Attach the lock: I inserted the lock through the door hole, connected the thumb turn and exterior keyhole, and screwed them together.
- Install the strike plate: I aligned the strike plate on the frame, drilled pilot holes, and screwed it in. I tested the bolt to make sure it slid in smoothly.
- Test the lock: I locked and unlocked the deadbolt with the key and thumb turn. Mine worked perfectly, but I tightened a loose screw just in case.
It’s straightforward once you get the hang of it. My first time was a bit slow, but now I can do it in half the time.
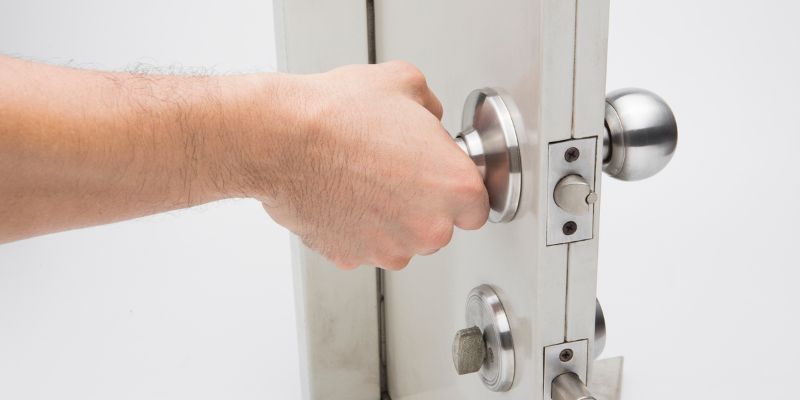
Single-Cylinder vs. Double-Cylinder: Which Is Better?
I had a tough time choosing between single- and double-cylinder deadbolts. Here’s what I learned after trying both:
- Single-Cylinder: I used this on my front door. It’s easy to unlock from inside with the thumb turn, which is great for quick exits. But if you have a window near the door, someone could break it and reach in to unlock it.
- Double-Cylinder: I put this on my back door with a glass panel. It’s more secure since it needs a key on both sides, but I keep a key nearby for emergencies like a fire.
For most homes, I recommend a single-cylinder unless you have windows close to the lock. Safety is key, so never leave a double-cylinder lock without a key handy.
Maintaining Your Deadbolt
Once your deadbolt is installed, a little care keeps it working like new. Here’s what I do:
- Lubricate the bolt: I spray WD-40 or graphite lubricant into the keyhole and bolt every 6 months. It prevents sticking.
- Tighten screws: I check the screws yearly to make sure they’re snug. A loose screw made my lock wobble once.
- Clean the lock: I wipe it with a damp rag to remove dirt. This keeps it looking shiny.
- Test regularly: I lock and unlock my deadbolt monthly to ensure it’s smooth. I caught a sticky bolt early this way.
These steps take just a few minutes and keep my deadbolt reliable.
Comparing Deadbolt Types
To help you choose, here’s a table based on my experiences:
| Deadbolt Type | Best For | Cost | Installation Time | Security Level | Difficulty |
|---|---|---|---|---|---|
| Single-Cylinder | Most doors, easy access | $15-$40 | 1 hour | High | Medium |
| Double-Cylinder | Doors with nearby windows | $20-$50 | 1 hour | Very High | Medium |
| Keyless Deadbolt | Convenience, no keys needed | $50-$150 | 1.5 hours | High | Medium |
| Smart Deadbolt | Tech-savvy homes, remote access | $100-$300 | 1.5 hours | Very High | Hard |
I love my single-cylinder for everyday use, but the smart deadbolt is a fun upgrade. Pick what fits your budget and needs.
Troubleshooting Common Deadbolt Issues
Sometimes, things don’t go perfectly. Here’s how I fixed some problems:
- Sticky lock: If the key won’t turn smoothly, I spray lubricant into the keyhole. This fixed my front door lock in seconds.
- Misaligned bolt: If the bolt doesn’t slide into the strike plate, I adjust the plate’s position. I had to file mine slightly to align it.
- Loose lock: If the deadbolt wobbles, I tighten the screws. I also check the door’s alignment with a level.
- Hard-to-turn key: If the key sticks, I clean the lock with compressed air and lubricate it. This happened to my garage deadbolt after a dusty summer.
These fixes are quick and keep your lock working smoothly.
Enhancing Your Deadbolt’s Security
A deadbolt is great, but I’ve added a few extras to make my doors even safer:
- Longer screws: I replaced the short screws in the strike plate with 3-inch screws. They go deeper into the frame, making the door harder to kick in.
- Strike plate cover: I added a metal cover over the strike plate for extra strength. It cost $10 and looks sleek.
- Door reinforcement kit: I installed a kit with metal plates around the lock area. It was $20 and made my door feel like a fortress.
- Security bar: For extra peace of mind, I use a removable security bar at night. It’s simple but effective.
These upgrades cost me less than $50 total and make my home feel super secure.
Why I Love Deadbolts
Installing a deadbolt was one of the best things I did for my home. Every time I lock my door, I feel confident knowing my family and belongings are safe. It’s not just about security—it’s about peace of mind. I saved money by installing them myself, and I love the feeling of accomplishment. Whether you’re locking up for the night or heading out for a trip, a deadbolt makes your home a haven.
Conclusion
There you go—a complete guide to understanding what a deadbolt is and why it’s awesome! I’ve been through the process of choosing and installing deadbolts, and I’m thrilled to share my tips with you. From single-cylinder to smart locks, there’s a deadbolt for every door and lifestyle. You don’t need to be a pro—just grab a few tools and take it step by step. Your home will feel safer, and you’ll love the confidence that comes with a strong lock. So, go pick out a deadbolt, make your doors secure, and enjoy the peace of mind. Happy locking!
Frequently Asked Questions
What’s the difference between a deadbolt and a regular lock?
A deadbolt has a solid bolt that slides into the frame, making it stronger than a spring lock. I found my deadbolt much harder to pry open than the old spring lock on my door.
Can I install a deadbolt on any door?
Most doors can handle a deadbolt, but check the thickness (1-3/8 to 1-3/4 inches is standard). I measured my door first to make sure the lock would fit.
Is a double-cylinder deadbolt safe?
It’s very secure but needs a key on both sides, so keep one nearby for emergencies. I use one on my back door, but I always have a key handy.
How long does it take to install a deadbolt?
It took me about an hour for my first deadbolt. With practice, I can do it in 45 minutes. A lock installation kit makes it faster.
Do I need a professional to install a deadbolt?
Not usually! I installed mine with basic tools and saved about $100. If you’re nervous about drilling, a locksmith can help, but it’s doable yourself.