

A solid red light on a smoke detector typically indicates that it has detected smoke and is actively alarming. However, the exact meaning can vary slightly by model, so always consult your device’s manual. This guide will help you understand common indicators and what to do.
Dealing with a blinking or solid red light on a smoke detector can be a bit unnerving, especially when you’re not sure what it means. Is it a real emergency, or just a quirky signal from your device? You’re not alone if this leaves you scratching your head! These little devices are crucial for our safety, but their indicator lights can sometimes be a mystery. Don’t worry, though. We’re going to break down what that solid red light usually signifies and what steps you should take. Think of me as your friendly guide, here to make sure your home is as safe and secure as possible, one simple explanation at a time. We’ll cover everything from what the light means to how to handle different situations.
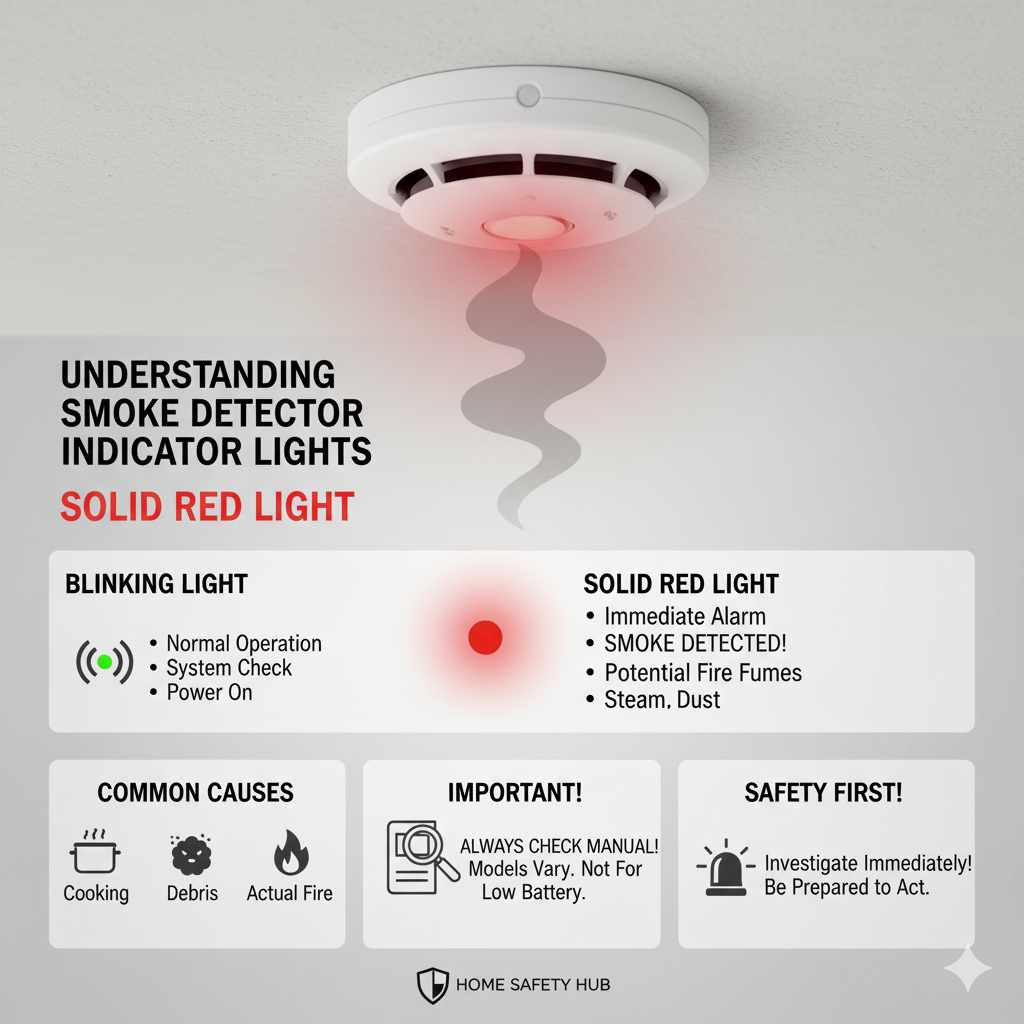
Understanding Smoke Detector Indicator Lights
Smoke detectors are vital safety devices, and understanding their signals is key to ensuring your home and loved ones are protected. While they all serve the same purpose – to alert you to potential fire hazards – the way they communicate this can differ slightly between models and manufacturers. The most common signals involve blinking or solid lights, often in red or green.
A blinking light typically means the detector is functioning normally, checking the air periodically. A solid light, especially red, often signifies a more immediate event. It’s important to remember that not all smoke detectors are the same. Some might use different color combinations or patterns to convey information. Always refer to your specific smoke detector’s user manual for the most accurate interpretation of its indicator lights. Knowing these signals can help you react appropriately and quickly in an emergency.
What a Solid Red Light Usually Means
In most smoke detector models, a solid red light is a direct indicator that the device has detected smoke particles in the air. This is its primary job – to sense a fire and sound the alarm. When you see a solid red light, it means the sensor inside the detector has been triggered.
This could be due to a genuine fire, but it can also be triggered by other factors like cooking fumes, steam, or even dust. The detector is doing exactly what it’s designed to do: alert you to a potential danger. It’s crucial to take any solid red light indication seriously, investigate the source of the potential smoke, and be prepared to take action.
Why Your Smoke Detector Might Be Showing a Solid Red Light
Several scenarios can cause your smoke detector to display a solid red light. Understanding these possibilities will help you diagnose the situation and respond correctly.
Actual Fire: This is the most critical reason. If there is a fire, the detector will sense the smoke and sound a loud alarm, accompanied by a solid red light.
Cooking Fumes: Strong fumes from cooking, especially burnt food or high-heat cooking like searing, can sometimes trigger the detector. This is more common in detectors located too close to the kitchen.
Steam: Excessive steam from a hot shower or a boiling pot on the stove can also set off the alarm, particularly in detectors located in or near bathrooms or kitchens.
Dust or Debris: A buildup of dust or small insects inside the detector’s sensing chamber can interfere with its operation and sometimes lead to false alarms.
Low Battery (Sometimes): While most detectors chirp or have a distinct blinking pattern for low batteries, some older or specific models might show a solid red light as part of their low battery warning, though this is less common.
Device Malfunction: In rare cases, the detector itself might be faulty and displaying an incorrect signal.
Testing: If you have recently tested the unit, the solid red light might indicate it was in the process of a self-test or that the test was successful in triggering the alarm.
Differentiating Between Models: What to Check
It’s essential to remember that smoke detector technology has evolved, and different manufacturers may use slightly varied light patterns or colors to communicate status. For instance, some advanced detectors might use a solid red light to indicate a specific type of event, while others use it more generally.
To be absolutely sure about what your smoke detector is telling you, always refer to the manufacturer’s instructions. You can usually find this information in the user manual that came with the device. If you’ve lost the manual, a quick online search for your smoke detector’s model number should bring up a digital copy. Knowing the specific signals for your device is the best way to ensure you’re responding correctly.
Step-by-Step Guide: What to Do When You See a Solid Red Light
Seeing a solid red light on your smoke detector can be alarming, but a calm, systematic approach will help you assess the situation and act appropriately. Follow these steps to ensure your safety and address the potential issue.
Step 1: Assess the Immediate Environment
The very first thing you need to do is check your surroundings. Is there any visible smoke? Do you smell anything burning? Listen for the alarm sound – is it a continuous, loud piercing noise, or is it a different pattern?
If you see smoke or smell fire: Immediately evacuate everyone from the home. Call the fire department from a safe location outside. Do not re-enter the building until authorities say it is safe. Your safety is the top priority.
If there is no visible smoke or smell of fire: Proceed to the next steps to investigate further.
Step 2: Investigate the Source (Safely!)
If there’s no immediate sign of fire, carefully investigate the area around the smoke detector.
Check the kitchen: Are you or someone else cooking? Did something burn? Open windows to air out the kitchen if it’s just cooking fumes.
Check bathrooms: If the detector is near a bathroom, was there a very long or hot shower?
Look for other potential triggers: Consider if there’s any unusual steam, dust, or even insects that might have entered the detector.
Step 3: Silence the Alarm (If Necessary and Safe)
If the alarm is sounding and you’ve determined there’s no fire, you’ll need to silence it. Most smoke detectors have a “Hush” or “Silence” button.
Locate the button: It’s usually a large button on the front of the detector.
Press and hold: Press and hold the button for a few seconds. This should silence the alarm temporarily. The red light may stop being solid or might turn off, depending on the model.
If the button doesn’t work: You might need to temporarily remove the battery or disconnect the power (if it’s hardwired). Be cautious when doing this.
Step 4: Clean the Smoke Detector
If dust or debris is suspected, cleaning the detector is a good preventative measure.
Vacuum: Use the soft brush attachment of your vacuum cleaner to gently vacuum the outside of the smoke detector, paying attention to the vents and openings.
Compressed air: You can also use a can of compressed air to blow out any dust from the sensor chamber. Hold the can upright and spray in short bursts from a safe distance.
Step 5: Reset the Smoke Detector
After silencing and cleaning, it’s a good idea to reset the detector to clear any lingering fault signals.
Battery-powered: Remove the battery for about 30 seconds, then reinsert it.
Hardwired: If your detector is hardwired into your home’s electrical system, you’ll likely need to turn off the power to the detector at your circuit breaker box. Then, disconnect the backup battery (if it has one) for 30 seconds, and reconnect it. Restore power at the breaker.
Step 6: Monitor the Detector
After taking these steps, keep an eye on the smoke detector.
Does the solid red light reappear? If it does, and the alarm sounds again without any apparent cause, the detector may be faulty and need replacement.
Does it return to normal? If the light returns to its normal blinking pattern (or turns off, depending on the model) and the alarm stays silent, the issue may have been a temporary trigger.
Step 7: Replace Old Detectors
Smoke detectors do not last forever. They have a lifespan, typically around 10 years. Check the manufacturing date on your detector. If it’s over 10 years old, it’s time to replace it, regardless of its indicator lights. Learn more about smoke alarm lifespan and replacement from the U.S. Fire Administration: USFA Smoke Alarm Information.
Common Causes of False Alarms and How to Prevent Them
False alarms from smoke detectors can be annoying and stressful. Fortunately, many common causes are preventable with a little understanding and proactive maintenance.
Cooking and Steam
Cause: As mentioned, strong cooking fumes, especially from burnt food or high-heat searing, and steam from showers or baths can trigger detectors.
Prevention:
Ensure your smoke detector is not placed too close to the kitchen or bathroom. The National Fire Protection Association (NFPA) recommends a minimum of 10 feet from cooking appliances. NFPA Smoke Alarm Recommendations.
When cooking, always use your range hood fan.
If a detector is near a bathroom, ventilate the area well after showers.
Environmental Factors
Cause: Insects, dust, and high humidity can interfere with the detector’s sensors.
Prevention:
Regularly vacuum the exterior of your smoke detectors and use compressed air to clean the vents.
Avoid installing detectors in areas with consistently high humidity or heavy insect activity, if possible.
Device Placement
Cause: Incorrect placement is a major contributor to false alarms. Detectors too close to vents, fans, or appliances are more prone to false triggers.
Prevention:
Follow manufacturer guidelines and NFPA recommendations for placement. Generally, install alarms on every level of your home, inside each bedroom, and outside sleeping areas.
Keep detectors at least 10 feet away from cooking appliances and at least 3 feet away from bathroom doors that open directly into a sleeping area.
Power Surges and Fluctuations
Cause: For hardwired detectors, power surges or fluctuations can sometimes cause temporary malfunctions or false alarms.
Prevention:
Ensure your home’s electrical system is properly grounded and maintained.
Consider using a surge protector for sensitive electronics, although this is less directly applicable to smoke detectors unless they are part of a larger integrated system.
Age and Maintenance
Cause: Old, dusty, or poorly maintained detectors are more likely to malfunction and produce false alarms.
Prevention:
Test your smoke detectors monthly by pressing the test button.
Clean your detectors every six months.
Replace batteries at least once a year (or as recommended by the manufacturer).
Replace the entire unit every 10 years.
Types of Smoke Detectors and Their Indicator Lights
Understanding the different types of smoke detectors can help you better interpret their signals. The two primary types are ionization and photoelectric, though many modern detectors combine both technologies.
Ionization Smoke Detectors
How they work: These detectors use a small amount of radioactive material to ionize the air between two electrically charged plates. When smoke particles enter the chamber, they disrupt the flow of ions, causing the alarm to trigger.
Best for: Ionization detectors are generally more responsive to fast-flaming fires with smaller smoke particles.
Indicator Lights: While specific patterns vary, a solid red light typically still signifies an alarm condition. A blinking green light often indicates normal operation, while a blinking red light might signal an issue or a test mode.
Photoelectric Smoke Detectors
How they work: These detectors use a light beam in a sensing chamber. When smoke enters, it scatters the light beam onto a sensor, triggering the alarm.
Best for: Photoelectric detectors are typically better at detecting slow-burning fires that produce larger smoke particles.
Indicator Lights: Similar to ionization detectors, a solid red light usually means smoke has been detected. A blinking green light often means it’s working correctly, and other patterns might indicate malfunctions or low battery.
Combination (Dual-Sensor) Smoke Detectors
How they work: These units combine both ionization and photoelectric sensors, offering broader protection against different types of fires.
Indicator Lights: They often follow the most common conventions, where a solid red light indicates an alarm. However, the specific light patterns for normal operation, low battery, or malfunction might be more complex. Always check the manual for these advanced units.
Hardwired vs. Battery-Powered
Hardwired: These detectors are connected to your home’s electrical system and usually have a battery backup. They often have more sophisticated indicator lights and can be interconnected so that if one alarm sounds, they all do.
Battery-Powered: These are simpler and can be installed anywhere. Their indicator lights and sounds are typically more basic.
Table: Common Smoke Detector Indicator Light Meanings (General)
| Light Color/Pattern | Likely Meaning | Action |
| :—————— | :—————————————————- | :—————————————————————————————————- |
| Solid Red | Smoke detected; Alarm is sounding. | Investigate for fire. If none, silence alarm, identify cause, clean, reset. If persistent, replace. |
| Blinking Green | Unit is powered and functioning normally. | No action needed. |
| Blinking Red | Varies: May indicate alarm, malfunction, or test mode. | Check manual; investigate if alarm sounds. |
| No Light | Unit is not powered or is malfunctioning. | Check power source (breaker, battery). If still no light, replace unit. |
| Chirping Sound | Low battery or end-of-life warning. | Replace battery immediately. If chirping continues after battery change, replace unit. |
Note: This table provides general guidance. Always refer to your specific smoke detector’s manual for precise interpretations.
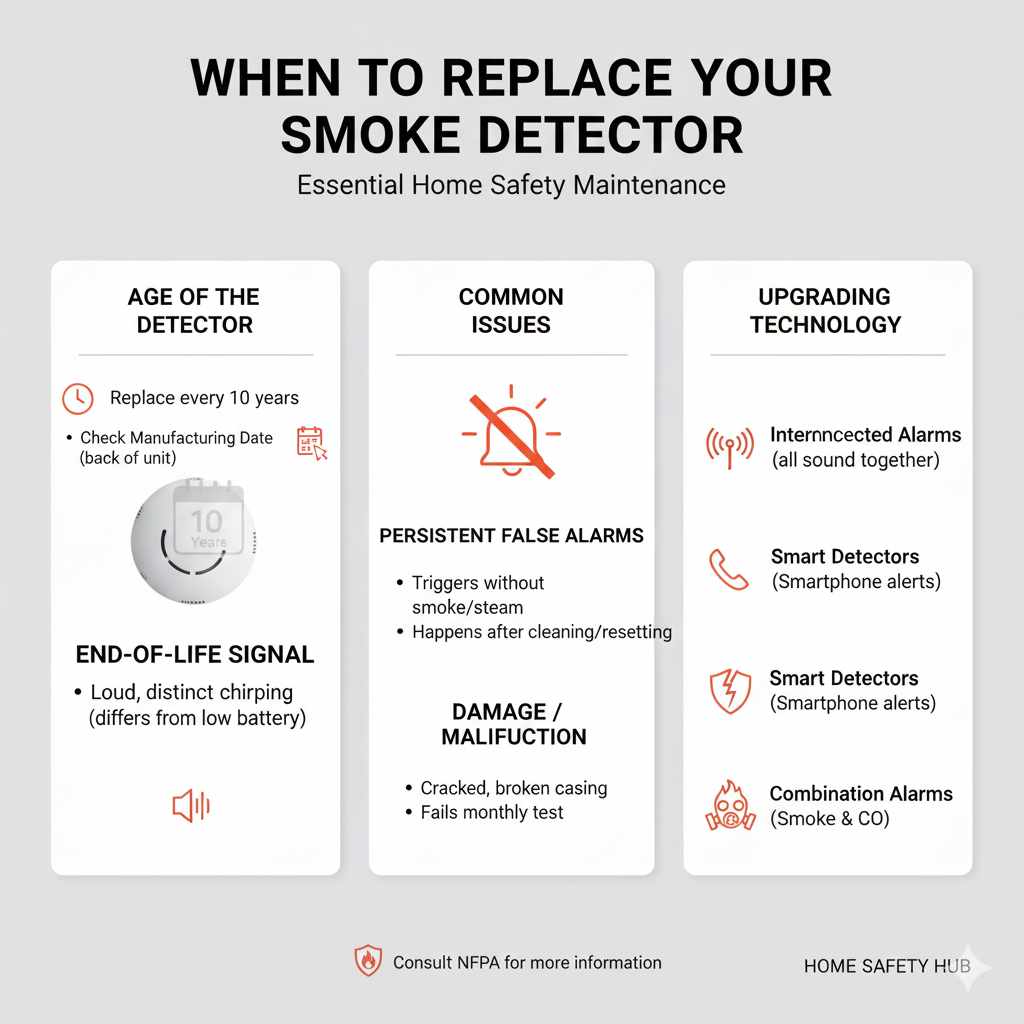
When to Replace Your Smoke Detector
Smoke detectors are not designed to last forever. Like many electronic devices, they degrade over time, and their ability to reliably detect smoke can diminish. Knowing when to replace them is just as important as understanding their indicator lights.
Age of the Detector
The most common recommendation from fire safety organizations is to replace smoke alarms every 10 years.
Manufacturing Date: Most smoke detectors have a manufacturing date stamped on the back or side. Count 10 years from this date for replacement.
End-of-Life Signal: Many newer detectors are designed to emit a specific chirp or warning sound, often accompanied by a light indicator, to signal that they have reached the end of their operational life. This is distinct from a low-battery chirp.
Persistent False Alarms
If your smoke detector repeatedly goes off for no apparent reason, even after cleaning, resetting, and ensuring there are no environmental triggers, it’s likely malfunctioning. This unreliability makes it a hazard, and it should be replaced immediately.
Damage or Malfunction
Physical damage to the detector, or if it fails its monthly test, indicates it’s no longer functional. Don’t try to repair a smoke detector; replace it.
Upgrading Technology
While not strictly a replacement due to malfunction, you might consider upgrading your detectors to newer models with enhanced features, such as:
Interconnected Alarms: Wireless or hardwired interconnected alarms communicate with each other, so if one detects smoke, they all sound. This is crucial for larger homes.
Smart Detectors: These can send alerts to your smartphone, even when you’re away from home.
* Combination Alarms: Detectors that sense both smoke and carbon monoxide provide multi-layered safety.
Replacing old or malfunctioning smoke detectors is a critical part of home safety maintenance. It ensures that these vital devices will perform when you need them most. For more information on smoke alarm maintenance and replacement schedules, consult resources from the National Fire Protection Association (NFPA).
Frequently Asked Questions About Solid Red Lights on Smoke Detectors
Here are some common questions beginner homeowners have about smoke detectors and their indicator lights.
Q1: My smoke detector has a solid red light and is beeping loudly. What should I do first?
A1: Your immediate priority is safety. If you see smoke or smell fire, evacuate everyone from the house immediately and call the fire department from a safe location outside. If there is no visible smoke or smell of fire, investigate the area around the detector for potential causes like cooking fumes or steam. Then, try to silence the alarm by pressing the hush button.
Q2: Can a solid red light mean something other than smoke?
A2: While a solid red light most commonly indicates smoke detection, some models might use it for other critical alerts. It’s essential to check your specific smoke detector’s manual. In some rare cases, it could indicate a system malfunction, but the primary meaning is usually an alarm condition due to smoke.
Q3: How often should I test my smoke detector?
A3: You should test your smoke detectors at least once a month. Press the test button on each unit to ensure the alarm sounds correctly. This simple test helps confirm that the batteries are working and the alarm mechanism is functional.
Q4: My smoke detector keeps going off for no reason. What’s wrong?
A4: This is likely a false alarm. Common causes include cooking fumes, steam, dust, or insects. Try cleaning the detector with a vacuum cleaner and compressed air. If the problem persists after cleaning and ensuring it’s not placed too close to a heat or steam source, the detector may be old or faulty and should be replaced.
Q5: How do I know if my smoke detector needs new batteries?
A5: Most smoke detectors will emit a distinct, intermittent chirping sound (usually once every minute or so) when the battery is low. Some models may also have a blinking light pattern that changes or a specific indicator on a digital display. Always replace the batteries at least once a year, or when you hear the low-battery chirp.
Q6: My smoke detector is over 10 years old. Does it need to be replaced even if it seems to be working?
A6: Yes, absolutely. Smoke detectors have a limited lifespan, typically 10 years from the manufacturing date. The sensors inside degrade over time, making them less effective, even if they pass a test. It’s crucial to replace them every decade to ensure reliable protection. Check the manufacturing date on the back of your unit.
Q7: What is the difference between a solid red light and a blinking red light on a smoke detector?
A7: Generally, a solid red light means the alarm is actively sounding due to detected smoke. A blinking red light can have various meanings depending on the model; it might indicate the unit is in an alarm state, undergoing a self-test, experiencing a malfunction, or in a specific operational mode. Always consult your user manual for the exact meaning of a blinking red light on your device.
Conclusion
Understanding the signals from your smoke detector, especially a solid red light, is a critical part of keeping your home safe. While it most often signals the presence of smoke and an active alarm, a calm, step-by-step approach will help you determine the cause and respond appropriately. Remember to always prioritize safety, investigate potential hazards, and take action to silence and address the alarm. Regular maintenance, including testing, cleaning, and timely battery replacement, along with replacing your detectors every 10 years, are fundamental practices for ensuring these life-saving devices function correctly. By staying informed and proactive, you can significantly enhance your home’s fire safety and gain peace of mind.