
Hey there! So, you’ve got a ratchet strap in your hands, ready to secure some cargo in your truck or trailer, but you’re scratching your head, thinking, “How do I thread this thing?” Don’t worry—I’ve been there! When I first started hauling gear for my automotive projects, threading a ratchet strap felt like solving a puzzle. After a few tries, some tangled straps, and a lot of patience, I figured it out. Now, I’m excited to share everything I’ve learned about how to thread a ratchet strap, complete with a clear diagram to make it super easy. Whether you’re a weekend DIYer, a car enthusiast, or just someone moving a couch across town, this guide will help you master ratchet straps like a pro. Let’s get started!
What Is a Ratchet Strap and Why Is It Important?
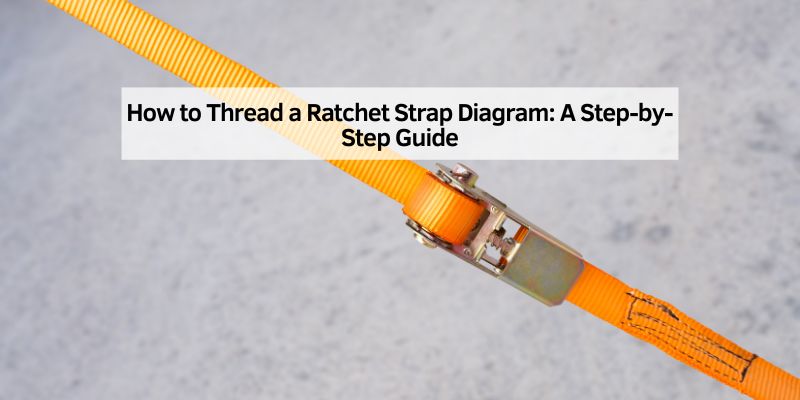
Before we dive into threading, let’s talk about what a ratchet strap is. It’s a heavy-duty tie-down tool used to secure cargo, like cars, motorcycles, or furniture, during transport. It has a long, sturdy strap, a ratchet mechanism to tighten it, and hooks or loops at the ends to anchor it. I use ratchet straps all the time when hauling parts to car shows or moving equipment for my shop.
Why does threading it right matter? If the strap isn’t threaded properly, it won’t hold tight. That could mean your load shifting or, worse, coming loose on the highway. I learned this the hard way when a poorly threaded strap loosened up while I was moving a toolbox. Luckily, nothing fell, but it was a wake-up call. Threading it correctly keeps your cargo safe and gives you peace of mind.
Parts of a Ratchet Strap
To thread a ratchet strap, you need to know its parts. When I first picked one up, I was confused by all the components, so let’s break it down. Here’s what you’ll find:
| Part | Description |
|---|---|
| Ratchet Mechanism | The metal device with a handle that tightens the strap by winding it. |
| Strap | The long, woven material (usually polyester) that wraps around your cargo. |
| Slot | The opening in the ratchet where you thread the strap. |
| Spindle | The rotating bar inside the ratchet that winds the strap as you crank it. |
| Hooks/Anchors | Metal hooks or loops at the strap’s ends to attach to anchor points on your vehicle or trailer. |
| Release Lever | A small tab or lever on the ratchet to loosen or release the strap. |
Understanding these parts makes threading much easier. I like to think of the ratchet as the brain and the strap as the muscle—together, they keep everything locked in place.
Step-by-Step Guide to Threading a Ratchet Strap
Alright, let’s get to the main event—how to thread a ratchet strap! I’ll walk you through it step by step, just like I did when I taught my buddy at the shop. I’ve also included a simple diagram below to help you visualize it. Grab your strap, and let’s do this.
Step 1: Open the Ratchet
Start by fully opening the ratchet. Pull the handle up until it’s at a 180-degree angle. This opens the slot and exposes the spindle. I always make sure the ratchet clicks into the open position—it’s a little stiff sometimes, but that’s normal. If it’s stuck, wiggle the handle gently.
Step 2: Prepare the Strap
Take the loose end of the strap (the part not attached to the ratchet). Make sure it’s not twisted or tangled. I’ve made the mistake of threading a twisted strap, and it didn’t tighten evenly. Smooth it out with your hands. If the strap is new, it might be coiled—unroll it completely.
Step 3: Thread the Strap Through the Slot
Now, feed the loose end of the strap through the bottom of the ratchet’s slot. Push it up so it comes out of the top. I usually feed about 6 to 12 inches through to give myself enough to work with. Pull the strap tight to make sure it’s lying flat against the spindle.
Step 4: Pull the Strap Through
Grab the strap from the top and pull it through until it’s snug. The strap should wrap around the spindle as you pull. I like to give it a little tug to make sure it’s secure before moving on. Don’t crank the ratchet yet—just get the strap in place.
Step 5: Close the Ratchet
Lower the ratchet handle to close it. This locks the strap onto the spindle. You might hear a click as it engages. I always check that the strap isn’t slipping by giving it a gentle pull. If it moves, open the ratchet and re-thread it more tightly.
Step 6: Secure the Strap to Your Load
Now that the strap is threaded, wrap it around your cargo and hook the ends to anchor points on your vehicle or trailer. I make sure the hooks are secure and won’t slip off. For example, when I tie down a car, I hook the straps to the frame or tie-down points, not the bumper.
Step 7: Tighten the Strap
Crank the ratchet handle up and down to tighten the strap. Each crank winds the strap around the spindle, making it super tight. I usually do 3 to 5 cranks, checking the tension as I go. Don’t overtighten—you don’t want to damage your cargo or snap the strap. When it’s tight, push the handle down to lock it.
Step 8: Check the Tension
Give the strap a tug to make sure it’s secure. I walk around my load to check all straps are tight and the cargo isn’t shifting. If it’s loose, crank the ratchet a bit more. If it’s too tight, release the tension slightly using the release lever.
Diagram: How to Thread a Ratchet Strap
To make this crystal clear, here’s a simple text-based diagram of threading a ratchet strap. Imagine looking at the ratchet from the side:
[Hook] ---- [Strap] ---- [Bottom Slot] ---- [Spindle] ---- [Top Slot] ---- [Loose End]
                ↑                   ↑
                |                   |
           (Feed strap up)     (Pull strap through)
- The strap starts at the hook, goes through the bottom slot, wraps around the spindle, and comes out of the top slot.
- Pull the loose end to tighten it before closing the ratchet.
I sketched this out on a napkin for a friend once, and it clicked for him right away. Hopefully, it helps you too!
Common Mistakes to Avoid
I’ve messed up threading ratchet straps more times than I’d like to admit, so let me save you some headaches. Here are the mistakes I’ve made and how to avoid them:
- Twisting the Strap: A twisted strap won’t tighten evenly and can wear out faster. I always smooth it out before threading.
- Threading Backward: If you feed the strap from the top down instead of bottom up, it won’t ratchet properly. Double-check the direction.
- Not Pulling Enough Strap Through: If you only thread a couple of inches, there won’t be enough to wind around the spindle. I aim for 6 to 12 inches.
- Overtightening: Cranking too hard can damage your cargo or break the strap. I learned this when I dented a toolbox by going overboard.
- Skipping the Lock: Always push the handle down to lock the ratchet. I forgot this once, and the strap loosened during a drive.
Tips for Using Ratchet Straps Safely
Threading the strap is just the start—using it safely is key. I’ve hauled everything from car engines to ATVs, and these tips have kept my loads secure:
- Check Weight Ratings: Every ratchet strap has a working load limit (WLL) printed on it. My 2-inch straps are rated for 3,333 pounds each, so I use multiple straps for heavier loads.
- Use Multiple Straps: For big items like cars, I use at least four straps—one for each corner. It keeps everything stable.
- Inspect the Strap: Before each use, I check for cuts, frays, or worn stitching. A damaged strap isn’t safe. I tossed one last year after it got chewed up by a sharp edge.
- Protect the Strap: Sharp edges on your cargo can cut the strap. I use corner protectors or old rags to cushion it.
- Secure Loose Ends: After tightening, tuck or tie the loose end so it doesn’t flap in the wind. I use a bungee cord to keep it neat.
Choosing the Right Ratchet Strap
Not all ratchet straps are the same, and picking the right one makes threading and securing easier. When I started, I grabbed the cheapest straps at the hardware store, but I quickly learned quality matters. Here’s what I look for:
- Width: Most straps are 1 to 4 inches wide. I use 2-inch straps for most automotive loads because they’re strong and versatile.
- Length: Straps come in lengths from 6 to 30 feet. I keep 15-foot and 20-foot straps in my truck for flexibility.
- Hook Type: Flat hooks, S-hooks, and E-track clips are common. I prefer flat hooks for trailers with anchor points.
- Material: Polyester is standard because it’s strong and weather-resistant. My straps have held up through rain and sun.
- Brand: I trust brands like Keeper, SmartStraps, and Rhino USA. They’re durable and have clear WLL ratings.
When I bought my current set of Keeper 2-inch straps, they came with a storage bag, which was a nice bonus for keeping my truck organized.
How to Release and Store a Ratchet Strap
Once you’re done hauling, you’ll need to release and store your strap. I used to struggle with this until I got the hang of it. Here’s how I do it:
- Release the Strap: Pull the release lever on the ratchet (usually a small tab under the handle). Hold it down and open the handle fully to loosen the strap. Pull the strap out of the slot.
- Remove Hooks: Unhook the strap from the anchor points. I check for any damage to the hooks while I’m at it.
- Wind the Strap: Roll the strap tightly to prevent tangles. I start at the hook end and wrap it toward the ratchet.
- Store Properly: Keep straps in a dry place, like a toolbox or storage bag. I store mine in my truck’s cab to protect them from rain and UV rays.
Proper storage keeps your straps ready for the next job. I’ve had mine for years because I take care of it.
Troubleshooting Common Ratchet Strap Issues
Sometimes, things don’t go smoothly. Here’s how I handle common problems:
- Strap Won’t Thread: If the strap won’t go through the slot, check for debris in the ratchet. I once found dirt clogging mine—cleaning it fixed the issue.
- Ratchet Won’t Crank: Make sure the strap is threaded correctly and not twisted. If it’s still stuck, lubricate the ratchet with a dry silicone spray.
- Strap Slips: If the strap loosens during use, it might not be threaded tightly enough. Re-thread it and pull more strap through the slot.
- Hooks Slip Off: Ensure hooks are attached to secure anchor points. I double-check mine before hitting the road.
Why Ratchet Straps Are a Must for Automotive Enthusiasts
If you’re into cars like me, ratchet straps are a lifesaver. I use them for:
- Hauling Vehicles: When I towed my project car to a shop, four ratchet straps kept it rock-solid on the trailer.
- Securing Parts: I’ve tied down engines, tires, and bumpers in my truck bed with no issues.
- Car Shows: Straps keep display gear, like tents and tables, secure during transport.
- Off-Roading: I use straps to secure gear in my Jeep when hitting the trails.
They’re versatile, affordable, and essential for anyone who moves gear or vehicles. I keep a set in every vehicle I own.
Maintaining Your Ratchet Straps
To make your straps last, a little maintenance goes a long way. Here’s what I do:
- Clean Them: If they get dirty, I wash them with mild soap and water, then air-dry. Never put them in a dryer—it weakens the fibers.
- Check for Damage: Before each use, I inspect for frays, cuts, or rust on the ratchet. If I see damage, I replace the strap.
- Lubricate the Ratchet: A quick spray of silicone lubricant keeps the mechanism smooth. I do this every few months.
- Store Properly: Keeping them out of sunlight and moisture prevents fading and mildew. My storage bag is a game-changer.
Conclusion
Threading a ratchet strap might seem tricky at first, but once you get the hang of it, it’s as easy as tying your shoes. I’ve shared every step I use, from opening the ratchet to tightening the strap, plus a handy diagram to guide you. Whether you’re hauling a car to a show, moving furniture, or securing parts in your truck, mastering this skill keeps your cargo safe and your mind at ease. With a little practice, you’ll be threading ratchet straps like a pro in no time.
I hope this guide has made the process clear and given you the confidence to tackle your next tie-down job. Grab your strap, follow these steps, and hit the road knowing your load is secure. Thanks for reading, and happy hauling!
FAQs
What is the right way to thread a ratchet strap?
Feed the strap through the bottom slot of the ratchet, around the spindle, and out the top. Pull it tight, close the ratchet, and crank to tighten.
How do I know if my ratchet strap is threaded correctly?
The strap should lie flat, not twisted, and stay tight when you crank the ratchet. If it slips or won’t tighten, re-thread it.
Can I use a ratchet strap for heavy loads like cars?
Yes, but check the working load limit (WLL) on the strap. Use multiple straps rated for the weight, like four for a car.
Why does my ratchet strap get stuck?
It might be threaded backward, twisted, or dirty. Re-thread it correctly, smooth it out, or clean the ratchet with silicone spray.
How do I store ratchet straps to make them last?
Roll them tightly, store in a dry place, and avoid sunlight or moisture. A storage bag or toolbox works great.