
Are you tired of that annoying leak under your bathroom sink? Or perhaps the water isn’t draining as swiftly as it should, leaving you with a mini flood every time you wash your hands.
You’re not alone. These common issues can turn your bathroom into a frustrating space, but there’s a simple solution: take apart your bathroom sink drain and fix it yourself. You might be thinking, “I’m not a plumber! How can I do this?
” But don’t worry. With a bit of guidance, you’ll discover that dismantling and inspecting your sink drain can be straightforward and even empowering. I’ll walk you through the process step-by-step, ensuring you feel confident and equipped to tackle this task. By the end, you’ll not only solve the problem but also gain new skills to handle similar issues in the future. Ready to roll up your sleeves? Let’s get started!
Tools And Materials Needed
Gathering the right tools makes the job easy. You will need a wrench for loosening nuts. A bucket helps catch any water. Have a screwdriver handy for screws. Plumber’s tape is useful for sealing threads. A cleaning cloth is good for wiping spills. Rubber gloves protect your hands.
Check for replacement parts if needed. Pipe cleaner can help remove clogs. Safety goggles keep your eyes safe. Flashlight helps see in dark places. Make sure to have a towel nearby for drying. Pliers can grip small parts well.
Preparation Steps
Make space around the sink. Remove items like soap and toothbrushes. Check for any obstacles under the sink. Move cleaning supplies or towels aside. Keep pets or small children away. Make sure you have good lighting. A flashlight can help see better in tight spots.
Wear gloves to protect your hands. Choose gloves that are waterproof. Safety goggles are important. They keep eyes safe from splashes. You may need a dust mask. This helps if dust flies up. Keep a towel nearby. It helps clean spills quickly.
Removing The Sink Stopper
Taking apart a bathroom sink drain requires removing the sink stopper. First, locate the pivot rod underneath the sink. Then, unscrew it to release the stopper. Once removed, clean the area thoroughly to prevent clogs. Reassemble by reversing the steps, ensuring each part is tightly secured.
Identifying The Stopper Type
First, look at the sink stopper. There are different types. Some have a lever you pull up. Others twist or press. Find out which type is in your sink. This helps you remove it easily. Check for any screws or clips. Some stoppers may need tools to loosen.
Loosening The Stopper Mechanism
Use a screwdriver for stoppers with screws. Turn gently to avoid damage. For twist stoppers, turn them counterclockwise. This should loosen them. Pull up the stopper to see if it moves. If not, check for any hidden screws or clips. Some stoppers need to be wiggled a bit. Be patient and gentle.

Credit: www.wikihow.com
Disconnecting The P-trap
Before starting, put a bucket under the sink. The bucket will catch any water. This keeps your floor clean and dry. Make sure the bucket is right under the P-Trap. It will help when you start unscrewing the parts.
Use your hands to loosen the trap. You might need a wrench if it’s too tight. Turn the nuts to the left. It helps to free the trap. Let the water fall into the bucket. This step needs care. Be gentle and take your time. Finally, remove the trap and set it aside.
Detaching The Drain Pipe
First, locate the slip nuts on the drain pipe. These nuts hold the pipe in place. Use a wrench or pliers to turn them. Turn the nuts counterclockwise until loose. Be gentle to avoid breaking the pipe. If nuts are stuck, apply some lubricant. This helps loosen them easily. Once loose, you can remove the slip nuts.
With slip nuts removed, gently pull the drain pipe away from the sink. Be cautious to avoid damaging other parts. If the pipe doesn’t budge, check for any hidden fasteners. Removing them might be necessary. After the pipe is free, inspect it for clogs or damages. Proper removal ensures smooth maintenance later.
Cleaning And Maintenance Tips
Remove the drain stopper carefully. Rinse it with warm water. Use a soft brush for scrubbing. Soap and vinegar are great cleaners. They can remove dirt and grime. Rinse the parts well. Dry them with a clean cloth. Avoid harsh chemicals. They can damage parts. Keep the area tidy after cleaning.
Look closely at each part. Check for cracks or rust. Broken parts need replacing. Even small cracks can be a problem. Tighten any loose parts. It can stop leaks. Regular checks help avoid big issues later. Always handle parts gently. This keeps them from breaking.
Reassembling The Sink Drain
Taking apart a bathroom sink drain involves loosening nuts and removing the trap. Remember to place a bucket underneath. Ensure all parts are clean before reassembling.
Reattaching The Drain Pipe
First, place the drain pipe back under the sink. Align it with the hole. Tighten the nut with your hand. Use a wrench for extra tightness. Ensure there are no gaps. Double-check the alignment. This avoids leaks.
Securing The P-trap
The P-trap is a curved pipe. It’s essential for stopping odors. Attach it to the drain pipe. Ensure it connects well. Tighten the slip nuts by hand. Use a wrench if necessary. The P-trap should not wobble. Check for any leaks.
Installing The Sink Stopper
Insert the sink stopper into the drain hole. Attach the pivot rod under the sink. Connect it to the stopper. Use the clip to secure it. Test the stopper by pulling the lever. It should move up and down smoothly. Adjust if needed.

Credit: www.youtube.com
Testing For Leaks
Turn on the faucet to let water flow. Watch closely. Is water moving through the drain? Check if the water is going down smoothly. Listen for unusual sounds.
If the water stays, there might be a blockage. Fix it soon. This helps keep everything working.
Look under the sink. Is there water dripping? Touch the pipes. Are they wet? If you find drips, there is a leak. Tighten the pipes and check again.
Drips can make a mess. Keep towels ready. Sometimes, fixing leaks needs a plumber. Don’t wait too long.
Frequently Asked Questions
How Do You Take Apart A Bathroom Sink Drain Stopper?
To remove a bathroom sink drain stopper, first detach the pivot rod clip. Unscrew the pivot nut and pull out the pivot rod. Lift the stopper from the sink hole. Clean and reassemble by reversing steps. Ensure all parts are securely tightened for proper function.
How Do You Remove A Drain From A Bathroom Sink?
To remove a bathroom sink drain, first detach the stopper. Next, unscrew the drain trap using pliers. Finally, unscrew the drain flange from underneath the sink. Ensure all parts are set aside safely for reinstallation or replacement. Use a cloth to clean any debris or residue.
How To Open Drain Pipe Under Sink Bathroom?
Turn off the water supply. Place a bucket under the sink. Loosen the slip nuts using a wrench. Remove the P-trap carefully. Clean out any debris or blockage. Reassemble by tightening the nuts securely. Check for leaks before turning the water back on.
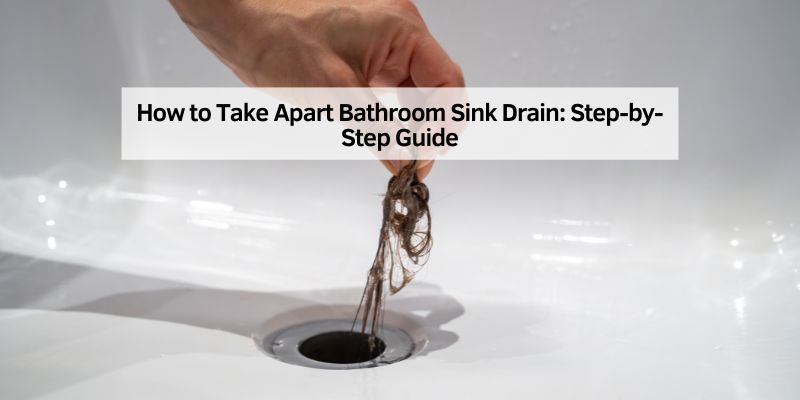
How Do You Get Gunk Out Of A Bathroom Sink Drain?
Remove gunk by pouring baking soda down the drain. Follow with vinegar and let it fizz for 10 minutes. Flush with hot water to clear residue. For stubborn clogs, use a plunger or plumber’s snake. Regular cleaning prevents buildup and maintains efficient drainage.
Conclusion
Taking apart a bathroom sink drain can seem tricky. But it’s manageable with the right steps. Start by gathering basic tools. Turn off the water supply to avoid mess. Follow the steps carefully, unscrewing parts gently. Clean each part well before reassembly.
Check for any leaks once it’s back together. This process keeps your sink working smoothly. Regular maintenance helps avoid bigger plumbing issues. With practice, it becomes simple and quick. Remember, patience and care are key. Now, you’re ready to tackle your sink drain confidently.