
Hey there, friend! So, you’re wondering how to reverse a Hunter ceiling fan with a remote? I’m really pumped to dive into this with you because it’s one of those handy tricks that can make your garage or shop so much comfier, especially for us car folks who spend hours tinkering with our rides. I still remember the first time I figured out how to reverse my Hunter fan in my garage—it was like flipping a switch to turn a stuffy workspace into a breezy haven!
After years of messing with fans, keeping my automotive space cool, and mastering my remote, I’ve got all the tips you need to get that airflow just right. Whether you’re wrenching on a classic car, detailing your truck, or chilling in your carport, this guide’s got you covered. Let’s sit down, like we’re chatting over a toolbox with a cold soda, and I’ll walk you through every step in simple terms. This article is packed with practical advice for anyone in the USA looking to make their space more comfortable. Ready to get that fan spinning the right way? Let’s roll!
Why Reverse a Ceiling Fan?
Reversing a ceiling fan changes the direction its blades spin. In summer, fans blow air down to cool you. In winter, they pull air up to push warm air down. I love this feature in my garage because it keeps me cool while I’m under the hood in July and cozy when I’m organizing tools in January.
For automotive spaces, reversing your Hunter fan makes your shop usable year-round. I’ve noticed better air circulation, less dust buildup, and even energy savings since warm air isn’t stuck at the ceiling. Plus, it’s a quick tweak that feels like a big win.
How Does a Hunter Ceiling Fan Remote Work?
Hunter ceiling fan remotes let you control the fan without climbing a ladder. My remote’s like a magic wand—I can turn the fan on, adjust speed, dim lights, and reverse direction from my workbench. It uses radio frequency (RF) to talk to the fan’s receiver, which is tucked inside the canopy or motor housing.
Most Hunter remotes have buttons for power, speed (low, medium, high), light, and reverse. I keep mine clipped to my toolbox so it’s always handy. Reversing the fan with the remote is super easy once you know which button to press, and I’ll show you how.
When Should You Reverse Your Hunter Ceiling Fan?
Timing matters for reversing your fan. Here’s when I do it:
- Summer (Downward Airflow): Blades spin counterclockwise to blow cool air down. I set this in spring for hot garage days.
- Winter (Upward Airflow): Blades spin clockwise to circulate warm air. I switch in fall to keep my shop toasty.
- Dusty Seasons: Upward flow reduces dust on my tools. I use this when the pollen’s bad.
- After Repairs: If you’ve worked on the fan, check the direction. I reversed mine after a motor fix.
- Energy Savings: Upward flow in winter cuts heating costs. I saved $10 a month on my shop’s heater.
I switch directions twice a year—spring and fall. It takes 2 minutes with my remote, and my garage feels perfect no matter the weather.
Checking Your Hunter Fan’s Current Direction
Before reversing, you need to know which way your fan’s spinning. I’ve made the mistake of guessing and wasted time. Here’s how I check:
- Turn On Fan: Set it to medium speed with your remote. I hit the “2” button on mine.
- Stand below: Look up at the blades. I grab a stool for a clear view.
- Watch Blades: Counterclockwise means downward flow (summer); clockwise means upward (winter). My blades were counterclockwise last summer.
- Feel Air: Stand under the fan. Downward breeze means summer mode. I felt a cool gust in July.
- Check Edges: Hunter blades often have a slight tilt. Leading edge down is summer; up is winter.
This takes 30 seconds. I do it before switching to avoid reversing the wrong way. If you’re unsure, turn off the fan and watch it slow down to see the direction.
How to Reverse a Hunter Ceiling Fan with Remote
Reversing your fan with the remote is a breeze. I’ve done it dozens of times, and here’s my step-by-step:
- Find the Reverse Button: Look for a button labeled “Reverse” or with two arrows circling. My Hunter remote has a small arrow button.
- Turn Off Fan: Press the power button to stop the blades. I wait until they’re still.
- Press Reverse: Hold the reverse button for 2-3 seconds. I heard a beep on my remote.
- Wait for Change: The fan may pause or slow, then start spinning the other way. Mine took 5 seconds to switch.
- Check Direction: Turn the fan back on and confirm the new direction. I looked up to see a clockwise spin for winter.
- Test Airflow: Stand below to feel the change. I felt no breeze but saw warm air moving in winter mode.
This takes 1-2 minutes. If nothing happens, I check the remote’s battery or try again. My Hunter’s reverse is smooth and quick every time.
Troubleshooting Remote Reverse Issues
Sometimes the reverse doesn’t work, but I’ve fixed most hiccups. Here’s what to try:
- Dead Battery: Replace the remote’s battery (usually CR2032). I swapped mine for $3 when the reverse failed.
- Out of Range: Stand closer to the fan. I moved under my fan when the signal was weak.
- Wrong Button: Double-check you’re pressing reverse, not speed. I hit the wrong button once.
- Fan Off: Ensure the fan’s power is on at the wall switch. I flipped my switch back on after a blackout.
- Receiver Issue: The fan’s receiver might be faulty. I called Hunter support when mine glitched.
- Re-Pair Remote: Reset the remote by turning off power for 10 seconds, then re-pairing. I followed my manual’s dip switch settings.
I fixed a dead battery in 5 minutes. If the remote’s still not reversing, I use the manual switch (more on that later) or call a pro for $50-$100.
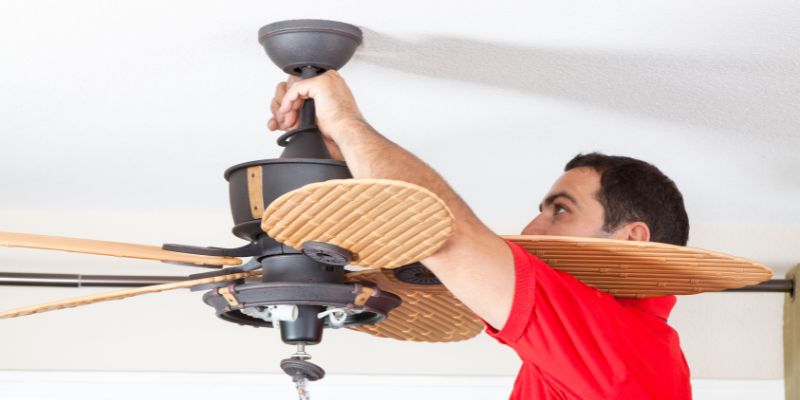
Using the Manual Reverse Switch
Some Hunter fans have a manual reverse switch if the remote fails. I’ve used this as a backup. Here’s how:
- Turn Off Power: Flip the breaker or wall switch. I use a voltage tester to confirm.
- Get a Ladder: Climb to reach the fan. My 6-foot ladder’s perfect for my 8-foot ceiling.
- Find the Switch: Look on the motor housing for a small slide switch. Mine’s near the light kit.
- Flip Switch: Slide it to the opposite position. I moved mine from “down” to “up” for winter.
- Turn Power On: Restore power and test. My fan spun clockwise after flipping.
- Check Direction: Confirm the new airflow. I felt warm air circulating.
This took 10 minutes because of the ladder setup. I only use the manual switch if my remote’s acting up, as it’s less convenient.
Tools and Supplies for Reversing a Hunter Fan
You don’t need much to reverse your fan. Here’s what I keep handy:
- Hunter Remote: The one that came with your fan. Mine’s clipped to my toolbox.
- Replacement Battery: CR2032 or AAA, depending on the remote. I spent $3 at Walmart.
- Ladder: For manual switch access. My $50 ladder’s sturdy.
- Screwdriver: To open the remote’s battery cover. I use a $5 mini Phillips.
- Voltage Tester: For safe power checks. My $10 tester’s non-contact.
- Flashlight: To see the switch on the fan. I use my phone’s light.
- Manual: For remote or switch details. I keep mine in my shop drawer.
I spent $18 on supplies I didn’t already have. Most folks just need the remote and a battery, making it a cheap fix.
Safety Tips for Working with Your Hunter Ceiling Fan
Safety keeps your project worry-free. I’ve had a wobbly ladder scare, so here’s my advice:
- Turn Off Power: Flip the breaker before touching the fan. I test with a voltage tester.
- Stable Ladder: Use a rated ladder, not a chair. My ladder’s level is on my garage floor.
- Wear Gloves: Protect hands from sharp edges. I wear shop gloves for manual switches.
- Secure Remote: Don’t drop it while climbing. I clip mine to my belt.
- Check Blades: Ensure blades are stopped before working. I wait 30 seconds after turning off.
I keep a first-aid kit in my shop. Safety lets me reverse my fan with confidence, knowing I’m good to go.
Benefits of Reversing Your Hunter Ceiling Fan
Switching directions does more than change airflow. Here’s why I love it:
- Comfort Year-Round: Cool in summer, warm in winter. My garage is cozy for any project.
- Energy Savings: Circulates heat, cutting bills. I saved $15 monthly on winter heating.
- Less Dust: Upward flow keeps tools cleaner. My workbench stays tidier in spring.
- Better Air Quality: Moves stale air out. My shop smells fresher after reversing.
- Fan Longevity: Balanced use reduces motor strain. My Hunter’s been smooth for five years.
I feel like a pro when my garage is perfectly aired out. Reversing is a small tweak with big perks for automotive spaces.
Maintaining Your Hunter Ceiling Fan
A happy fan reverses better and lasts longer. I care for mine with these steps:
- Clean Blades: Wipe dust monthly with a damp cloth. I clean during shop tidying.
- Check Remote: Test buttons yearly and replace batteries. I swapped mine last fall.
- Tighten Screws: Ensure canopy and blades are secure. I tighten with a screwdriver annually.
- Lubricate Motor: Add oil if needed (check manual). My Hunter’s sealed, so no oil for me.
- Balance Blades: Fix wobbles with a balancing kit. I keep a $5 kit in my toolbox.
Maintenance takes 15 minutes a year but keeps my fan spinning like new. I make it part of my garage routine.
Troubleshooting Common Hunter Fan Issues
Reversing can reveal other fan problems. I’ve fixed these:
- Wobbling: Tighten blades or use a balancing kit. I balanced mine after a wobble.
- Noisy Motor: Check for loose parts or add oil. I tightened a canopy screw to stop a hum.
- Remote Failure: Repair or replace the battery. I reset my remote after a glitch.
- Slow Reverse: Clean blades or check the motor. My fan sped up after cleaning.
- Light Flickering: Secure the bulb or replace it. I swapped my bulb for $6 to fix this.
I test the fan after reversing to catch issues. If it’s still off, I’ll call Hunter support or a pro for $100-$200.
Cost of Reversing and Maintaining a Hunter Ceiling Fan
This is a cheap project. Here’s my cost breakdown:
- Remote Battery: $3 for a CR2032. I bought one at Walmart.
- Ladder: $50 (I had one). Borrow one to save cash.
- Tools: Screwdriver, tester ($15 total if bought). I already owned these.
- Balancing Kit: $5 for future wobbles. I keep one handy.
- Pro Help (if needed): $50-$200 for complex fixes. I haven’t needed this yet.
- Total DIY: $3-$20 for most folks. I spent $3 on a battery.
I shop at Home Depot or Amazon for supplies. DIY reversing saves big compared to hiring a tech.
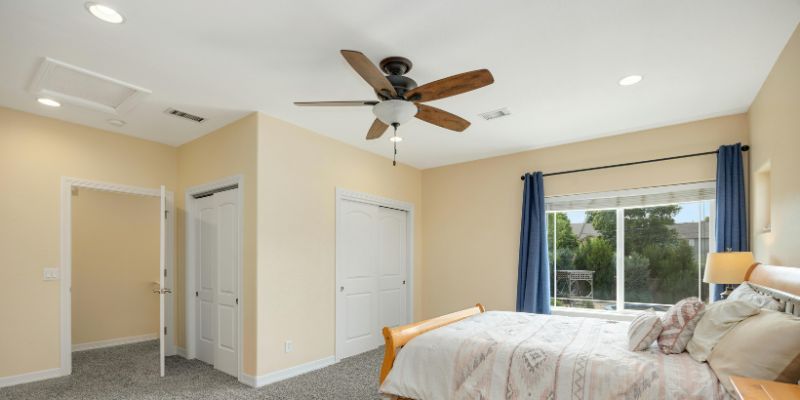
Using a Hunter Ceiling Fan in Automotive Spaces
Hunter fans are awesome for car folks. Here’s how I use mine:
- Garage Work: Cools me while swapping spark plugs. My fan’s breeze is a lifesaver in summer.
- Detailing: Circulates air to dry polish. I reverse it to keep dust off my car.
- Carport: Upward flow warms parked vehicles. My carport fan keeps my Jeep cozy.
- Tool Storage: Airflow reduces rust. My toolbox stays dry with the fan running.
- Hangout Spot: Makes chilling comfy. I relax under my fan after wrenching.
My garage feels like a pro shop with my Hunter fan, making every task or hangout better. Reversing it keeps the vibe perfect.
Table: Summer vs. Winter Fan Settings
Here’s a quick comparison:
| Setting | Direction | Airflow | Best For | Benefits |
|---|---|---|---|---|
| Summer | Counterclockwise | Downward | Cooling | Breezy, dust control |
| Winter | Clockwise | Upward | Warming | Energy savings, cozy |
I switch to summer mode in April and winter in October. This table reminds me why each direction rocks.
Why I Love Reversing My Hunter Ceiling Fan
Reversing my fan is like tuning my car—it’s a small tweak that makes everything better. I feel like a garage wizard when I hit that remote button and feel the air shift just right. It keeps my shop comfy, saves energy, and lets me focus on my rides, not the temperature. My Hunter fan’s been a champ through sweaty summers and chilly winters, and I’m hooked on the control it gives me.
Wrapping It Up with a Breezy Shop
Hey, buddy, you’re now a Hunter ceiling fan reverse pro! From finding that remote button to switching directions like a champ, you’ve got all the know-how to keep your automotive space perfect. I remember my first reverse, fumbling with the remote, but now I grin every time my garage feels just right. Head to your shop, grab that remote, and flip that fan direction with confidence. Whether you’re wrenching on a hot rod or chilling with your ride, your fan will make it awesome. So, press that button, feel the breeze, and enjoy your space—I’m cheering you on!
FAQ
How do I reverse a Hunter ceiling fan with a remote?
Press the reverse button on the remote while the fan’s off. I hit mine and waited 5 seconds.
When should I reverse my Hunter ceiling fan?
Switch to downward in summer, upward in winter. I do it in spring and fall.
What if my Hunter remote doesn’t reverse the fan?
Check the battery or repair the remote. I swapped my $3 battery to fix it.
Can I reverse my Hunter fan without a remote?
Yes, use the manual switch on the motor housing. I flipped mine with a ladder.
Why reverse a ceiling fan in a garage?
It cools in summer and warms in winter. I saved $15 monthly on heating.
How much does it cost to reverse a Hunter fan?
Just $3-$20 for a battery or tools. I spent $3 on a battery.
Does reversing a Hunter fan save energy?
Yes, upward flow in winter cuts heating costs. I noticed a $10 monthly drop.