

Replacing a vanity light is simple with the right steps. First, ensure safety by turning off the power.
Then, gather the necessary tools for the job. Updating a vanity light can transform your bathroom’s look. It’s not just about aesthetics; proper lighting improves functionality too. Whether you’re freshening up the space or fixing an old fixture, replacing a vanity light is a manageable task.
You don’t need to be an expert electrician. With some basic tools and a bit of patience, you can complete this task yourself. It’s a cost-effective way to enhance your bathroom’s ambiance. Follow a few guided steps, and you’ll have a new, stylish light fixture in no time. Ready to brighten up your space? Let’s dive into the process together.
Choosing The Right Vanity Light
Vanity lights come in many styles. Some are modern, others are traditional. Consider the room’s style when picking a light. Does it have a sleek look or a vintage charm? Choose a design that matches your space. You might like brushed nickel or polished chrome. Think about the colors in your bathroom. A light that blends well with the walls is nice. Pay attention to the shape of the light fixture. Round, square, or oval? Each shape gives a different feel. Decide what fits best.
Energy-efficient lights save money. LED bulbs use less power. They last a long time. Check the wattage before buying. Lower wattage means less energy. Look for lights with ENERGY STAR ratings. These lights are tested for efficiency. Reduce your energy bill with smart choices. Consider dimmer switches for control. They let you adjust brightness. Bright lights use more power. Keep the light soft and save energy.

Credit: www.youtube.com
Gathering Necessary Tools And Materials
First, get a screwdriver. You need it to remove screws. Next, have a wire stripper ready. It helps with wires. Keep a voltage tester nearby. Safety first! A ladder is also important. You need to reach high places. Don’t forget pliers. They come in handy for gripping.
Make sure you have a new vanity light fixture. Choose one that fits your style. Get light bulbs. They must match the fixture. You need wire nuts for safety. They keep wires together. Have electrical tape ready. It secures connections. Lastly, mounting hardware is a must. It helps attach the light.
Safety Precautions Before Starting
Always ensure the power is off before working. Find the circuit breaker. Switch it off to cut electricity. Use a voltage tester to confirm no power. Safety first is the key. Avoid risks and protect yourself.
Wearing protective gear is crucial. Gloves can save your hands. Safety goggles protect your eyes. Non-slip shoes help prevent falls. Ensure you are safe while working. Be smart, be safe.
Removing The Old Vanity Light
First, turn off the power. Use the main switch. Safety is important. Next, find the wires behind the light. They are usually black, white, and green. Carefully detach the wires. Use a screwdriver if needed. Label the wires for later use. This helps with the new light.
Use a screwdriver to remove screws. These hold the light to the wall. Gently pull the fixture away. Some lights are heavy. Ask for help if needed. Check the wall for any damage. If there are holes, fill them. This makes the wall ready for the new light.
Preparing The Wall For New Installation
Start by turning off the power to ensure safety. Remove the old fixture and inspect the wall for damages. Repair any cracks or holes, ensuring a smooth surface for the new vanity light.
Inspecting Electrical Box
First, turn off the power from the main switch. Safety is very important. Check the electrical box for any damage. It must be in good condition. If the box is loose, it needs fixing. Make sure the wires inside are not damaged. Damaged wires are dangerous. Use a flashlight to see clearly. Ensure the box is well attached to the wall. A secure box is necessary for safety.
Cleaning The Surface
Dirt and dust can cause problems. Use a damp cloth to clean the wall. Remove all dust and grime. Make sure the wall is dry before starting work. A clean surface helps in better installation. It prevents future problems. Clean surfaces make your work easier and safer. Ensure no moisture is left behind. Moisture can damage new installations.
Installing The New Vanity Light
Find the right spot on the wall. Use a pencil to mark it. Hold the fixture up to the marks. Make sure it’s level with the wall. Use a drill to make holes for screws. Attach the mounting bracket to the wall. Tighten the screws to hold it in place. Check the bracket is secure before moving on.
Turn off the power at the circuit breaker. This keeps you safe. Connect the black wires together. Then connect the white wires. Use wire nuts to secure them. Twist the wires together tightly. Connect the ground wire last. Usually, it’s green or bare. Make sure all connections are snug. Push the wires into the wall box. Now, attach the fixture to the bracket. Tighten the screws to hold it steady.
Testing The New Vanity Light
Before checking the light, restore power to the fixture. Flip the circuit breaker back to the “on” position. Make sure all switches are turned on. This step is important for checking the new light.
Turn on the light switch to see if the light works. Observe if the light turns on without flickering. Check for any unusual sounds or smells. Everything should be smooth and normal. If the light doesn’t work, check the bulb. Make sure it is properly screwed in. Also, verify all connections are tight.
Final Touches And Adjustments
Ensure all screws and wires are securely fastened for safety. Adjust the light fixture to sit evenly against the wall. Test the new vanity light by turning it on to check for proper illumination.
Aligning The Fixture
Make sure the vanity light fixture is straight. Use a level tool for this. Hold the level against the fixture. Check if the bubble is centered. If not, adjust the fixture gently. Tighten the screws once it is straight. This helps your light look neat and tidy.
Adjusting Light Bulbs
Use the right type of light bulbs. Check the bulb size and wattage. Screw in each bulb carefully. Ensure they are not too tight. Light bulbs should glow evenly. If a bulb flickers, try tightening it slightly. Your vanity will shine bright with well-set bulbs.
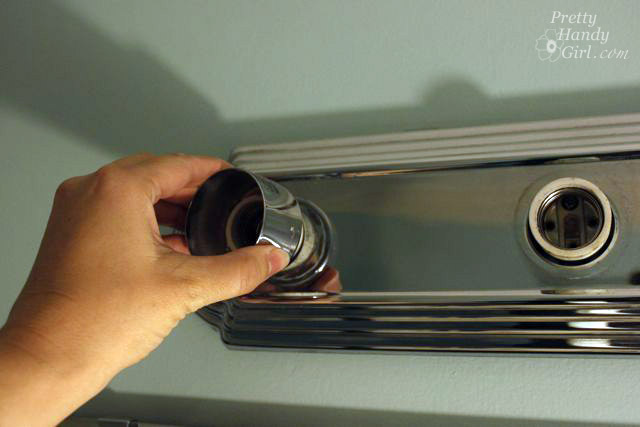
Credit: prettyhandygirl.com
Frequently Asked Questions
Is It Hard To Replace Vanity Lights?
Replacing vanity lights is generally easy for most homeowners. You need basic tools and safety precautions. Always turn off power at the circuit breaker before starting. Remove the old fixture, connect wires to the new one, and secure it in place.
Consult a professional if unsure.
Are Vanity Lights Easy To Install?
Vanity lights are generally easy to install for most homeowners. Basic tools like a screwdriver and wire stripper are needed. Follow the manufacturer’s instructions carefully. Ensure the electrical circuit is off before starting. For complex installations, consider hiring a professional electrician for safety and efficiency.
Can I Replace The Bathroom Light Myself?
Yes, you can replace the bathroom light yourself. Ensure safety by turning off the power first. Use suitable tools and follow installation instructions carefully. Hiring a professional is recommended if unsure about electrical work. Safety is crucial to prevent accidents and ensure proper installation.
How To Center A Vanity Light Fixture When The Junction Box Is Off Center?
Use a mounting bracket to shift the vanity light. Extend wires using wire connectors. Secure the fixture centrally.
Conclusion
Replacing a vanity light is a simple task. You only need basic tools and a little patience. First, ensure the power is off. Then, remove the old light carefully. Next, attach the new fixture, following the instructions. Check connections before restoring power.
Test the light to ensure it works properly. Remember, safety comes first. Using a step-by-step approach makes the process easier. Enjoy your newly brightened space! With practice, you’ll gain confidence in handling small home projects. Keep your toolkit handy for future tasks.
Brighten up your home, one light at a time.