
Hey there! If you’ve ever stood under a flickering track light in your garage or showroom, wondering how to swap out that pesky bulb, you’re not alone. I’ve been there, squinting up at my track lighting, trying to figure out how to replace a bulb without breaking the fixture or my patience. Track lighting is awesome for highlighting your car, tools, or workspace, but changing those bulbs can feel like a puzzle.
After years of tinkering in my automotive shop and dealing with all sorts of track lighting systems, I’ve cracked the code on replacing bulbs safely and easily. Whether you’re a DIY car enthusiast or just want your garage to shine, I’m excited to share my journey. This guide is packed with practical steps, personal stories, and tips to make replacing your track lighting bulb a breeze. Let’s light up your space together!
Why Track Lighting Matters in an Automotive Space
Track lighting is a game-changer for any automotive setup. I installed it in my garage to spotlight my classic Mustang during restoration, and it made every detail pop. Unlike standard ceiling lights, track lighting is adjustable, letting you aim light exactly where you need it—over a workbench, car hood, or display area. It’s perfect for tasks like detailing, wrenching, or showing off your ride.
But when a bulb burns out, the whole vibe dims. I learned this when one of my track lights went dark mid-project, leaving my workspace shadowy. Replacing the bulb isn’t just about brightness—it keeps your garage functional and safe. Plus, a well-lit space makes working on cars more fun and precise.
Understanding Track Lighting Systems
Before diving into bulb replacement, let’s talk about how track lighting works. I was clueless at first, thinking all track lights were the same. Turns out, they vary. Track lighting has a metal track mounted to the ceiling, with fixtures (called heads) that hold bulbs. The track carries electricity, so you can snap heads in or move them along the track.
There are three main track types I’ve encountered:
- H-Type: Most common, with three contact points. I have this in my garage.
- J-Type: Slightly different shape, used by Juno brands. I saw this in a friend’s shop.
- L-Type: Found in older systems, less common now.
Each type uses specific bulbs, like MR16, GU10, or PAR. I made the mistake of buying a GU10 bulb for an MR16 fixture once—it didn’t fit! Check your track type and bulb base before buying replacements.
Identifying the Right Replacement Bulb
Picking the right bulb is crucial. I learned this after buying the wrong bulb and wasting a trip to the hardware store. Track lighting bulbs come in different shapes, sizes, and bases. Here’s how I figure it out:
- Check the Old Bulb: Look at the burned-out bulb for markings like “MR16,” “GU10,” or “PAR20.” My garage uses MR16 bulbs with a two-pin base.
- Note the Wattage and Voltage: Most track lights use low-voltage (12V) or line-voltage (120V) bulbs. Mine are 12V, 50W MR16s. Check the fixture or manual for specs.
- Choose the Light Type: I’ve used halogen, LED, and incandescent. LEDs are my favorite now—they last longer (up to 25,000 hours) and save energy. I switched my halogens to LEDs and cut my electric bill noticeably.
- Beam Angle: Track lights have focused beams (like 25° or 40°). I use 40° for broad garage lighting and 25° for spotlighting car details.
If you can’t read the old bulb, check the fixture or track system manual. I keep a photo of my bulbs on my phone to avoid mix-ups at the store.
Safety First: Preparing to Replace the Bulb
Safety is a big deal when messing with electricity. I learned this when I got a mild shock trying to change a bulb without turning off the power—yikes! Here’s how I stay safe:
- Turn Off the Power: Flip the circuit breaker or light switch for the track lighting. I double-check by testing the fixture with a non-contact voltage tester ($10 at hardware stores).
- Let the Bulb Cool: Track bulbs, especially halogens, get hot. I burned my fingers once by grabbing a bulb too soon. Wait 10–15 minutes after turning off the light.
- Use a Ladder: Track lights are high up. I use a sturdy step ladder to reach them safely. Never stand on a chair—I almost fell doing that!
- Wear Gloves: For halogen bulbs, oils from your skin can shorten their life. I use clean cotton gloves or a cloth to handle them.
These steps keep you safe and protect your bulbs. I always set up my ladder and tools before starting to stay organized.
Step-by-Step Guide to Replacing a Track Lighting Bulb
Now, let’s get to the fun part—swapping that bulb! I’ve done this dozens of times, and here’s my process for most track lighting systems:
- Turn Off Power: I flip the breaker to ensure no electricity flows. Safety first!
- Let the Bulb Cool: I wait 10–15 minutes to avoid burns. I use this time to grab my ladder and gloves.
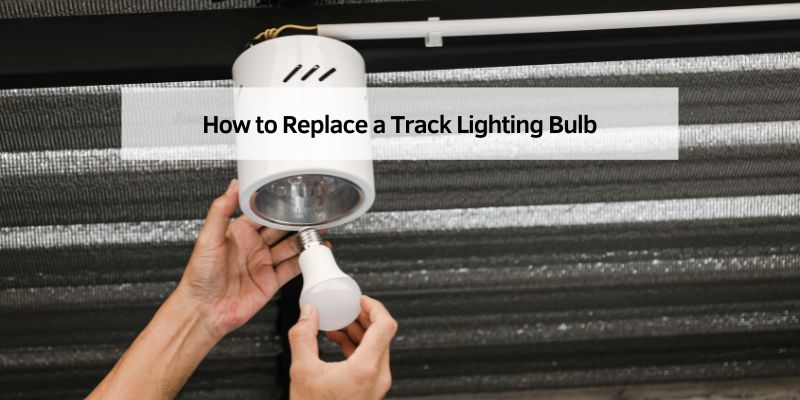
- Access the Fixture: I climb the ladder and position the track head so the bulb is easy to reach. Some heads tilt or twist—mine slides along the track.
- Remove the Old Bulb: Depending on the bulb type:
- For MR16 or GU10 (two-pin): I gently twist counterclockwise (about a quarter turn) and pull the bulb out.
- For PAR or screw-in bulbs, I unscrew counterclockwise like a regular light bulb.
- For snap-in bulbs, I press a release clip or pull gently. My MR16s pop out with a slight tug.
- Check the Fixture: I inspect the socket for damage or corrosion. Once, I found a bent pin and had to replace the head.
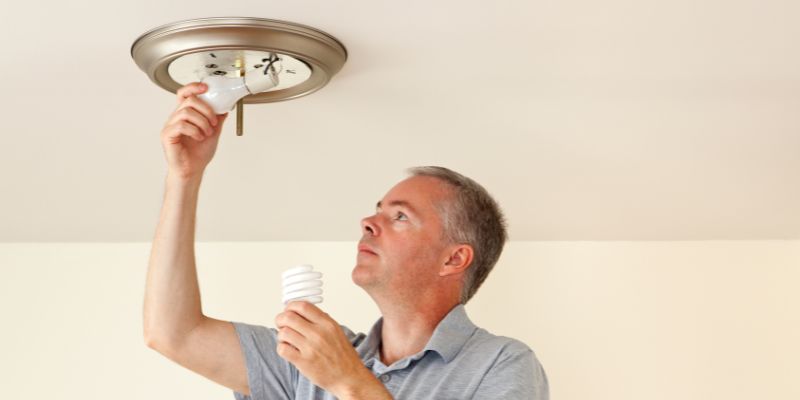
- Insert the New Bulb: Using gloves, I push or twist the new bulb into place:
- MR16/GU10: Align the pins and push, then twist clockwise to lock.
- PAR/screw-in: Screw clockwise until snug, not too tight.
- Snap-in: Push until it clicks. I had one that wouldn’t snap until I cleaned the socket.
- Test the Light: I turn the power back on and check if the bulb lights up. If it doesn’t, I will recheck the pins or try another bulb.
- Adjust the Head: I aim the light where I need it—like over my workbench—and tighten any screws to hold it in place.
This process takes me about 10 minutes now, but my first try took 30 because I didn’t know my bulb type. Practice makes perfect!
Troubleshooting Common Issues
Sometimes, things don’t go smoothly. I’ve hit a few snags, so here’s how I fix them:
- Bulb Won’t Come Out: If it’s stuck, I wiggle gently while pulling. For MR16s, I use a cloth for grip. Once, I had to replace a warped socket.
- New Bulb Doesn’t Work: I check the pins or socket for dirt. Cleaning with rubbing alcohol fixed a GU10 bulb that wouldn’t light.
- Flickering Light: This usually means a loose connection. I tighten the bulb or check the track contacts. A loose track head caused flickering in my garage once.
- Wrong Bulb Type: If the bulb doesn’t fit, I double-check the base (like GU10 vs. GU5.3). I returned the wrong bulb to the store after this mistake.
- No Power: If the track doesn’t light up, I verify the breaker and check the track’s wiring. I had a loose track connector once, fixed with a screwdriver.
Patience is key. If you’re stuck, turn off the power and double-check everything.
Comparing Bulb Types for Track Lighting
Choosing the right bulb can be tricky, so here’s a table based on my experience with different types:
| Bulb Type | Best For | Pros | Cons | Cost |
|---|---|---|---|---|
| Halogen | Bright, focused light | Crisp light, affordable | Hot, short lifespan (2,000 hours) | $3–$8 |
| LED | Energy efficiency, long-term use | Long-lasting (25,000 hours), cool | Higher upfront cost | $8–$15 |
| Incandescent | Budget, warm light | Cheap, easy to find | Inefficient, short lifespan | $2–$5 |
| CFL | Rarely used for tracks | Energy-saving | Slow to brighten, bulky | $5–$10 |
I switched to LEDs for their longevity and cool operation. Halogens are great for color accuracy, but burn out faster. Pick based on your budget and lighting needs.
Upgrading Your Track Lighting System
While replacing bulbs, I realized my old track system could use an upgrade. Here’s what I’ve done to improve my setup:
- Switch to LEDs: I replaced all my halogen bulbs with LEDs. They’re brighter, last longer, and cut my energy bill.
- Add More Heads: My track had room for extra heads, so I added two to light my workbench better.
- Install a Dimmer: A dimmable track switch lets me adjust brightness for detailing or relaxing. I got one for $20.
- Check Track Compatibility: When I moved to a new garage, I made sure my H-type heads fit the new track. Always check before buying.
Upgrading made my garage feel like a professional shop. It’s worth considering if your system is outdated.
Maintaining Your Track Lighting
Keeping your track lighting in top shape ensures it lasts. Here’s how I maintain mine:
- Clean the Track: Dust can cause poor connections. I wipe the track with a dry cloth monthly.
- Inspect Fixtures: I check for loose heads or bent pins. Tightening screws fixed a wobbly head once.
- Replace Bulbs Early: If one bulb flickers, I replace it before it dies to avoid strain on the track.
- Store Spare Bulbs: I keep extra LEDs in my toolbox to avoid late-night store runs.
- Check Wiring: Loose track connections caused dimming in my system. I tightened them with a screwdriver.
These habits keep my lights bright and reliable.
Common Mistakes to Avoid
I’ve made plenty of blunders with track lighting. Here’s what to watch out for:
- Not Turning Off Power: I got a shock once—always flip the breaker!
- Buying the Wrong Bulb: I grabbed a GU5.3 instead of a GU10 once. Check the base type twice.
- Handling Hot Bulbs: I burned my fingers grabbing a halogen bulb too soon. Wait for it to cool.
- Over-tightening Bulbs: Screwing too hard can damage the socket. I cracked a fixture doing this.
- Ignoring Track Type: Not all heads fit all tracks. I tried using a J-type head on an H-type track—big mistake.
Avoid these, and you’ll save time and money.
My Track Lighting Triumph
Last month, I was prepping my Mustang for a car show. One track light burned out, dimming my display area. I grabbed my ladder, turned off the power, and swapped the old MR16 halogen for a new LED bulb. It took 10 minutes, and the new bulb’s bright, cool light made my car’s paint gleam. I adjusted the head to highlight the chrome trim, and it looked stunning. Visitors at the show raved about the setup, and I felt like a pro. That small fix made a huge difference, and now I’m confident swapping bulbs anytime.
Conclusion: Light Up Your Automotive World
Replacing a track lighting bulb might seem tricky, but with the right steps, it’s a quick and satisfying task. I’ve gone from fumbling with the wrong bulbs and shaky ladders to swapping bulbs like a seasoned DIYer. Whether you’re lighting up a classic car, a workbench, or your entire garage, this guide has you covered. Grab the right bulb, stay safe, and enjoy a brighter workspace. Your automotive projects deserve to shine, and now you’ve got the know-how to make it happen. So climb that ladder, swap that bulb, and let your space glow!
FAQs
How do I know which bulb to buy for my track lighting?
Check the old bulb for markings like “MR16” or “GU10.” I take a photo of mine to match at the store. Also, note the wattage and voltage.
Can I use LED bulbs in my track lighting?
Yes! I switched to LEDs for longer life and less heat. Just make sure they match your track’s voltage and base type.
Is it safe to change a track lighting bulb myself?
Totally, if you turn off the power. I use a voltage tester to be sure, and wear gloves for halogen bulbs.
Why won’t my new track lighting bulb work?
Check if it’s the right type or if the socket is dirty. I cleaned a socket with alcohol once, and it fixed the issue.
How often should I replace track lighting bulbs?
Halogens last about 2,000 hours; LEDs up to 25,000. I replace LEDs every few years, but halogens burn out faster.
Can I mix different bulb types in one track?
It’s not ideal. I tried mixing halogens and LEDs, and the brightness was uneven. Stick to one type for consistency.
What do I do if my track light flickers?
Tighten the bulb or head. If that doesn’t work, clean the track or check for loose wiring. I fixed the flickering by tightening my track’s contacts.