
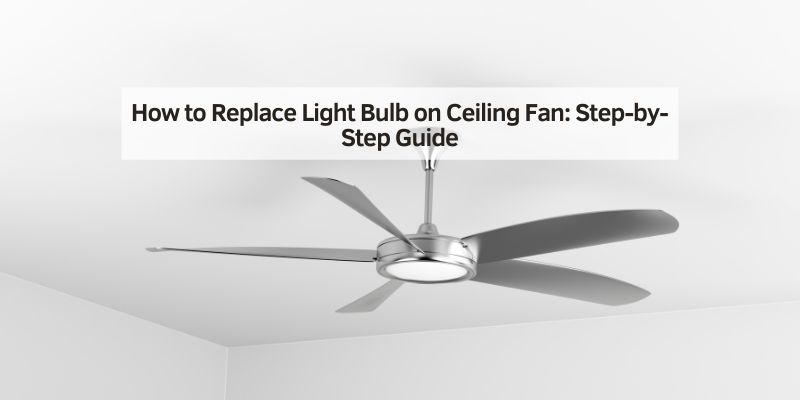
Have you ever found yourself squinting under a dim light or struggling to see clearly in your favorite room? If your ceiling fan’s light bulb has given up, it can feel like a minor setback that disrupts your comfort.
But don’t worry—you’re not alone, and fixing this issue is simpler than you might think. By learning how to replace the light bulb on your ceiling fan, you can restore the brightness and ambiance to your space in no time.
Imagine the satisfaction of watching your room light up again after a quick and easy DIY fix. Whether you’re looking to save money on professional services or simply enjoy the pride of doing it yourself, this guide is designed to help you every step of the way. You’ll gain the confidence to tackle this task with ease, ensuring your home stays well-lit and welcoming. Keep reading to discover how you can effortlessly replace the light bulb in your ceiling fan and bring back the glow to your room.
Tools And Materials Needed
Replacing a light bulb is easy. First, gather the right tools. A ladder is essential. You need it to reach the ceiling fan. A screwdriver might be necessary. Some covers are held by screws. Have a new light bulb ready. Make sure it fits your fan. Check the bulb’s wattage. Ensure it matches the old bulb.
Use a cloth to handle the bulb. This keeps it clean. A dust cloth can help too. Dust might gather on the fan. A small container is useful. It holds any screws you remove. This keeps them safe. These tools make the job easy.
Safety Precautions
Always turn off the power before starting. This keeps you safe. Use a sturdy ladder. Make sure it’s stable. Ask someone to hold it. This prevents accidents. Wear gloves to protect your hands. Bulbs can be hot. Wait for the bulb to cool down. This avoids burns. Check your environment. Ensure the floor is dry. Wet floors are slippery. Keep tools nearby but out of the way. This avoids tripping. If unsure, ask for help. It’s better to be safe.
Make sure the new bulb matches the old one. Use the right wattage. Avoid using bulbs too strong. This can damage the fan. Read the fan’s manual if needed. It’s helpful. Keep children away during the process. This is important for their safety.
Identifying Bulb Type
First, check the bulb in your ceiling fan. Is it a screw-in type or a pin-based type? Look at the shape and size. Small bulbs might be candelabra. Larger ones are usually standard bulbs. Check for markings on the bulb. They might show the wattage or type. Compare it with new bulbs at the store.
Some fans need special bulbs. Use the fan’s manual for this info. Manuals often show bulb type and size. If no manual, check online. Many brands list bulb types on their websites. This helps find the right bulb quickly. Don’t guess the type; it might not fit or work.
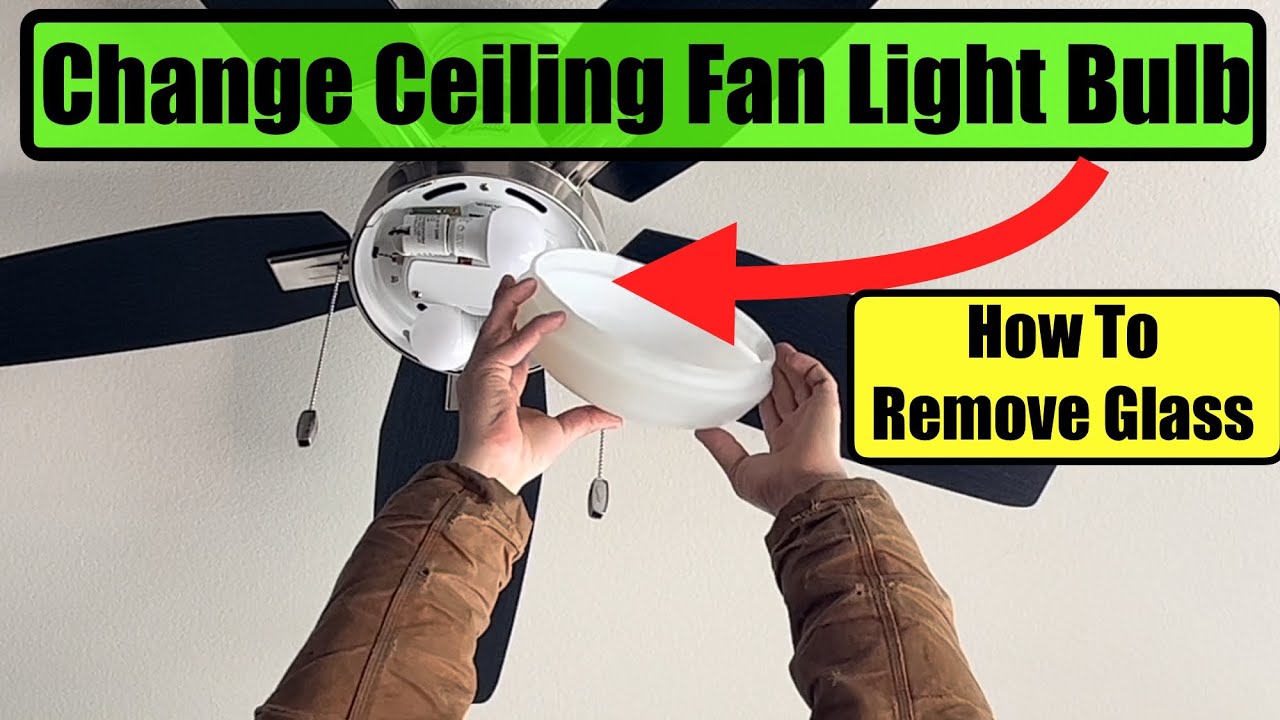
Removing Light Fixture Cover
First, find the screws or clips holding the cover. Look around the edge of the light fixture. Sometimes they are hidden. Use a flashlight if needed.
Check for small metal clips or plastic tabs. Gently feel with your fingers. Be careful not to apply too much force.
Support the cover with one hand. Use the other to unscrew or unclip. Hold the glass cover securely. It can be slippery.
Lower the cover slowly. Place it on a soft surface. This prevents breaking. Always handle with care to avoid accidents.
Unscrewing The Old Bulb
First, turn off the power to the ceiling fan. This is important for safety. Use a sturdy chair or ladder to reach the fan. Hold the old bulb gently. Twist the bulb counterclockwise. It should come out easily. If it’s stuck, don’t force it. Check if the bulb is in good condition. If broken, be extra careful. Wear gloves to protect your hands. Dispose of the old bulb properly. Recycle if possible. Now, you’re ready for the new bulb. Remember the right size and type. This ensures it fits and works well.

Credit: www.youtube.com
Choosing The Right Replacement Bulb
Check the bulb’s wattage before buying. Too much power can damage the fan. Look at the old bulb for its type. Is it LED or incandescent? Ensure the new bulb matches the type. Use the same type for safety.
Choose bulbs that save energy. LED bulbs use less power. They last longer than regular bulbs. Save on bills with these bulbs. CFL bulbs are also good choices. They use less energy than incandescent bulbs. Help the environment with these options.
Installing New Bulb
First, hold the new bulb by its base. Align it with the socket. Gently twist the bulb into the socket. Stop when it feels snug. Do not overtighten. Tightening too much may break the bulb. Make sure the bulb is secure and firm.
Check that the bulb does not move. If it wobbles, it is loose. Twist the bulb slightly more to secure it. Always ensure the bulb is cool before touching. This avoids burns. Properly secured bulbs last longer.
Turn on the fan light switch. Observe the light. If it does not turn on, check the bulb. Also, ensure the power is on. If the bulb flickers, it might be loose. Check the bulb’s fit again. A stable light means success.
Reattaching Fixture Cover
Place the cover back on the ceiling fan. Align it with the holes. Make sure it fits snugly. Use your hands to hold it steady. Screws are needed next. Insert them into the holes. Tighten each screw with a screwdriver. Do not over-tighten. The cover should stay firm. Check if it is secure.
Look for any gaps. If gaps are present, adjust the cover. It should fit flush. Now, the light bulb is safe. Everything should be in place. Enjoy the light from your fan.
Troubleshooting Common Issues
Check if the bulb is tightly screwed in. Sometimes a loose bulb won’t light. Make sure the bulb is not burnt out. Replace it with a new one if needed. Also, ensure the power is on. Check if the switch is functioning properly. Inspect the socket for any damage. Damaged sockets can cause issues. If all else fails, consult an electrician.
Flickering lights can be annoying. First, tighten the bulb. Loose bulbs may flicker. Next, check the bulb type. Some bulbs flicker with dimmers. Switch to compatible bulbs if necessary. Also, inspect the wiring. Faulty wiring can cause flickering. If unsure, call a professional for help. Safety is important.
Credit: www.youtube.com
Maintenance Tips
Dust can settle on the ceiling fan blades. This makes them work harder. Clean the blades every month with a soft cloth. Use a mild cleaner if needed. Check the fan body too. Remove cobwebs and dust from it. Clean light fixtures gently. Avoid water near electrical parts. This keeps the fan safe.
Inspect the fan twice a year. Look for loose screws. Tighten them if necessary. Check the fan’s balance. If it wobbles, adjust it. Listen for strange noises. They might mean the fan needs fixing. Examine the light bulbs. Replace burnt bulbs right away. This ensures proper lighting.
Frequently Asked Questions
How Do I Change A Light Bulb In A Ceiling Fan?
Turn off the fan and light. Unscrew the globe or cover. Remove the old bulb and insert a new one. Reattach the cover and turn the power back on. Ensure the bulb is securely fitted and test the light.
How To Remove Ceiling Fan Light Cover?
Turn off the power. Locate screws or clips on the light cover. Unscrew or unclip carefully. Remove the cover.
Can The Light On A Ceiling Fan Be Replaced?
Yes, you can replace the light on a ceiling fan. Ensure compatibility with the fan model first. Remove the old bulb or fixture carefully. Install the new light according to the manufacturer’s instructions. Always turn off the power before beginning any electrical work.
How To Remove A Broken Light Bulb From A Ceiling Fan?
Turn off the power to the ceiling fan. Wear gloves for protection. Use pliers to gently unscrew the broken bulb base. Dispose of broken glass safely. If needed, use a bulb extractor tool for better grip. Recheck power before inserting a new bulb.
Conclusion
Replacing a light bulb on a ceiling fan is easy. Follow simple steps and ensure safety first. Turn off the power to prevent accidents. Use a sturdy ladder for better reach. Remove the old bulb gently. Choose the right bulb size for replacement.
Insert the new bulb securely. Turn on the power to test it. This process saves time and effort. Remember, proper bulb replacement ensures good lighting. With practice, it becomes second nature. Brighten your room quickly and safely. Enjoy your well-lit space with confidence.