

Hey there, buddy! So, you’re curious about how to replace an LED recessed light? I’m thrilled to sit down and chat about this with you because it’s one of those projects that can make your garage or shop shine brighter, especially for us car folks who love a well-lit space for our rides. I still remember the first time I swapped out a dim LED recessed light in my garage—it was like turning my workspace into a pro shop! After years of tinkering with lighting, upgrading my automotive haven, and learning the tricks of LED replacements, I’ve got all the know-how to share.
Whether you’re illuminating your garage for wrenching on a classic, a carport for late-night detailing, or a showroom for your prized ride, this guide’s got you covered. Let’s hang out, like we’re chilling by the toolbox with a cold drink, and I’ll walk you through every step in simple terms. This article is packed with practical tips for anyone in the USA looking to keep their space bright and safe. Ready to swap that light and make your garage glow? Let’s dive in!
What Is an LED Recessed Light?
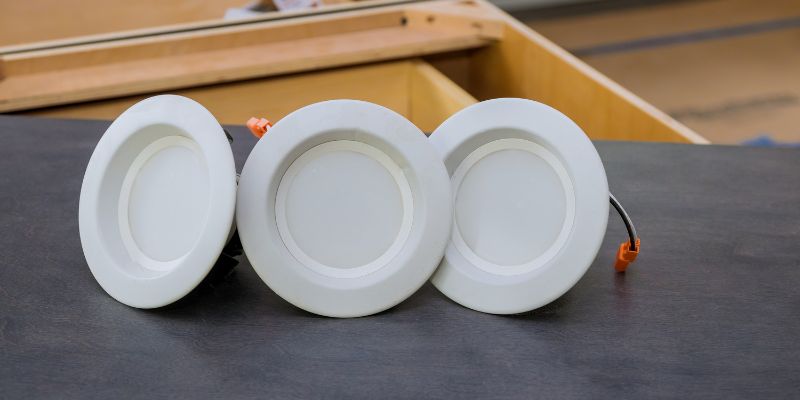
An LED recessed light is a fixture that sits flush with your ceiling, giving off bright, efficient light. I love how they make my garage look clean and modern—no bulky lamps dangling down. They’re built with LED technology, which means they use less power and last longer than old bulbs like incandescents. In my shop, these lights are perfect for lighting up my workbench or car bays.
The fixture has a housing in the ceiling, a trim for looks, and an LED module or bulb inside. I’ve replaced both integrated LED units and ones with replaceable bulbs. Knowing your type is key before starting, and I’ll help you figure that out.
Why Replace an LED Recessed Light?
LEDs last a long time, but they don’t live forever. Here’s why I’ve replaced mine:
- Burnout: LEDs dim or flicker when they’re dying. My first light flickered after five years.
- Better Brightness: Newer LEDs are brighter. I upgraded for more lumens in my shop.
- Color Change: Swap for warmer or cooler light. I went from 2700K to 4000K for clearer work light.
- Damage: Drops or power surges kill LEDs. I broke one installing a lift.
- Style Upgrade: New trims look sleeker. I swapped for black baffles to match my garage vibe.
- Energy Savings: Modern LEDs use less power. My new lights cut my bill by $10 a year.
Replacing a light keeps your garage safe and functional, letting you work on cars or show them off without squinting.
Types of LED Recessed Lights
Not all LED recessed lights are the same, and I’ve worked with a few. Here’s what’s out there:
- Integrated LED Fixtures: The LED is built into the housing, non-replaceable. I replaced a whole unit when it died.
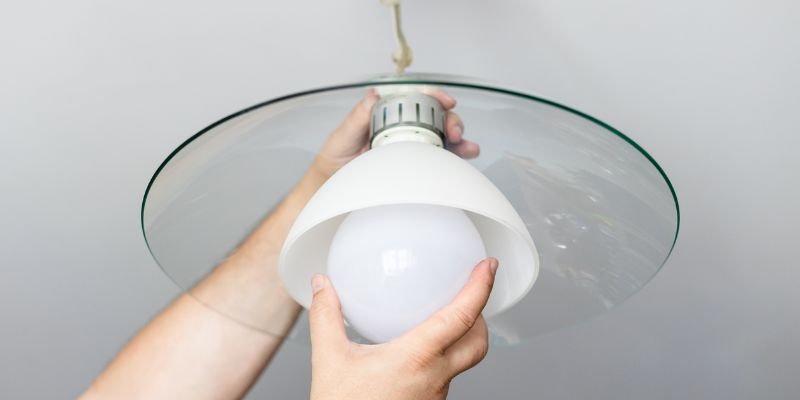
- LED Bulb Fixtures: Use replaceable LED bulbs, like GU10 or MR16. My kitchen has these for easy swaps.
- Retrofit Kits: Convert old recessed lights to LED. I used one to upgrade my carport.
- IC-Rated: Safe for insulated ceilings. My garage has these to prevent fires.
- Non-IC Rated: For open ceilings, cheaper but less safe. I avoided these in my insulated shop.
I use 6-inch IC-rated integrated LEDs in my garage—they’re bright and safe. Check your existing light’s label or housing to know what you’ve got.
Tools and Supplies You’ll Need
Swapping an LED light needs some basic gear. I’ve got my kit ready. Here’s my list:
- Replacement LED Light or Bulb: Match your fixture’s size and type. I spent $25 on a 6-inch LED.
- Ladder: To reach the ceiling safely. My 6-foot ladder’s perfect.
- Screwdriver: Phillips or flathead for screws. My $10 set covers both.
- Voltage Tester: To check power. My $10 non-contact tester’s a must.
- Gloves: For grip and safety. I use $3 shop gloves.
- Flashlight: To see in tight spots. My phone’s light works fine.
- Wire Nuts: For wiring integrated units. I got a $3 pack.
- Pliers: For twisting wires. My $8 needle-nose pliers are handy.
- Cleaning Cloth: To wipe dust. I use a $2 rag.
- Safety Goggles: For eye protection. I spent $3 on mine.
I spent about $40 on supplies I didn’t already own. Check Home Depot, Lowe’s, or Amazon for lights and tools. Your fixture’s manual might list compatible replacements.
Planning Your LED Recessed Light Replacement
Good planning makes the job smooth. I learned this after a rushed swap went wrong. Here’s my approach:
- Identify the Light: Check if it’s integrated or bulb-based. I looked at my garage light’s label.
- Measure Size: Note the diameter (4, 5, or 6 inches). My lights are 6 inches.
- Check Voltage: Most are 120V, but some are low-voltage. Mine’s standard 120V.
- Buy the Right Replacement: Match brand, size, and lumens. I got a 1000-lumen Halo LED.
- Count Lights: Plan for multiple if one’s dying. I bought two to match the brightness.
- Clear Space: Move cars or tools below. I parked my truck outside to work.
I spent 20 minutes checking specs and shopping online. A quick plan saved me from buying the wrong light.
Checking the Power Supply
Safety’s first, and I always check the power. Here’s how I do it:
- Find the Breaker: Locate your garage’s breaker in the panel. Mine’s labeled “garage lights.”
- Turn Off Power: Flip the breaker to off. I double-check with a flashlight.
- Test Voltage: Use a non-contact tester at the light’s wires or switch. My tester beeps if the power’s on.
- Confirm Off: Test a nearby outlet too. I plugged in a lamp to be sure.
- Lock Breaker: Tape it off to avoid accidental flips. I use $1 painter’s tape.
This takes 5 minutes. I never skip this step—shocks are no joke, and I’ve felt a tingle once!
Removing the Old LED Recessed Light
Taking out the old light is easy once the power’s off. I’ve done this a bunch. Here’s my process:
- Set Up Ladder: Place it on flat ground. My ladder’s level is on my garage floor.
- Remove Trim: Pull down or twist the trim ring. My baffle trim popped off with a tug.
- Detach Bulb or Module: For bulbs, twist or pull; for integrated, unscrew the clips. I unclipped my LED module.
- Disconnect Wires: Undo wire nuts or push-in connectors. I twisted off the nuts counterclockwise.
- Remove Housing (if needed): Unscrew or unclip the housing for full replacements. I left mine since only the module died.
- Clean Area: Wipe dust from the ceiling. I used a rag to tidy up.
This took 10 minutes per light. I keep parts organized on my workbench to avoid losing clips or screws.
Choosing the Right Replacement LED Light
Picking the right light is crucial. I’ve bought duds before. Here’s what I check:
- Size: Match the housing (4, 5, or 6 inches). My 6-inch LED fit perfectly.
- Lumens: 800-1000 for garages. I chose 1000 lumens for a bright work light.
- Color Temperature: 4000K for cool, clear light; 2700K for warm. I use 4000K in my shop.
- Dimmable: If you have a dimmer, get dimmable LEDs. My garage isn’t dimmable, so I skipped this.
- IC Rating: Use IC-rated for insulated ceilings. My garage lights are IC-rated.
- Brand: Halo, Cree, or Lithonia for quality. My Halo LED’s been solid.
I spent $25 per light at Home Depot. Check your old light’s specs or bring it to the store to match.
Installing the New LED Recessed Light
Putting in the new light is the fun part. I feel like a pro here. Here’s how I do it:
- Unpack Light: Check for all parts—module, trim, wires. My Halo kit was complete.
- Connect Wires: Match black to black, white to white, ground to ground with wire nuts. I twisted mine tightly.
- Secure Module: Clip or screw the LED into the housing. My module clicked in with spring clips.
- Attach Trim: Push or twist the trim onto the housing. My baffle snapped on smoothly.
- Test Fit: Ensure it’s flush with the ceiling. I adjusted mine for a tight seal.
- Turn On Power: Flip the breaker and test. My garage lit up like a showroom!
This took 15 minutes per light. I used pliers for tight wire nuts and checked connections twice for safety.
Ensuring Proper Installation
A good install prevents issues later. I’ve fixed sloppy swaps. Here’s how I nail it:
- Check Flushness: Ensure the trim sits flat against the ceiling. I pressed mine for a snug fit.
- Test Stability: Tug gently on the trim. My light didn’t budge.
- Verify Wiring: Confirm wire nuts are tight, no exposed wires. I re-twisted one loose nut.
- Run for 10 Minutes: Check for flickering or heat. My LED stayed cool and steady.
- Adjust Aim (if adjustable): Point the light at work areas. My fixed lights didn’t need this.
This adds 5 minutes but saves headaches. I step back to admire the glow when it’s done right.
Safety Tips for Replacing LED Recessed Lights
Safety keeps the job fun and shock-free. I’ve learned these tips:
- Power Off: Always cut the breaker and test. My voltage tester’s my best friend.
- Stable Ladder: Use a rated ladder, not a chair. I level mine on my garage floor.
- Wear Gear: Gloves, goggles for dust or debris. I spent $3 on goggles.
- Avoid Wet Hands: Dry hands prevent shocks. I wipe mine before wiring.
- Work with a Buddy: Have someone hold the ladder. My son spotted me last time.
I keep a first-aid kit in my shop. Safety lets me swap lights with confidence, knowing I’m safe.
Troubleshooting Common Replacement Issues
Sometimes things go wrong, but I’ve fixed most. Here’s what to check:
- Light won’t Turn On: Check wiring or breaker. I found a loose wire nut once.
- Flickering: Bad connection or dimmer mismatch. I swapped a non-dimmable LED for one that worked.
- Loose Trim: Clips not engaged. I re-clipped my trim for a tight fit.
- Wrong Size: The Light doesn’t fit the housing. I returned a 5-inch LED for a 6-inch one.
- Overheating: Rare with LEDs, but check ventilation. I cleared insulation around my housing.
I test each step to catch issues early. If stuck, an electrician helps for $50-$100.
Maintaining Your LED Recessed Lights
LEDs need little care, but I do these to keep them shining:
- Clean Trims: Wipe dust monthly with a rag. I clean during shop sweeps.
- Check Clips: Ensure modules are secure yearly. I tugged mine last spring.
- Inspect Wiring: Look for loose nuts every few years. I checked mine when swapping.
- Clear Insulation: Keep IC-rated lights free of extra fluff. I vacuumed my attic yearly.
- Test Brightness: Note dimming over time. My lights are still bright after three years.
Maintenance takes 10 minutes a year. I make it part of my garage tidy-up, keeping my shop bright.
Cost of Replacing LED Recessed Lights
This project’s affordable. Here’s my breakdown for one light:
- LED Light: $20-$40 per unit or bulb. I spent $25 on a Halo LED.
- Tools: Tester, screwdriver, pliers ($25 if bought). I had mine already.
- Supplies: Wire nuts, gloves, goggles ($11). I spent $6 on extras.
- Ladder: $50 (I owned one). Borrow to save.
- Total DIY: $26-$76 per light. I spent $31.
- Pro Cost: $100-$200 per light for electricians. I saved by DIY.
I shopped at Home Depot and Amazon. Sales or borrowing tools cut costs.
Using LED Recessed Lights in Automotive Spaces
These lights are perfect for car folks. Here’s how I use mine:
- Garage Work: Bright light for engine swaps. My six lights cover every corner.
- Detailing: Clear light to spot swirls. I love the crisp glow on my paint.
- Carport: Safe for outdoor ceilings. My two carport lights keep my Jeep cool.
- Showroom: Highlights my classic car. My Mustang shines under LEDs.
- Tool Storage: Lights up shelves. My toolbox area’s never dark.
My garage feels like a pro shop, safe and bright for any project. Replacing LEDs keeps it that way.
Table: Integrated LED vs. LED Bulb Fixtures
Here’s a comparison:
| Feature | Integrated LED | LED Bulb Fixture |
|---|---|---|
| Replacement | Swap entire unit | Change bulb only |
| Cost | $20-$40 | $5-$15 per bulb |
| Lifespan | 30,000-50,000 hours | 15,000-25,000 hours |
| Ease of Swap | More wiring | Quick twist or pull |
| Best For | Modern garages | Budget upgrades |
I chose integrated LEDs for my garage’s longevity. Bulb fixtures are great for quick swaps.
Why I Love Replacing LED Recessed Lights
Swapping an LED recessed light is like upgrading a car part—it’s a small fix that makes a big difference. I feel like a garage pro when I pop in a new light and watch my shop glow. It’s a cheap, fun project that keeps my space safe and functional for wrenching or showing off my rides. My LEDs have been champs, lighting up my automotive world for years. I’m hooked on the brightness and vibe they bring.
Wrapping It Up with a Bright Glow
Hey, friend, you’re now an LED recessed light replacement pro! From picking the right light to wiring it like a champ, you’ve got all the skills to make your automotive space shine. I remember my first swap, nervous about the wires, but now I grin every time my garage lights up. Head to your shop, grab that new LED, and install it with confidence. Whether you’re working on a hot rod or admiring your ride, your lights will make it awesome. So, clip in that module, flip the breaker, and bask in the glow—I’m cheering you on!
FAQ
How do I replace an L ED recessed light?
Turn off the power, remove the old light, wire the new one, and clip it in. I swapped mine in 15 minutes.
Can I replace an integrated LED recessed light myself?
Yes, with basic tools and care. I replaced my garage’s integrated unit with a $25 LED.
What if my LED recessed light flickers after replacement?
Check wiring or dimmer compatibility. I swapped a mismatched LED to stop flickering.
How much does it cost to replace an LED recessed light?
DIY costs $20-$80 per light; pros charge $100-$200. I spent $31.
Where can I buy replacement LED recessed lights?
Home Depot, Lowe’s, or Amazon. I got my Halo LED at Home Depot.
Do I need an electrician to replace LED recessed lights?
Not usually, but hire one for complex wiring. I did my DIY to save $100.
How long do LED recessed lights last?
30,000-50,000 hours for integrated; 15,000-25,000 for bulbs. My garage LEDs are going strong.