
Are you tired of staring at that outdated lighting fixture in your living room? Imagine transforming your space with a new, stylish light that not only brightens your room but also enhances its overall aesthetic.
Replacing a lighting fixture might sound daunting, but it’s easier than you think. With the right guidance, you can tackle this DIY project like a pro without breaking a sweat. You’ll discover simple steps to safely and efficiently replace a lighting fixture, saving you both time and money.
Get ready to take control of your home’s ambiance and impress your guests with your newfound skills. Keep reading to learn how you can illuminate your space with confidence.

Credit: www.youtube.com
Safety Precautions
Before replacing a lighting fixture, turn off the electricity at the circuit breaker. Use a voltage tester to confirm power is off. Wear safety goggles and gloves. Ensure the ladder is stable and on a flat surface. Keep tools organized and within reach to prevent accidents.
Turn Off Power
Always turn off the powerat the main switch. This keeps you safe. Check the power is off using a tester. Never touch wires without checking.
Gather Necessary Tools
Get all your toolsready first. You will need a screwdriver and pliers. Having everything ready makes the job easier.
Use Protective Gear
Wear protective gearlike gloves and goggles. Gloves protect your hands. Goggles keep your eyes safe from dust. Safety first!
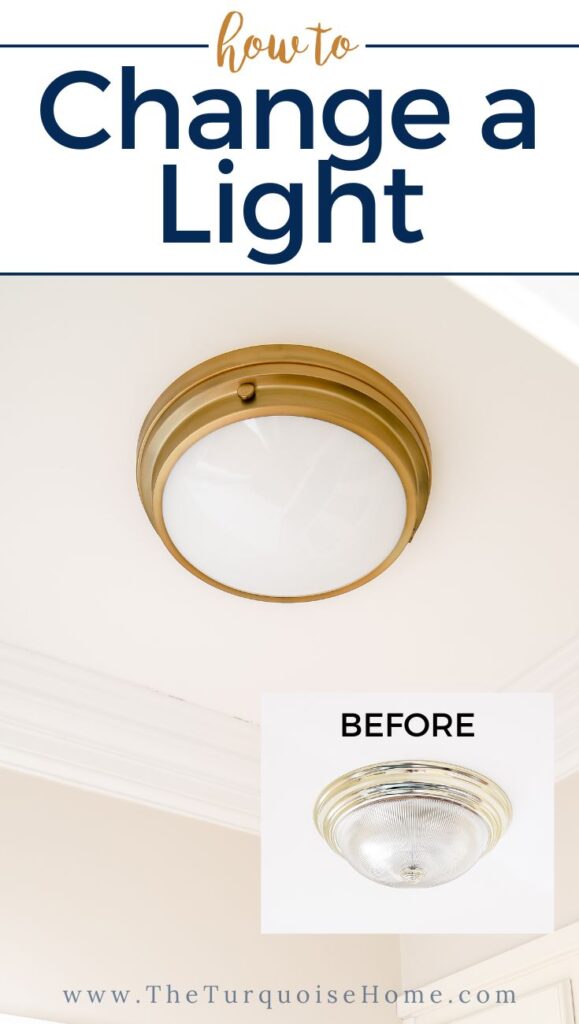
Credit: theturquoisehome.com
Choosing The Right Fixture
The design of your room matters. Colors and style should match the fixture. A modern room might need a sleek fixture. A vintage room might need something classic. Think about the theme of your room.
Size is important. A big fixture might overwhelm a small room. A small fixture might look lost in a large room. Type matters too. Ceiling, wall, or pendant? Choose what fits best.
Energy-efficient fixtures save money. Look for LED options. They use less power. Check the wattage and energy labels. It helps the planet too.
Removing The Old Fixture
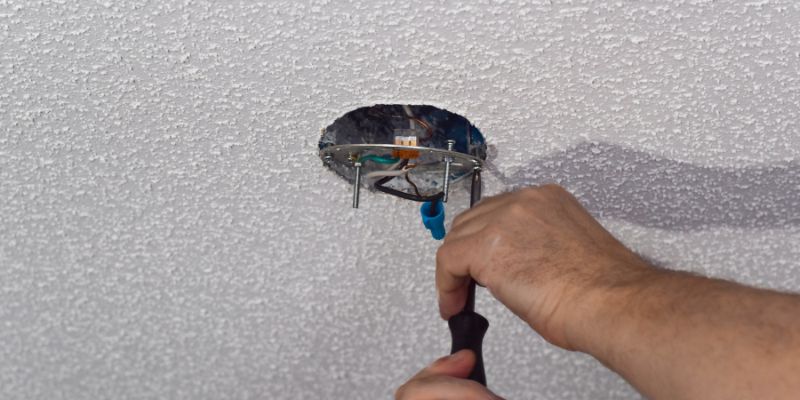
First, turn off the power at the breaker. Use a screwdriver to unscrew the fixture. Hold the fixture to prevent it from falling. Detach it carefully from the ceiling. This keeps you safe.
Find the wires behind the fixture. Disconnect the wires by removing caps. Note wire colors for later. This helps with the new fixture.
Check the ceiling box for damage. It should be strong and firm. Look for loose screws or cracks. Fix any issues before installing the new fixture.
Credit: www.artofmanliness.com
Installing The New Fixture
Switching out an old lighting fixture can brighten a room. Start by turning off the power. Remove the old fixture carefully. Connect wires of the new fixture. Secure it in place. Test the new light to ensure it’s working properly.
Enjoy the refreshed look and improved lighting.
Attach The Mounting Bracket
First, secure the mounting bracketto the ceiling. Use a screwdriverto tighten the screws. Make sure the bracket is stableand won’t move. This keeps your fixture in place. Check if the bracket is alignedcorrectly. Adjust if needed.
Connect Wires Correctly
Now, connect the wires. Match the colors. Black to black. White to white. Ground wire to ground wire. Twist the wires together. Use a wire connector for safety. Make sure all wires are secure. This stops electric shocks. Double-check your connections.
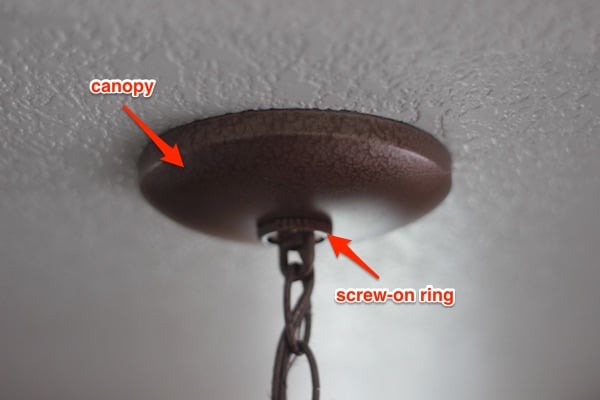
Secure The Fixture
Lastly, secure the fixture. Hold the fixture up. Attach it to the mounting bracket. Use screws to secure it. Make sure it’s tight. The fixture should not wobble. Check if it’s straight. Adjust if necessary. Turn on the light to test.
Testing The New Installation
Make sure the power switch is on. Check if electricity flows properly. Be careful with switches and wires. Safety is important here.
See if the light turns on. Does it shine bright? Flickering lights mean trouble. Always want a steady glow.
Wiggle the fixture gently. Is it firmly in place? Tighten any loose screws. Safety checks are important.
Troubleshooting Common Issues
Flickering lights can be annoying. Check the bulb first. Sometimes it’s loose. Tighten it gently. If it still flickers, replace the bulb. A new bulb can solve the problem.
A loose fixture may cause trouble. Turn off the power first. Safety is key. Then, tighten the screws on the fixture. Make sure it’s secure. A tight fixture works better.
Wiring can be tricky. Check all connections. They should be tight and secure. Look for frayed wires. If you see any, call a professional. It’s best to be safe.
Maintenance Tips
Need to replace a lighting fixture? Turn off power first for safety. Remove old fixture carefully. Connect wires correctly for new one. Secure new fixture in place. Test lighting to ensure everything works. Enjoy your updated space with improved lighting.
Regular Cleaning
Dust can gather on fixtures over time. Use a soft cloth for cleaning. This prevents dirt buildup and keeps lights bright. Regular cleaning helps maintain the fixture’s look and function. A clean fixture shines better.
Inspect For Wear And Tear
Check fixtures often for signs of damage. Look for loose parts or rust. Tighten screws if needed. Replace any broken pieces. Regular inspections keep fixtures safe and working well.
Replace Bulbs As Needed
Bulbs can burn out or fade over time. Swap old bulbs for new ones. This keeps rooms well lit. Bright bulbs improve room atmosphere. Choose bulbs that fit the fixture type.
Frequently Asked Questions
How Do I Safely Replace A Light Fixture?
First, turn off the power at the circuit breaker. Use a voltage tester to confirm the power is off. Remove the old fixture carefully. Install the new fixture following the manufacturer’s instructions. Reconnect the wires, secure the fixture, and restore power.
Always ensure safety precautions are followed throughout the process.
What Tools Are Needed For Fixture Replacement?
You’ll need a screwdriver, voltage tester, wire stripper, and ladder. Ensure you have the correct light bulbs for the new fixture. Having a helper can make the process easier. Proper tools ensure a safer and more efficient installation.
Can I Replace A Fixture Without An Electrician?
Yes, you can replace a fixture yourself if you follow instructions carefully. Ensure the power is off before starting. If you feel unsure, consult an electrician. Safety should always be your priority during any electrical work.
How Long Does It Take To Replace A Fixture?
Replacing a light fixture usually takes about 30 minutes to an hour. Time depends on your experience and fixture complexity. Having all necessary tools and following instructions can speed up the process. Take your time to ensure a safe and proper installation.
Conclusion
Replacing a lighting fixture is simpler than it seems. With the right tools, you can do it yourself. Save on costly electrician fees. Follow safety tips to avoid accidents. Ensure the power is off before starting. Take your time and double-check connections.
A new fixture can brighten any room. Enjoy the satisfaction of your DIY success. Transform your space with your personal touch. Remember, practice makes perfect. Soon, you’ll feel more confident in home improvements. Happy fixing!