
Hey there, friend! So, you’re wondering how to remove recessed light housing? I’m super excited to dive into this with you because it’s one of those projects that can really freshen up your garage or shop, especially for us car folks who love a bright, clean workspace. I still remember the first time I tackled a recessed light housing in my garage—it was like solving a puzzle that made my shop look and feel brand new! After years of swapping lights, upgrading my automotive haven, and learning the tricks of housing removal, I’ve got all the tips to share.
Whether you’re updating your garage for wrenching on a classic, a carport for detailing, or a showroom for your prized ride, this guide’s got you covered. Let’s sit down, like we’re chatting over a toolbox with a cold drink, and I’ll walk you through every step in simple terms. This article is packed with practical advice for anyone in the USA looking to tackle this job like a pro. Ready to pull out that old housing and make your space shine? Let’s get started!
What Is Recessed Light Housing?
Recessed light housing is the metal or plastic can that sits inside your ceiling, holding the light bulb or LED module. It’s the backbone of your recessed light, keeping everything secure and safe. I think of it as the engine bay of my lighting setup—hidden but crucial. The housing connects to your wiring and supports the trim and bulb, giving your garage that sleek, flush look.
In my shop, the housing is tucked above the ceiling, out of sight. It’s designed to handle heat and protect your home from fire risks. Removing it lets you upgrade, repair, or replace your lighting, keeping your automotive space bright and functional.
Why Remove Recessed Light Housing?
Taking out the housing isn’t something you do every day, but I’ve had plenty of reasons to do it. Here’s why it’s worth the effort:
- Upgrade Lighting: Swap old cans for modern LEDs. I upgraded my garage for brighter light.
- Damaged Housing: Cracks or rust need fixing. I replaced a rusty can in my carport.
- Renovation: Change the ceiling layout or style. I removed two when I added a lift.
- Fire Safety: Old housing may not be IC-rated. I swapped mine for safer ones.
- Electrical Issues: Faulty wiring in the can. I fixed a shorted housing last year.
- Aesthetic Change: New trims or sizes look better. I wanted 6-inch cans instead of 4-inch.
Removing the housing keeps your garage safe and lets you customize your space, whether you’re working on cars or showing them off.
Types of Recessed Light Housings
Not all housings are the same, and I’ve dealt with a few. Here’s what you might find:
- IC-Rated: Safe for insulated ceilings, can touch insulation. My garage has these for safety.
- Non-IC Rated: Needs clearance from insulation, cheaper but riskier. I avoided these in my shop.
- New Construction: For open ceilings during builds. I didn’t use these since my garage was done.
- Remodel: Clips into existing ceilings, easy to install or remove. My housings are remodel type.
- Airtight: Seals to save energy. I used these in my carport to keep it cool.
- Low-Voltage: For 12V systems, less common. I saw one in a buddy’s showroom.
I have 6-inch IC-rated remodel housings in my garage—they’re safe and easy to work with. Check your housing’s label or ceiling to know what you’ve got.
Tools and Supplies You’ll Need
Removing a housing unit needs some basic gear. I’ve got my kit dialed in. Here’s my list:
- Ladder: To reach the ceiling safely. My 6-foot ladder’s sturdy.
- Screwdriver: Phillips and flathead for screws or clips. My $10 set covers both.
- Voltage Tester: To check power. My $10 non-contact tester’s a must.
- Pliers: For twisting wires or pulling clips. My $8 needle-nose pliers are handy.
- Wire Cutters: To trim wires if needed. I spent $12 on mine.
- Flashlight: To see in the ceiling. My phone’s light works fine.
- Gloves: For grip and safety. My $3 shop gloves are great.
- Safety Goggles: For dust protection. I spent $3 on mine.
- Drywall Saw: For cutting around the housing if stuck. My $10 saw’s sharp.
- Drop Cloth: To catch debris. I use a $5 tarp.
- Electrical Tape: To cap wires safely. I got a $2 roll.
- Patch Kit: For ceiling holes after removal. I spent $8 on spackle.
I spent about $58 on supplies I didn’t already own. Check Home Depot, Lowe’s, or Amazon for tools. Keep a bucket handy for small parts.
Planning Your Recessed Light Housing Removal
Planning makes the job smoother. I learned this after a messy first try. Here’s my approach:
- Locate Housing: Find the can in your ceiling or attic. I checked my garage attic first.
- Check Type: Note if it’s IC-rated, remodel, or new construction. My remodel cans had clips.
- Count Housing: Plan for multiple if upgrading. I removed four in one go.
- Access Ceiling: Ensure attic or ceiling access. My garage has an attic hatch.
- Clear Space: Move cars or tools below. I parked my truck outside.
- Plan Wiring: Decide if wires stay or go. I capped mine for future use.
I spent 20 minutes scouting my ceiling and attic. A quick sketch of housing locations saved me time and kept my shop tidy.
Ensuring Safety with Power
Safety’s my top priority—shocks are no fun! Here’s how I handle power:
- Find Breaker: Locate your garage’s breaker in the panel. Mine’s labeled “garage lights.”
- Turn Off Power: Flip the breaker off. I check with a flashlight.
- Test Voltage: Use a non-contact tester at the light’s wires. My tester beeps if power’s on.
- Double-Check: Test a nearby outlet or switch. I plugged in a lamp to confirm.
- Lock Breaker: Tape it off to prevent flips. I use $1 painter’s tape.
This takes 5 minutes. I never skip this step—I got a small zap once and learned my lesson!
Accessing the Recessed Light Housing
Getting to the housing can be tricky, but I’ve got it down. Here’s how I do it:
- Set Up Ladder: Place it on flat ground. My ladder’s level is on my garage floor.
- Check Attic Access: If possible, go above the ceiling. My attic hatch made it easy.
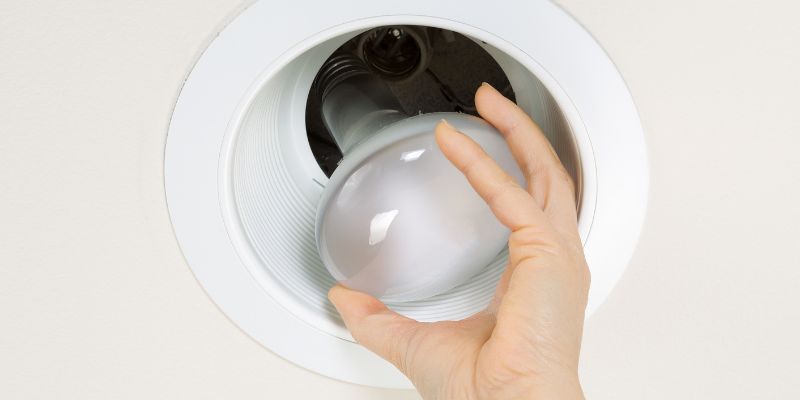
- Remove Trim: Pull or twist off the trim ring below. My baffle trim popped off with a tug.
- Detach Bulb or Module: Unscrew or unclip the bulb. I removed my LED module first.
- Inspect Housing: Look for clips, screws, or brackets. My remodel housing had spring clips.
- Clear Insulation: Move any insulation around IC-rated cans. I used gloves to shift fiberglass.
This took 10 minutes per light. I prefer attic access for remodel cans—it’s faster than working from below. Keep a flashlight handy for tight spots.
Disconnecting the Wiring
Wiring’s the delicate part, and I’m extra careful here. Here’s my process:
- Confirm Power’s Off: Test wires with a voltage tester. I checked twice for safety.
- Remove Wire Nuts: Twist off nuts connecting house wires to the housing. I turned counterclockwise.
- Separate Wires: Pull black, white, and ground wires apart. My wires were color-coded.
- Cap Loose Wires: Wrap house wires with electrical tape or nuts. I taped mine to prevent shorts.
- Remove Junction Box: If attached, unscrew the box from the housing. My box stayed in the ceiling.
This took 5 minutes per light. I labeled wires with $2 masking tape to make future installs easy. If wires are stuck, I use pliers gently.
Removing the Recessed Light Housing
Now it’s time to pull the housing out. I’ve done this enough to make it quick. Here’s how:
- Release Clips (Remodel): Squeeze spring clips from below or push from above. My clips folded inward.
- Unscrew Brackets (New Construction): Remove screws or nails from joists. I saw this in a friend’s build.
- Pull Housing: Gently tug the can down or out. My remodel can slide out smoothly.
- Wiggle if Stuck: Twist or rock it free. I cut around one stuck can with a drywall saw.
- Clear Debris: Shake out dust or insulation. I used a tarp to catch the mess.
- Patch Hole (if not reusing): Fill with spackle or drywall. I patched one for $8.
This took 10-15 minutes per light. I worked slowly to avoid ceiling damage. Attic access makes remodel cans easier to pop out.
Handling Insulation Around the Housing
Insulation can complicate things, but I’ve got tricks. Here’s my approach:
- Check IC Rating: IC-rated cans touch insulation; non-IC need 3-inch clearance. Mine were IC-rated.
- Move Insulation: Use gloves to pull fiberglass or foam away. I cleared a foot around each can.
- Protect Yourself: Wear goggles and a mask for dust. My $3 mask saved my lungs.
- Dispose Safely: Bag loose insulation if damaged. I reused mine after checking.
- Clean Up: Vacuum or sweep debris. I used my shop vac for $20.
This adds 5 minutes per light. I keep insulation clear to avoid fire risks, especially with old non-IC cans.
Patching the Ceiling After Removal
If you’re not replacing the light, patch the hole. I’ve done this a few times. Here’s how:
- Measure Hole: Note the size (4-6 inches usually). My hole was 6 inches.
- Cut Drywall: Trace a drywall scrap to fit and cut with a saw. I spent $5 on a scrap piece.
- Secure Patch: Glue or screw to a wood strip inside the ceiling. I used $2 adhesive.
- Apply Spackle: Spread over seams with a putty knife. My $8 kit worked great.
- Sand Smooth: Sand after drying (4 hours). I used $3 sandpaper.
- Paint: Match your ceiling color. I spent $10 on a pint of paint.
This took 30 minutes plus drying time. I patched one hole when I moved a light, and it’s invisible now.
Disposing of Old Recessed Light Housing
Getting rid of the old can is easy, but I do it right. Here’s my method:
- Check Material: Most are aluminum or steel, recyclable. Mine were aluminum.
- Remove Wires: Ensure no live wires remain. I double-checked mine.
- Clean Housing: Wipe off dust or grease. I used a $2 rag.
- Recycle: Take to a local scrap yard or recycling center. My town’s free drop-off was nearby.
- Trash if Needed: If non-recyclable, bag and toss. I recycled all mine.
This took 10 minutes. I drove to my recycling center during a shop cleanup, saving landfill space.
Safety Tips for Removing Recessed Light Housing
Safety keeps the job fun and shock-free. I’ve learned these tips:
- Power Off: Cut the breaker and test. My voltage tester’s my best friend.
- Stable Ladder: Use a rated ladder, not a chair. I level mine on my garage floor.
- Wear Gear: Gloves, goggles, mask for dust. I spent $6 on safety gear.
- Avoid Insulation Irritation: Cover skin when handling fiberglass. I wear long sleeves.
- Work with a Buddy: Have someone hold the ladder. My wife spotted me once.
I keep a first-aid kit in my shop. Safety lets me remove housings with confidence, knowing I’m safe.
Troubleshooting Common Removal Issues
Things can go wrong, but I’ve fixed most. Here’s what to watch for:
- Stuck Housing: Clips or screws won’t budge. I cut around one with a drywall saw.
- Damaged Ceiling: Pulling too hard cracks the drywall. I patched a crack for $8.
- Live Wires: The Breaker wasn’t off. I tested twice after a scare.
- Hidden Screws: Some housings have extra brackets. I found one in my attic.
- Insulation Mess: Fiberglass spills everywhere. I used a tarp to contain it.
I test each step to catch issues early. If stuck, an electrician helps for $50-$100.
Maintaining Your Recessed Lighting System
Even after removal, keep your other lights in top shape. I do these checks:
- Clean Trims: Wipe dust monthly with a rag. I clean during shop tidying.
- Check Clips: Ensure housings are secure yearly. I tugged mine last spring.
- Inspect Wiring: Look for loose nuts every few years. I checked when removing a can.
- Clear Insulation: Keep IC-rated cans free of extra fluff. I vacuum my attic yearly.
- Test Lights: Note flickering or dimming. My LEDs are still bright.
Maintenance takes 10 minutes a year. I make it part of my garage routine, keeping my shop lit.
Cost of Removing Recessed Light Housing
This is a budget-friendly project. Here’s my breakdown for one housing:
- Tools: Tester, screwdriver, saw, pliers ($35 if bought). I had mine already.
- Supplies: Gloves, goggles, tape, spackle ($25). I spent $17.
- Ladder: $50 (I owned one). Borrow to save.
- Patch Materials: Drywall, paint ($15). I spent $13 on one patch.
- Total DIY: $17-$75 per housing. I spent $30.
- Pro Cost: $100-$200 per housing for electricians. I saved by DIY.
I shopped at Home Depot and Walmart. Sales or borrowing tools cut costs.
Using Recessed Lights in Automotive Spaces
Recessed lights are perfect for car folks. Here’s how I use mine:
- Garage Work: Bright light for engine swaps. My six lights cover every corner.
- Detailing: Clear light to spot swirls. I love the glow on my paint.
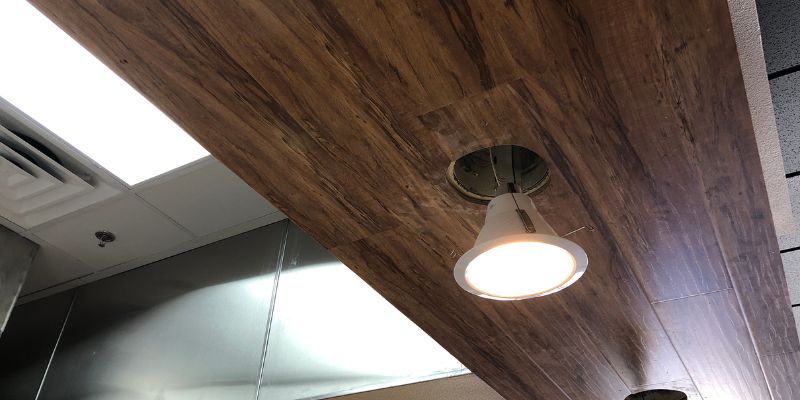
- Carport: Safe for outdoor ceilings. My two carport lights keep my Jeep cool.
- Showroom: Highlights my classic car. My Mustang shines under LEDs.
- Tool Storage: Lights up shelves. My toolbox area’s never dark.
Removing old housing lets me upgrade my garage, keeping it safe and bright for any project.
Table: IC-Rated vs. Non-IC-Rated Housings
Here’s a comparison:
| Feature | IC-Rated | Non-IC Rated |
|---|---|---|
| Insulation Contact | Can touch insulation | Can touch the insulation |
| Safety | High, fire-safe | Riskier, needs clearance |
| Cost | $20-$40 | $10-$25 |
| Best For | Insulated garages | Open ceilings |
| Removal Ease | Same as non-IC | Same as IC |
I used IC-rated housings for my insulated garage. They’re safer and worth the extra cost.
Why I Love Removing Recessed Light Housing
Removing a recessed light housing is like swapping a car part—it’s a hands-on fix that upgrades your space. I feel like a garage pro when I pull out an old can and plan a brighter setup. It’s a cheap, rewarding project that keeps my shop safe and functional for wrenching or showing off my rides. My garage has been a bright haven for years, and removing housing lets me keep it that way. I’m hooked on the control and shine it brings.
Wrapping It Up with a Bright Shop
Hey, buddy, you’re now a recessed light housing removal pro! From cutting power to pulling that can like a champ, you’ve got all the skills to refresh your automotive space. I remember my first removal, nervous about the ceiling, but now I grin every time my garage glows. Head to your shop, grab that ladder, and tackle that housing with confidence. Whether you’re working on a hot rod or admiring your ride, your space will shine. So, unscrew those clips, pull that can, and enjoy the upgrade—I’m cheering you on!
FAQ
How do I remove a recessed light housing?
Turn off power, disconnect wires, release the clips, and pull it out. I removed mine in 15 minutes.
Do I need to access the attic to remove the recessed light housing?
Not always—remodel cans come out from below. I used my attic for easier access.
Is it safe to remove the recessed light housing myself?
Yes, if you cut power and use safety gear. I tested my wires twice to stay safe.
How much does it cost to remove a recessed light housing?
DIY costs $17-$75 per housing; pros charge $100-$200. I spent $30.
What if the housing is stuck in the ceiling?
Wiggle it or cut around with a drywall saw. I freed one stuck can this way.
Where can I buy tools for removing recessed light housing?
Home Depot, Lowe’s, or Amazon. I got my voltage tester at Home Depot.
What do I do with the hole after removing the housing?
Patch with drywall and spackle. I patched one for $13, and it’s invisible.