
I’ll never forget the first time I tried to remove a recessed ceiling light in my kitchen. I was nervous, but with a few simple tools and some patience, I got it done! In this article, I’ll show you how to remove a recessed ceiling light step by step. Whether you’re a beginner or a home improvement pro, you’ll find easy tips and clear instructions to make this task a breeze. Let’s get started with a fun, safe, and budget-friendly guide to removing those tricky ceiling lights!
What Is a Recessed Ceiling Light?
A recessed ceiling light is a light fixture tucked into your ceiling. It sits flush, giving a clean, modern look. These lights are common in kitchens, living rooms, and bathrooms. They’re great for bright, even lighting but can be tricky to remove if you don’t know how. Understanding their parts—like the bulb, trim, and housing—helps make removal simple and safe.
Why Remove a Recessed Ceiling Light?
You might want to remove a recessed light to replace a burnt-out bulb, upgrade to LED, or change the fixture entirely. Sometimes, you’re re Martaizing the room or refreshing the look of your home. Whatever the reason, removing these lights is easier than it looks with the right steps and tools.
Tools and Materials You’ll Need
To remove a recessed ceiling light, gather these basic tools:
- A flathead or Phillips screwdriver (depending on your fixture).
- A step ladder to reach the ceiling safely.
- A non-contact voltage tester for safety.
- Gloves to protect your hands from sharp edges.
- A replacement bulb or fixture (if needed).
These tools are affordable and easy to find at stores like Home Depot. A basic screwdriver costs about $5-$10, and a voltage tester is around $15. Check your fixture’s manual (if you have it) for specific screw types.
Table 1: Tool Cost Comparison
| Tool | Estimated Cost | Where to Buy |
|---|---|---|
| Screwdriver | $5-$10 | Hardware stores |
| Voltage Tester | $10-$20 | Home Depot, Amazon |
| Step Ladder | $20-$50 | Walmart, Lowe’s |
| Caption: Affordable tools make removing recessed lights easy and safe. |
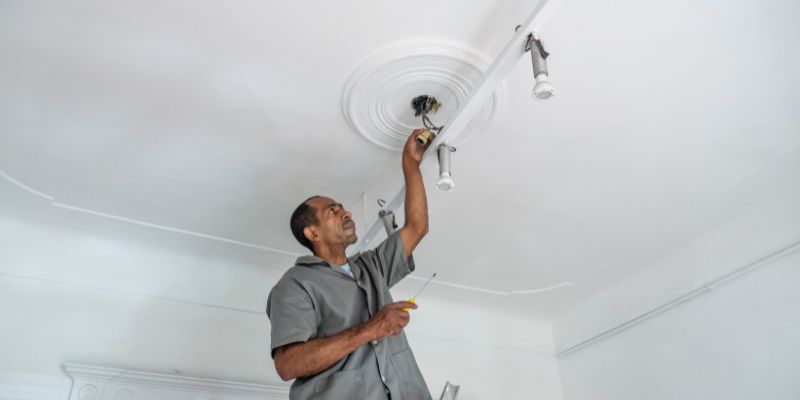
Step-by-Step Guide to Removing a Recessed Ceiling Light
Here’s a simple guide to safely remove your recessed ceiling light. Follow these steps carefully to avoid damage or injury.
Step 1: Turn Off the Power
Safety first! Turn off the power to the light at your breaker box. Use a non-contact voltage tester to confirm the power is off. This prevents shocks or accidents.
Step 2: Remove the Light Bulb
Let the bulb cool down if it was recently on. Gently twist or pull the bulb out, depending on its type (e.g., halogen, LED). Check the bulb’s base to see if it’s a twist (bayonet) or pull (bi-pin) style.
Step 3: Remove the Trim
The trim is the decorative ring around the light. Look for small screws or clips holding it in place. Use your screwdriver to loosen screws or gently pull clips to release the trim. It should pop out easily.
Step 4: Access the Housing (Optional)
The housing is the metal can in the ceiling. You usually don’t need to remove it unless replacing the entire fixture. If needed, unscrew or unclip the housing carefully, watching for wires.
Step 5: Disconnect Wires (If Removing Fixture)
If replacing the fixture, disconnect the wires after confirming the power is off. Twist off wire nuts and gently pull wires apart. Take a photo of the wiring for reference when installing a new fixture.
Step 6: Patch or Replace
If you’re not replacing the light, patch the ceiling hole with drywall compound. If installing a new fixture, follow the manufacturer’s instructions to connect wires and secure it.
- Tip 1: Wear gloves to avoid cuts from sharp metal edges.
- Tip 2: Label wires with tape to remember their connections.
- Tip 3: Test the new bulb before securing the trim to save time.

Benefits and Challenges of Removing Recessed Lights
Removing recessed lights is straightforward and can save money on electrician fees, which can cost $100-$200. It also lets you upgrade to energy-efficient LEDs, reducing energy bills by up to 80% (ENERGY STAR). However, challenges include tricky clips, tight spaces, or old fixtures that are stuck. Patience and the right tools make it manageable.
Alternative Options
Instead of removing the entire fixture, consider these options:
- Replace the bulb with an LED for better efficiency.
- Use a retrofit kit to upgrade without removing the housing (ENERGY STAR).
- Cover the light with a decorative plate if you’re not replacing it.
Table 2: Bulb Type Comparison
| Bulb Type | Pros | Cons |
|---|---|---|
| Halogen | Bright, affordable | Hot, short lifespan |
| LED | Energy-efficient, long-lasting | Higher upfront cost |
| CFL | Energy-saving | Contains mercury |
| Caption: Choosing the right bulb can save money and energy. |
My Personal Tips for Success
When I first removed a recessed light, I struggled with a stuck trim. Gently wiggling it while pulling down worked like magic. Always double-check the power is off—I learned this the hard way with a small spark! Keep a flashlight handy for dark ceilings, and take your time to avoid breaking clips. These small steps make the process smooth and stress-free.
Visual Ideas (Not Included)
- A diagram showing bulb, trim, and housing parts.
- A photo of tools laid out on a table.
- A step-by-step infographic of the removal process.
Table 3: Common Mistakes to Avoid
| Mistake | Solution |
|---|---|
| Forgetting to turn off power | Always use a voltage tester |
| Breaking trim clips | Pull gently, use correct screwdriver |
| Losing small screws | Keep screws in a small container |
| Caption: Avoid these mistakes for a smooth removal process. |

Conclusion
Removing a recessed ceiling light is an easy project with the right tools and steps. You can save money, upgrade your lighting, or refresh your home’s look. Follow the simple steps, stay safe, and don’t rush. I love the satisfaction of finishing a DIY project like this—it’s empowering! Try removing a light this weekend and share your success in the comments. Check out resources at Home Depot or ENERGY STAR for more tips. Happy DIY-ing!
Frequently Asked Questions
How do I know if the power is off?
Use a non-contact voltage tester to check the fixture. It beeps or lights up if power is present. Always turn off the breaker first. This keeps you safe from shocks.
What if the trim won’t come off?
Check for hidden screws or clips. Gently wiggle the trim while pulling down. If it’s stuck, use a flathead screwdriver to pry it carefully.
Can I replace just the bulb?
Yes! Most recessed lights only need a new bulb. Check the bulb type (e.g., LED, halogen) and twist or pull it out carefully.
How much does it cost to remove a recessed light?
DIY removal costs $15-$50 for tools. Hiring an electrician costs $100-$200. LEDs save money long-term by cutting energy use.
What if I don’t want to replace the light?
Patch the ceiling hole with drywall compound. Sand and paint to match your ceiling. It’s an easy fix for a clean look.
Are recessed lights safe to remove?
Yes, if you turn off the power and follow steps carefully. Wear gloves and use a voltage tester to avoid shocks or cuts.
Can I upgrade to LED without removing the fixture?
Absolutely! Use an LED retrofit kit to upgrade easily. It screws into the existing socket and saves energy (ENERGY STAR).