
To remove polyurethane without removing the stain, focus on gentle chemical strippers or denatured alcohol. Test in an inconspicuous area first. Always work in a well-ventilated space and wear protective gear. Patience and the right technique are key to preserving your wood’s original color.
Have you ever refinished a piece of wood, only to find that removing the old polyurethane also stripped away the beautiful stain underneath? It’s a frustrating problem many DIYers face. You want a fresh, durable finish, but you don’t want to lose the color you love. The good news is, it’s absolutely possible to tackle that stubborn polyurethane layer without disturbing the stain. With the right approach and a bit of care, you can achieve a smooth, clean surface ready for a new coat, all while keeping your wood’s color intact. Let’s dive into how to do it the right way.
Why Removing Polyurethane Can Be Tricky
Polyurethane is a tough, protective coating. It’s designed to last, which is great for durability but can make it challenging to remove. When you sand too aggressively, or use harsh chemical strippers that aren’t stain-friendly, you risk not only removing the polyurethane but also the stain and even damaging the wood itself. The stain is often just a thin layer of pigment or dye that sits on or slightly within the wood’s surface. Aggressive removal methods can easily lift this color along with the topcoat.
The goal is to find a method that dissolves or lifts the polyurethane without bonding too strongly to or reacting with the stain pigments. This often means opting for less aggressive chemical solutions or using very specific mechanical techniques with extreme caution.
Understanding Your Wood and Its Finish
Before you start, it’s helpful to know a little about the finish you’re dealing with. Is it oil-based or water-based polyurethane? While the methods below generally work for both, some chemicals might be more effective on one type than the other. Also, consider the type of stain used. Dyes penetrate deeper and are generally more colorfast than pigments, which sit more on the surface. Knowing this can help you choose the safest removal method.
You can often tell the difference between oil-based and water-based polyurethane by its appearance. Oil-based finishes tend to have a slight amber or yellowish tint, especially as they age, and they have a stronger odor when applied. Water-based finishes are typically clearer and have less odor.
The Gentle Approach: Chemical Strippers That Preserve Stain
Chemical strippers are often the go-to for removing old finishes. However, not all strippers are created equal when it comes to preserving stain. You’ll want to look for strippers that are formulated to be less aggressive or specifically designed for delicate finishes.
Choosing the Right Chemical Stripper
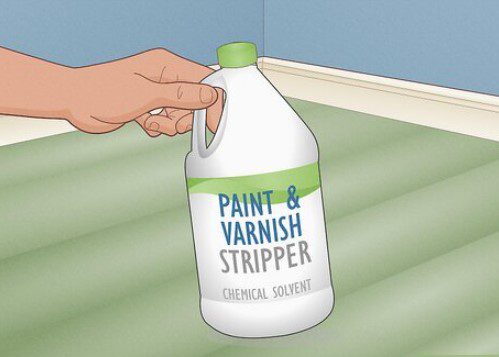
When selecting a stripper, consider these types:
- Methylene Chloride-Free Strippers: These are generally safer and less harsh than traditional methylene chloride-based strippers. They often work by breaking down the finish into a gel-like substance that can be scraped away.
- Citrus-Based or Soy-Based Strippers: These are the gentlest options available. They work more slowly but are much less likely to damage underlying stain or wood. They are also more environmentally friendly and have a much milder odor.
- Denatured Alcohol: For lighter coats of polyurethane, especially water-based finishes, denatured alcohol can be surprisingly effective. It works by dissolving the finish without being overly aggressive.
Important Note on Strippers: Always read the product label carefully. Some strippers might recommend neutralization or a specific cleanup procedure. Following the manufacturer’s instructions is crucial for both safety and effectiveness.
How to Use Chemical Strippers Safely and Effectively
Here’s a step-by-step guide:
- Preparation is Key:
- Ventilation: Work in a well-ventilated area, ideally outdoors or in a garage with open doors. If indoors, open all windows and use fans to circulate air.
- Protection: Wear chemical-resistant gloves (like nitrile), safety glasses or goggles, and old clothing. A respirator mask rated for organic vapors is highly recommended.
- Protect Your Workspace: Lay down drop cloths or old newspapers to protect the floor or surrounding areas from drips.
- Test in an Inconspicuous Area: Before applying the stripper to the entire piece, test it on a small, hidden spot (like the underside of a table or the back of a drawer). This will show you how the stripper affects both the polyurethane and the stain. Wait for it to work, scrape gently, and then clean as directed to see the results.
- Apply the Stripper:
- Using a natural-bristle brush (synthetics can be damaged by some strippers), apply a thick, even coat of the stripper. Don’t brush it out too thin.
- Work in manageable sections, especially on larger pieces.
- Let the Stripper Work: This is where patience comes in. The stripper needs time to break down the polyurethane. Follow the manufacturer’s recommended dwell time. You’ll often see the polyurethane start to bubble or wrinkle.
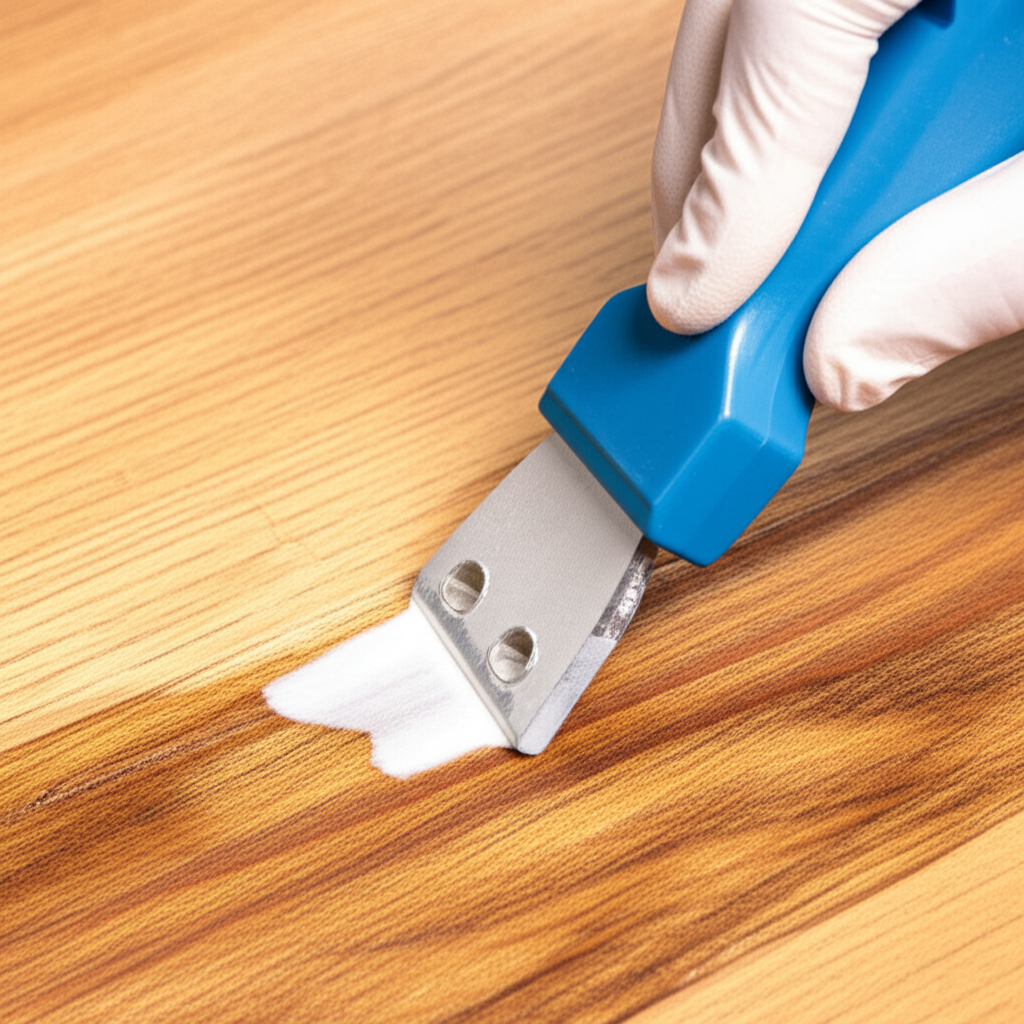
- Scrape Away the Finish:
- Use a plastic scraper or a putty knife with rounded corners to gently lift the softened polyurethane. Avoid sharp metal tools that can gouge the wood.
- Scrape with the grain of the wood.
- For intricate areas or corners, use plastic scrapers, old toothbrushes, or brass brushes (brass is softer than steel and less likely to damage wood).
- Remove Residue:
- Most strippers require a specific cleanup. This might involve wiping with mineral spirits, denatured alcohol, or a stripper wash/neutralizer. Check the product instructions.
- Use steel wool (0000 grade is finest and least likely to scratch) or a clean cloth dampened with the recommended cleaning agent. Again, work with the grain.
- Inspect and Repeat if Necessary: Once you’ve scraped and cleaned, inspect the surface. If any polyurethane remains, you may need to apply another coat of stripper to those areas.
Using Denatured Alcohol for Lighter Jobs
Denatured alcohol is a fantastic option for removing water-based polyurethane or very thin coats of oil-based polyurethane, and it’s much less aggressive than most commercial strippers. It’s also readily available at most hardware stores.
When to Use Denatured Alcohol
Denatured alcohol is ideal when:
- You’re dealing with a water-based polyurethane finish.
- The polyurethane layer is relatively thin.
- The stain is known to be particularly sensitive or you want the gentlest possible approach.
How to Use Denatured Alcohol
The process is similar to using a chemical stripper, but generally simpler and less hazardous:
- Ventilation and Protection: Ensure good ventilation and wear gloves and eye protection. Denatured alcohol is flammable, so keep it away from open flames or sparks.
- Test Area: Always test on a hidden spot first to ensure it doesn’t lift the stain.
- Apply Alcohol: Dampen a clean, lint-free cloth or a piece of 0000-grade steel wool with denatured alcohol.
- Rub Gently: Rub the surface of the wood in the direction of the grain. You should see the polyurethane begin to soften and dissolve into the cloth or steel wool.
- Work in Sections: Clean the area with a dry cloth to remove the dissolved finish. Then, reapply alcohol to the next section and repeat the rubbing process.
- Clean Up: Once the polyurethane is removed, wipe the entire piece down with a clean cloth dampened with denatured alcohol to remove any residue. Allow the wood to dry completely.
Gentle Mechanical Removal: Sanding with Caution
While sanding is often the enemy of the stain, there are times when very light, careful sanding can help in conjunction with chemical methods or for removing patchy remnants of polyurethane.
When Sanding Might Be an Option
Consider light sanding only:
- After most of the polyurethane has been removed chemically, and you have stubborn spots left.
- If the stain is known to be very durable and penetrates deeply.
- As a final smoothing step after all polyurethane is gone, using very fine grit sandpaper.
How to Sand Without Damaging the Stain
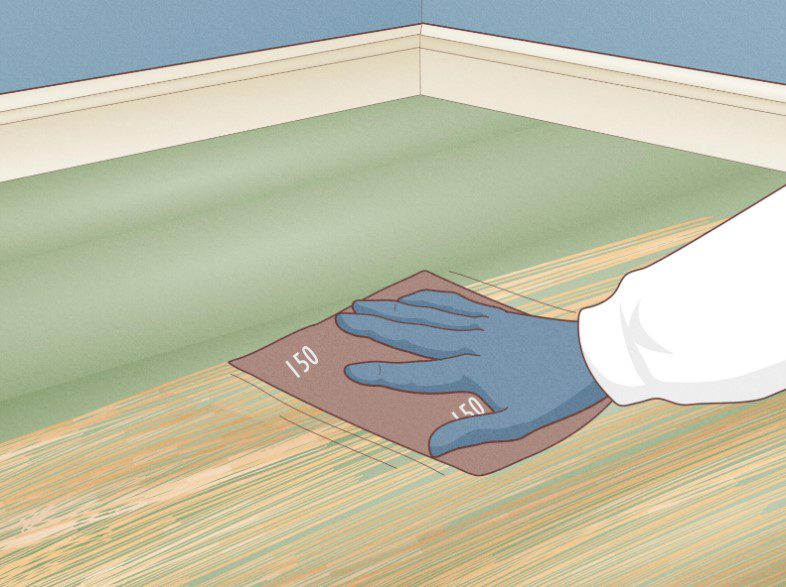
- Use the Finest Grit: Start with 220-grit sandpaper and, if absolutely necessary, move to 320-grit. Never use coarser grits.
- Sand Lightly and Evenly: Apply very light pressure. The goal is to remove the last bits of polyurethane, not to abrade the wood surface or the stain.
- Always Sand with the Grain: This is non-negotiable. Sanding across the grain will create visible scratches that are very difficult to remove.
- Use a Sanding Block or Pole Sander: For flat surfaces, a sanding block or pole sander helps distribute pressure evenly, preventing you from digging into the wood.
- Vacuum Frequently: Use a shop vacuum with a brush attachment to remove dust often. This allows you to see your progress and avoid sanding over accumulated dust, which can scratch the surface.
- Consider a Soft Brush: Sometimes, a stiff nylon brush or even a clean brass brush can be used to gently lift softened polyurethane after a chemical treatment, which is less abrasive than sandpaper.
Tools and Materials You’ll Need
Gathering the right supplies can make the process much smoother:
| Tool/Material | Purpose | Notes |
|---|---|---|
| Chemical Stripper (Methylene Chloride-Free, Citrus, or Soy-Based) | Dissolves polyurethane | Choose based on wood type and desired gentleness. |
| Denatured Alcohol | Dissolves water-based poly or light oil-based poly | Flammable, use with care. |
| Plastic Scrapers (various shapes) | To lift softened polyurethane | Avoid sharp metal edges that can gouge wood. |
| 0000-Grade Steel Wool | For scraping and residue removal | The finest grade available; also use with alcohol. |
| Natural Bristle Brushes | To apply stripper | Synthetic brushes can be damaged by some chemicals. |
| Lint-Free Cloths or Rags | For wiping and cleaning | Avoid materials that leave fibers behind. |
| Chemical-Resistant Gloves (Nitrile) | Protect hands from chemicals | Essential for safety. |
| Safety Glasses or Goggles | Protect eyes from splashes and dust | Always wear when working with chemicals or sanding. |
| Respirator Mask (Organic Vapor) | Protect lungs from chemical fumes | Highly recommended for chemical stripping. |
| Drop Cloths or Newspapers | Protect work area | Catch drips and debris. |
| Fine-Grit Sandpaper (220-320 grit) | For very light touch-ups or smoothing | Use with extreme caution. |
| Sanding Block | For even pressure when sanding | Helps prevent gouges. |
When to Seek Professional Help
While most DIY projects are manageable, there are times when it’s best to call in the pros:
- Valuable Antiques: If the piece is a valuable antique, the risk of accidental damage might outweigh the savings of DIY. A professional restorer has the experience and specialized products to handle delicate finishes.
- Complex Finishes: If the wood has intricate carvings, inlays, or a very old, unknown finish, a professional might be better equipped.
- Lack of Confidence or Time: If you’re uncomfortable with the chemicals involved or don’t have the time to dedicate to a careful, potentially multi-step process, a professional refinisher can save you stress.
You can find professional wood finishers or antique restorers through local woodworking guilds, furniture repair shops, or by asking for recommendations at high-end furniture stores.
After Polyurethane Removal: Preparing for a New Finish
Once you’ve successfully removed the old polyurethane without lifting the stain, you’ll want to prepare the surface for a new finish. This is a critical step to ensure your new coating adheres well and looks its best.
- Final Cleaning: After removing the stripper residue, give the entire piece a thorough wipe-down with a clean cloth dampened with denatured alcohol or mineral spirits (depending on what the stripper manufacturer recommended for cleanup). This removes any lingering chemical residue.
- Allow to Dry Completely: Let the wood dry thoroughly. This can take 24-48 hours, especially if any moisture was introduced during cleaning. Wood needs to be completely dry before applying a new finish.
- Light Sanding (Optional but Recommended): Once the wood is dry, you can very lightly sand the entire surface with 220-grit or 320-grit sandpaper. This isn’t to remove any finish, but to de-nib the wood and create a perfectly smooth surface for your new topcoat. Sand with the grain.
- Dust Removal: After sanding, thoroughly wipe down the piece with a tack cloth. A tack cloth is slightly sticky and will pick up even the finest dust particles that a dry cloth or vacuum might miss. This is crucial for a smooth, professional-looking finish.
- Apply New Finish: Now your wood is ready for a new coat of polyurethane, varnish, lacquer, or your chosen finish. Apply thin, even coats, allowing adequate drying time between each layer as recommended by the product manufacturer.
Frequently Asked Questions (FAQ)
Can I use regular sandpaper to remove polyurethane without affecting the stain?
No, not usually. Standard sandpaper, especially anything coarser than 220-grit, will likely remove both the polyurethane and the stain. If you must sand, use the finest grits (220-320) very lightly and only after most of the polyurethane is gone chemically.
Will mineral spirits remove polyurethane without removing the stain?
Mineral spirits are great for cleaning up oil-based finishes and can soften some types of polyurethane, but they are generally not strong enough to dissolve thick polyurethane layers on their own. They are unlikely to remove the stain, but they might not fully remove the polyurethane either. Denatured alcohol or a specialized stripper is usually more effective for complete removal.
Is it safe to use a heat gun to remove polyurethane?
Using a heat gun can be effective for removing polyurethane, but it carries a significant risk of scorching the wood or lifting the stain, especially if the stain is a simple pigment. It also requires careful temperature control and is best left to experienced users. Chemical methods are generally safer for preserving the stain.
How do I know if the stain has been removed along with the polyurethane?
After attempting to remove the polyurethane, wipe the surface with a clean, damp cloth. If the cloth picks up color, or if the wood appears significantly lighter or blotchy in areas where the polyurethane was thickest, the stain has likely been affected. Always test your chosen removal method in an inconspicuous area first to gauge its effect on the stain.
Can I just put a new coat of polyurethane over the old one?
You can, but it’s generally not recommended unless the old finish is in very good condition and you’re just adding a refresh. If the old polyurethane is scratched, peeling, or damaged, applying a new coat over it can lead to adhesion problems and an uneven finish. It’s best to remove the old finish for a proper refinish.
What’s the difference between stain and polyurethane?
Stain is a colorant that adds hue to the wood. It can be a dye (which penetrates deep into the wood fibers) or a pigment (which sits more on the surface). Polyurethane, on the other hand, is a clear protective topcoat. It forms a durable film over the wood to protect it from moisture, wear, and tear. You can have stained wood with no topcoat, or finished wood that has been stained and then coated.
Conclusion
Removing polyurethane without taking the stain with it is a task that requires patience, the right tools, and a gentle touch. By opting for less aggressive chemical strippers, like those based on citrus or soy, or by using denatured alcohol for lighter finishes, you significantly increase your chances of success. Always remember to test your chosen method in a hidden spot first, wear your protective gear, and work in a well-ventilated area. While a light touch-up with very fine-grit sandpaper might be necessary in some cases, avoid aggressive sanding at all costs. With these proven techniques, you can confidently strip away old, worn-out polyurethane, revealing the beautiful, stained wood underneath, ready for a fresh, durable new finish.