
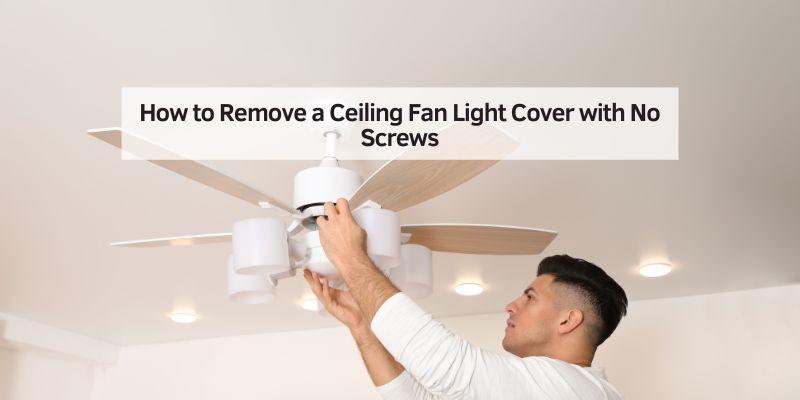
Hey there! If you’ve ever stood under a ceiling fan, squinting up at the light cover, wondering how on earth to get it off without any visible screws, you’re not alone. I’ve been there, scratching my head, trying to figure out how to change a bulb or clean the cover without breaking anything. It’s frustrating when there’s no obvious way to remove it, right? But don’t worry—I’ve explored this topic thoroughly, and I’m excited to share everything I’ve learned about removing a ceiling fan light cover with no screws.
Whether you’re a DIY newbie or a seasoned home improver, this guide will walk you through the process step-by-step, with tips and tricks I’ve picked up along the way. Let’s dive in and get that light cover off safely and easily!
Why Do Some Ceiling Fan Light Covers Have No Screws?
When I first encountered a ceiling fan with a no-screw light cover, I was puzzled. Why would manufacturers design it this way? After some digging, I found that screwless designs are all about convenience and aesthetics. Screws can loosen over time, especially with the vibrations from a spinning fan. Plus, they can be an eyesore, disrupting the sleek look of a modern fan. Manufacturers use alternative mechanisms like clips, twist-locks, or spring-loaded systems to make removal quick and tool-free. These designs also make maintenance easier for homeowners like you and me, who just want to swap a bulb or clean the cover without a toolbox. But, of course, it only feels convenient once you know how it works!
Tools You Might Need
Before we get into the nitty-gritty, let’s talk about what you’ll need. The good news? You probably won’t need much. Here’s what I keep handy when tackling a screwless ceiling fan light cover:
| Tool/Item | Purpose |
|---|---|
| Step ladder | To safely reach the ceiling fan |
| Gloves (optional) | To protect your hands and improve grip |
| Soft cloth | To clean the cover or protect it from scratches |
| Replacement bulb | In case you’re changing the light bulb |
| Flashlight (optional) | To see better in dim lighting |
I always make sure my ladder is sturdy because wobbling at ceiling height is no fun. Gloves are great if the cover is dusty or slippery, and a soft cloth helps avoid scratches. If you’re replacing a bulb, double-check the wattage and type your fan requires—I learned that the hard way after buying the wrong one!
Common Types of Screwless Ceiling Fan Light Covers
Not all screwless light covers are the same, and that’s where things can get tricky. Through my own trial and error, I’ve found there are a few common types of mechanisms. Knowing which one you’re dealing with makes all the difference. Here’s what I’ve come across:
Twist-and-Lock Covers
These are super common. The cover twists into place and locks with a slight turn. To remove it, you usually rotate it counterclockwise. I’ve found these on brands like Hunter and Hampton Bay. They’re intuitive once you get the hang of it, but the first time, it feels like solving a puzzle.
Clip-On Covers
Some covers use spring-loaded clips or tabs. These grip the fan’s housing tightly. You’ll need to gently pull or press to release them. I’ve seen these on more modern fans, and they can be a bit stubborn if you don’t know where the clips are.
Bayonet-Style Covers
These are like twist-and-lock but with a push-and-twist motion, similar to a bayonet light bulb. You push the cover up slightly and then rotate it. I’ve noticed these on older models or budget-friendly fans.
Magnetic Covers
Rare, but so cool! Some high-end fans use magnets to hold the cover in place. These are the easiest to remove—just a gentle tug, and it comes right off. I wish all fans used this method!
Figuring out which type you have Ascertain the type of cover by looking closely at the fan’s housing or checking the manual (if you still have it). If you’re unsure, don’t worry—we’ll go through a step-by-step process that covers all these types.
Step-by-Step Guide to Removing the Light Cover
Alright, let’s get to the main event—removing that light cover! I’ve done this enough times to know that patience and a gentle touch are key. Here’s the process I follow:
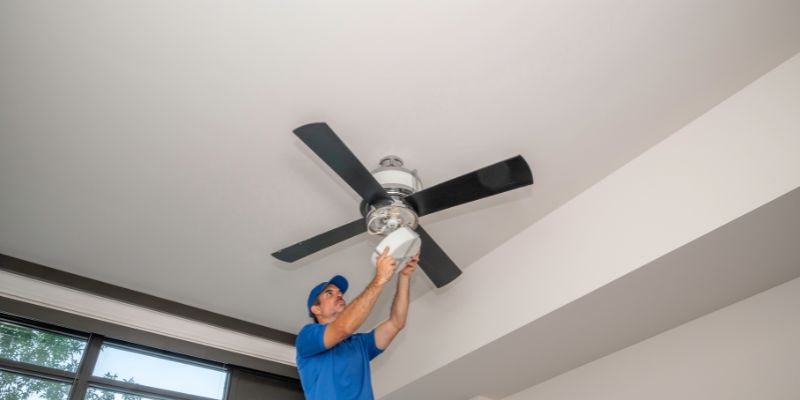
Step 1: Turn Off the Power
Safety first! I always turn off the power to the fan at the circuit breaker or unplug it if it’s a plug-in model. You don’t want to risk a shock while you’re up on a ladder. If you’re just cleaning or inspecting, you can skip this, but I recommend it for bulb changes or repairs.
Step 2: Let the Bulb Cool Down
If the fan’s light was recently on, give the bulb a few minutes to cool. I’ve burned my fingers before by rushing in too soon. A cool bulb is safer to work around and easier to handle if you’re replacing it.
Step 3: Position Your Ladder
Set up your step ladder directly under the fan. Make sure it’s stable—I always check that it’s on a flat surface. If you’re short like me, you might need a taller ladder to reach comfortably. Stand at a height where you can easily see and touch the light cover.
Step 4: Inspect the Cover
Here’s where you play detective. Look closely at the cover and the fan’s housing. Are there any slots, grooves, or clips? Sometimes, the mechanism is subtle, like small indentations for twisting or tiny tabs for clips. I like to use a flashlight if the room is dim—it helps spot these details.
Step 5: Try the Twist-and-Lock Method
Start with the most common method. Gently grasp the cover (I use gloves for better grip) and try rotating it counterclockwise. Apply even pressure, and don’t force it. If it moves a quarter-turn and feels loose, you’re on the right track. Keep twisting until it releases. If it doesn’t budge, move to the next method.
Step 6: Check for Clips or Tabs
If twisting doesn’t work, look for clips or tabs around the edge of the cover. These might be small metal or plastic pieces that blend into the fan’s design. Gently press or pull on them while tugging the cover downward. I’ve found that applying pressure to multiple clips at once (if you can reach them) works best. Be patient—clips can be finicky.
Step 7: Test the Bayonet-Style Mechanism
For bayonet covers, push the cover slightly upward toward the fan, then twist counterclockwise. I’ve noticed this type often has a slight “click” when it’s in the right position to release. If it feels stuck, don’t force it—double-check for clips or a different mechanism.
Step 8: Try a Gentle Tug for Magnetic Covers
If you suspect a magnetic cover (lucky you!), give it a gentle, straight-down pull. These usually come off smoothly, but I always hold on tight to avoid dropping the cover. If it doesn’t move, you’re likely dealing with another type.
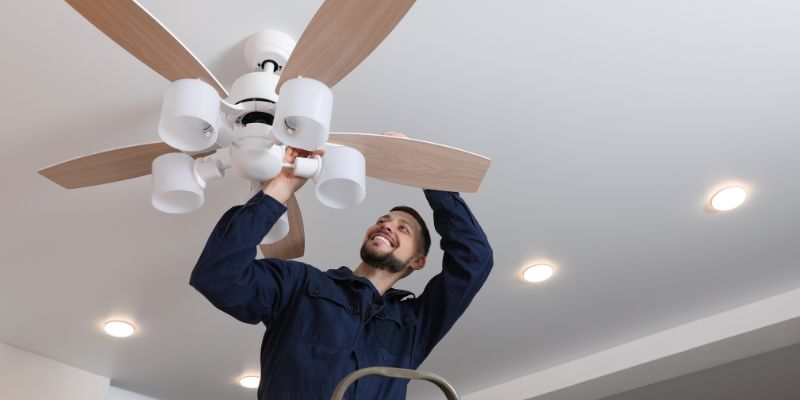
Step 9: Remove the Cover Carefully
Once the cover releases, lower it slowly. If you’re changing a bulb, it might still be attached to the cover, so handle it gently to avoid breaking anything. I like to place the cover on a soft cloth to prevent scratches while I work.
Step 10: Clean or Replace the Bulb
With the cover off, you can clean it with a soft cloth and mild cleaner (I use a mix of water and a drop of dish soap). If you’re swapping the bulb, check your fan’s manual for the correct type—some use LED-only or specific wattages. I always double-check to avoid frying the circuit.
Step 11: Reattach the Cover
To put the cover back, reverse the removal process. For twist-and-lock, align the grooves and rotate clockwise. For clips, push until you hear a click. For bayonet, push up and twist. For magnetic, just align it, and the magnets will do the rest. Give it a gentle tug to ensure it’s secure.
Troubleshooting Common Issues
Sometimes, things don’t go as planned. Here are some problems I’ve run into and how I fixed them:
The Cover Won’t Budge
If nothing’s working, don’t panic. Double-check for hidden clips or slots. Sometimes, dust or grime can make the cover stick—I’ve used a damp cloth to clean the edges, which can help. If it’s still stuck, consult the fan’s manual or look up your model online for specific instructions.
The Cover Feels Loose but Won’t Come Off
This usually means you’re close! Try a slight push upward before twisting, as it might be a bayonet mechanism. I’ve also found that gently wiggling the cover while twisting can help it release.
The Cover Is Fragile or Cracked
If the cover feels brittle (common with older plastic covers), go extra slow. I’ve cracked a cover before by being too rough, and replacements aren’t always cheap. If it’s already cracked, consider replacing it—check with the manufacturer or a hardware store.
Tips for Success
Over time, I’ve picked up a few tricks that make this process smoother:
- Work in Good Light: A well-lit room helps you spot clips or grooves. I use a headlamp if the ceiling light is the only source.
- Take Photos: Before removing the cover, snap a quick pic of how it’s positioned. It’s a lifesaver for reassembly.
- Check the Manual: If you have the fan’s manual, it’s your best friend. Many manufacturers include diagrams for screwless covers.
- Be Gentle: Forcing anything can break the cover or the fan’s housing. Patience is key!
- Upgrade to LED: If you’re replacing a bulb, consider LED bulbs. They last longer and save energy—I’ve switched all my fans to LEDs.
Safety First
I can’t stress this enough: safety matters. Always use a sturdy ladder, and don’t lean too far to reach. If you’re uncomfortable working at heights or dealing with electrical components, call a professional. I’ve had moments where I realized I was in over my head, and it’s better to be safe than sorry.
When to Call a Professional
Sometimes, the job is trickier than expected. If the cover is stuck, the fan’s wiring looks damaged, or you’re unsure about the mechanism, it’s time to call in a pro. I once had a fan with a faulty clip system that needed a technician to replace the entire light kit. Electricians or handymen can save you time and prevent costly damage.
Maintaining Your Ceiling Fan Light Cover
Once the cover is off, it’s a great time to give it some TLC. I clean mine every few months to keep it dust-free and shiny. Use a soft cloth and avoid harsh chemicals that could damage the finish. If you’re replacing bulbs often, check for loose connections in the fan’s light kit—tightening them can prevent flickering. I also inspect the cover for cracks or wear, especially if it’s an older fan.
Conclusion
Removing a ceiling fan light cover with no screws might seem daunting at first, but with a little know-how, it’s a breeze. Whether it’s a twist-and-lock, clip-on, bayonet, or magnetic cover, the key is to stay patient, work safely, and use the right technique for your fan’s design. I’ve gone from being totally stumped to confidently tackling this task in just a few minutes, and I’m sure you can too! With the steps and tips I’ve shared, you’re ready to change bulbs, clean covers, or just satisfy your curiosity about what’s up there. So grab your ladder, take a deep breath, and give it a try—you’ve got this!
Frequently Asked Questions
Why doesn’t my ceiling fan light cover have screws?
Screwless designs are used for convenience and aesthetics. Manufacturers opt for clips, twist-locks, or magnets to make removal easier and keep the fan looking sleek. It’s a practical choice, but it can be confusing if you’re not used to it.
What if I can’t figure out how to remove the cover?
If the cover won’t come off, check for hidden clips or try a different method, like pushing up before twisting. Look up your fan’s model online or consult the manual. If you’re still stuck, a professional can help.
Can I replace a screwless light cover with a different type?
It depends on your fan’s design. Some fans allow interchangeable covers, but you’ll need to check with the manufacturer for compatibility. I’ve found that sticking with the original type is usually easiest.
How do I clean the light cover without damaging it?
Use a soft cloth with water and a tiny bit of mild soap. Avoid abrasive cleaners or scrubbers, especially on plastic or frosted glass covers. I dry mine with a microfiber cloth to prevent streaks.
What kind of bulb should I use for my ceiling fan?
Check your fan’s manual for the recommended bulb type and wattage. Most modern fans use LED or CFL bulbs for efficiency. I always go for LEDs—they’re brighter and last longer.
Is it safe to remove the cover while the fan is on?
I don’t recommend it. Turn off the power at the circuit breaker to avoid shocks, especially if you’re changing a bulb. If you’re just cleaning, you can leave the power on but make sure the light is off and cooled down.