

Hey there! If you’re a car enthusiast like me, you probably love getting your hands dirty and tackling projects that make your space feel just right. Whether it’s tweaking your ride’s engine or upgrading your garage to look like a showroom, there’s something satisfying about a job well done. A few years back, I decided to spruce up my home garage with a new ceiling light fixture to brighten up my workspace.
Let me tell you, learning how to install a light fixture in the ceiling was a game-changer! It’s not just about better lighting—it’s about creating a vibe that screams “car guy” (or gal). I’ve installed several fixtures since then, from my garage to my kitchen, and I’m excited to share everything I’ve learned with you.
So, grab a seat, maybe a coffee, and let’s walk through how to install a ceiling light fixture, step by step, with a nod to our automotive passion. You’ll be lighting up your space like a pro in no time!
Why Install a New Ceiling Light Fixture?
I’ve always believed that good lighting is like a great set of headlights—it makes everything clearer and more enjoyable. In my garage, the old fluorescent light was dim and flickered like a bad horror movie. I wanted something brighter, maybe with a sleek, industrial look that matched my love for polished chrome and clean lines. Installing a new ceiling light fixture can transform any space, whether it’s your garage, kitchen, or even a man cave where you display your car memorabilia.
New fixtures can save energy, especially if you use LED bulbs, and they let you customize your space’s style. I chose a brushed nickel fixture for my garage because it reminded me of the shiny accents on my classic Mustang. Plus, doing it yourself saves money and feels as rewarding as nailing a perfect tune-up on your car. But before we dive into the how-to, let’s talk about what you’ll need to get started.
Tools and Materials You’ll Need
When I first tried installing a light fixture, I learned the hard way that having the right tools makes all the difference. It’s like working on your car—you wouldn’t swap a spark plug without a socket wrench, right? Here’s what I keep in my toolbox for this job:
- Screwdriver Set: Flathead and Phillips for securing the fixture and removing old parts.
- Wire Stripper: To trim and prepare wires for connection.
- Voltage Tester: A must to check that the power’s off. I use a non-contact tester for safety.
- Ladder: To reach the ceiling comfortably. I use a sturdy step ladder from my garage.
- Wire Nuts: For connecting wires securely. I always keep extras in my toolbox.
- Pliers: Needle-nose pliers help with twisting wires and holding small parts.
- New Light Fixture: Pick one that fits your style—I went for a modern industrial design.
- Electrical Tape: To wrap wire connections for extra safety.
- Drill and Anchors: If your ceiling box needs reinforcement or you’re installing a heavier fixture.
I also grab safety glasses and gloves, just like I do when working under my car’s hood. Safety first, always! You can find most of these at Home Depot or even in your garage if you’re a DIYer like me.
Preparing for the Installation
Before I touch any wires, I make sure I’m set up for success. Think of it like prepping your car for a big mod—you don’t dive in without checking everything first. Here’s how I get ready:
- Turn Off the Power: I head to my breaker box and switch off the circuit for the room I’m working in. Then, I use my voltage tester to double-check that the wires are dead. I learned this after a scary zap during my first attempt!
- Gather Your Tools: I lay everything out on my workbench, just like I do before swapping out car parts. It saves time and keeps me organized.
- Check the Ceiling Box: Most ceilings have an electrical box where the fixture mounts. I make sure mine is secure and rated for the new fixture’s weight. Once, I had to replace a flimsy box with a heavier-duty one for a chandelier-style fixture.
- Read the Instructions: Every fixture is a bit different, like car models. I always skim the manual to know what I’m dealing with.
One time, I skipped turning off the power properly and got a mild shock—lesson learned! Always double-check that the power’s off before you start.
Step-by-Step Guide to Installing a Ceiling Light Fixture
Now, let’s get to the fun part—the actual installation. I’ve done this enough times to have a system, and I’ll break it down so it’s as easy as changing your car’s oil. Follow these steps, and you’ll have your new light fixture up in no time.
Step 1: Remove the Old Fixture
If you’ve got an old light fixture, you’ll need to take it down. I start by removing the cover or shade, usually held by screws or clips. Then, I unscrew the fixture from the ceiling box. The wires are usually connected with wire nuts, so I twist those off carefully and separate the wires. I keep a bucket handy to catch any falling screws—trust me, they’re as easy to lose as a lug nut in the garage!
Step 2: Inspect the Wiring
With the old fixture down, I check the wires in the ceiling box. Most homes have three wires: black (hot), white (neutral), and green or bare copper (ground). If your home is older, you might see different colors, like red or blue. I make sure the wires are in good shape—no fraying or damage. One time, I found a chewed-up wire in my garage ceiling, probably from a mouse, so I replaced it before moving on.
Step 3: Mount the New Fixture’s Bracket
Most light fixtures come with a mounting bracket that screws into the ceiling box. I attach this first, making sure it’s level and secure. It’s like bolting on a new car part—tight but not overdone. I use my screwdriver to fasten it, checking that it doesn’t wobble. If the box is loose, I add anchors or replace it with a sturdier one, especially for heavier fixtures.
Step 4: Connect the Wires
This is where it feels like wiring a car stereo. I match the fixture’s wires to the ceiling wires: black to black, white to white, and ground to ground. I strip about half an inch of insulation off the fixture’s wires if needed, then twist them together with the ceiling wires using wire nuts. I give them a gentle tug to make sure they’re secure, then wrap each connection with electrical tape for extra safety. One time, I mixed up the wires and the light wouldn’t turn on—double-check your connections!
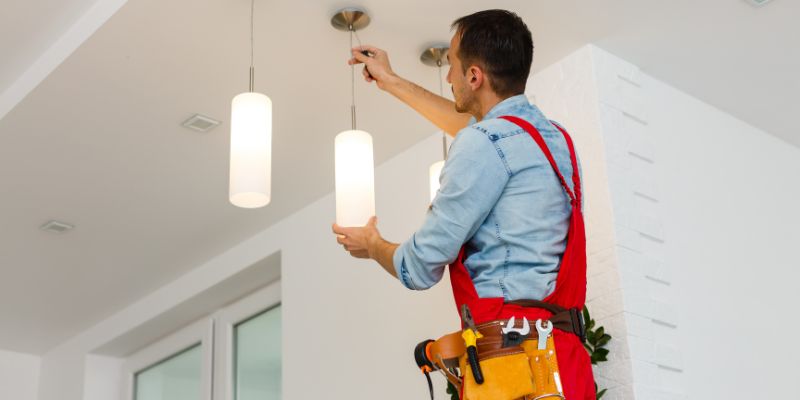
Step 5: Attach the Fixture
With the wires connected, I tucked them neatly into the ceiling box. Then, I screw the fixture onto the mounting bracket. I make sure it’s snug but not overtightened, just like torquing a wheel lug. Some fixtures have decorative caps or plates to cover the screws—I add those for a polished look, like waxing a car after a wash.
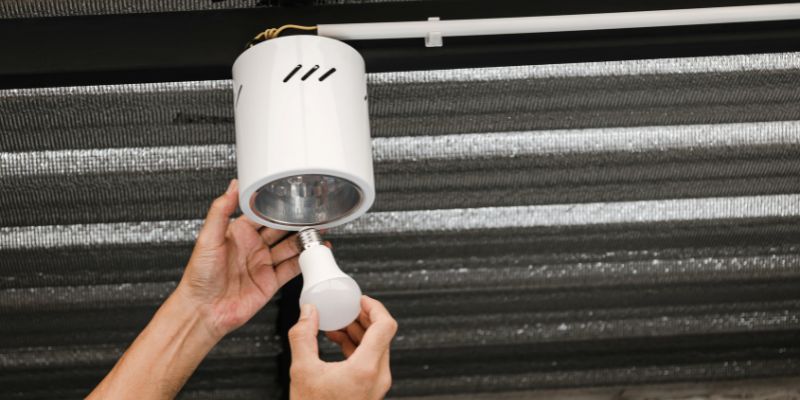
Step 6: Install Bulbs and Shades
I pop in the bulbs—usually LEDs for energy savings—and attach the shade or cover. I learned to check the fixture’s max wattage to avoid overloading it. Once, I used a bulb that was too powerful, and it overheated the fixture. Now I stick to the recommended wattage, usually printed on the fixture or in the manual.
Step 7: Test the Light
With everything in place, I head back to the breaker box and flip the power on. Then, I test the light switch. When that light comes on, it’s like firing up a freshly tuned engine—pure satisfaction! If it doesn’t work, I turn off the power and check my connections or bulb compatibility.
Common Challenges and How to Solve Them
Installing light fixtures isn’t always smooth sailing. Here are some issues I’ve run into and how I fixed them:
- Loose Ceiling Box: If the box wobbles, I tighten it or replace it with a heavy-duty one. I had to do this in my old house for a heavy industrial fixture.
- Mismatched Wires: Older homes might have non-standard wire colors. I use a voltage tester to identify the hot wire and label everything clearly.
- Fixture Too Heavy: If the fixture is too heavy for the existing box, I install a brace bar or fan-rated box. I learned this after a chandelier started sagging.
- Flickering Lights: This usually means a loose connection or incompatible bulb. I tighten the wires or swap to a compatible LED bulb.
Choosing the Right Light Fixture for Your Space
Picking a light fixture is like choosing the perfect rims for your car—it’s all about style and function. Here’s what I consider:
- Style: I love industrial or modern fixtures for my garage, like brushed nickel or matte black. They match my automotive vibe.
- Size: A small fixture looks lost in a big room, while a huge one overwhelms a small space. I measure my ceiling height and room size before buying.
- Bulb Type: I prefer LEDs for their brightness and efficiency. They’re like upgrading to high-performance headlights.
- Dimmability: A dimmable fixture is great for setting the mood, like when I’m relaxing in my man cave with car posters on the wall.
I once bought a fixture that was too big for my kitchen ceiling—it looked like a spaceship! Now I always check the dimensions and visualize how it’ll look in the space.
Where to Shop for Ceiling Light Fixtures
Finding the right fixture took some trial and error, but here are my favorite places to shop:
- Home Depot: They have everything from budget-friendly to high-end fixtures. I grabbed a sleek black pendant there for my garage.
- Amazon: Great for deals and variety. I found a set of industrial-style fixtures for my kitchen on a budget.
- Lowe’s: They carry brands like Kichler and Progress Lighting, perfect for quality and style.
- Wayfair: Ideal for unique, trendy designs. I got a geometric fixture for my dining room that’s a real conversation starter.
- Lamps Plus: Their selection of modern and industrial fixtures is top-notch. I splurged on a brushed nickel chandelier from them.
Comparison Table: Types of Ceiling Light Fixtures
Here’s a table to help you choose the right fixture, based on my experience:
| Fixture Type | Best For | Light Distribution | Aesthetic Vibe |
|---|---|---|---|
| Pendant | Kitchens, garages, islands | Focused downward | Modern, industrial |
| Chandelier | Dining rooms, large spaces | Diffused, ambient | Elegant, luxurious |
| Flush Mount | Low ceilings, small rooms | Even, wide | Simple, functional |
| Semi-Flush Mount | Medium ceilings, hallways | Balanced, wide | Versatile, stylish |
Tips for a Successful Installation
After installing a few fixtures, I’ve got some tricks up my sleeve:
- Plan: Measure your space and check the fixture’s weight. It’s like planning a car mod—prep saves headaches.
- Work with a Buddy: Having someone hold the fixture while you connect wires is a lifesaver. My brother helped me with my last install.
- Label Wires: I use tape to mark wires so I don’t mix them up. It’s like labeling parts during an engine rebuild.
- Test Bulbs First: Pop in the bulbs and test them before mounting the fixture. I once installed a whole fixture only to find the bulb was dead!
- Keep It Clean: Wipe down the fixture before installing to avoid smudges. It’s like detailing your car for a show.
My Journey with Light Fixtures
When I started this journey, I was nervous about working with electricity. I’d rebuilt carburetors and swapped suspensions, but wiring felt intimidating. My first project was a simple flush-mount fixture in my garage. I fumbled with the wires and forgot to turn off the power once—yikes! But with each install, I got more confident. Now, I’ve got a mix of pendants, chandeliers, and flush mounts in my home, each one adding a touch of my automotive style. The best part? Every time I flip the switch, I feel like I’ve added horsepower to my space.
Conclusion
Installing a ceiling light fixture is one of those projects that feels daunting at first but is so rewarding once you get the hang of it. From picking a sleek, automotive-inspired fixture to wiring it up like a pro, you’re not just adding light—you’re creating a space that reflects your personality.
For me, it’s about bringing that same passion I have for cars into my home, whether it’s a garage where I wrench or a kitchen where I dream up my next build. With the right tools, a little patience, and the steps I’ve shared, you’ll be lighting up your space like a freshly polished classic car. So, grab your screwdriver, channel your inner gearhead, and let’s make your ceiling shine!
FAQs
Is it safe to install a ceiling light fixture myself?
Yes, if you follow safety steps like turning off the power and using a voltage tester. I always double-check everything to stay safe.
What tools do I need to install a light fixture?
You’ll need a screwdriver, wire stripper, voltage tester, ladder, wire nuts, and pliers. I keep these in my garage toolbox for easy access.
How do I know if my ceiling box can support a new fixture?
Check if the box is secure and rated for the fixture’s weight. I had to replace a flimsy box once for a heavier chandelier.
Can I use LED bulbs in any ceiling fixture?
Most fixtures take LED bulbs, but check the base size (usually E26) and wattage limit. I love LEDs for their brightness and efficiency.
What if my light fixture flickers after installation?
Flickering usually means loose wires or an incompatible bulb. I tighten connections or swap to a compatible LED to fix it.
How long does it take to install a ceiling light fixture?
It takes me about 30-60 minutes, depending on the fixture. Simple ones are quicker, like swapping a car’s air filter, but heavier ones take longer.