

Hey there, friend! I’m thrilled to sit down with you today and chat about a practical, hands-on topic I’ve tackled myself: how to install a Kwikset deadbolt. If you’re in the USA and want to boost your home’s security—or even your garage where you keep your car gear—this is a fantastic project! I’ve installed a few Kwikset deadbolts over the years, and I love how simple and reliable they are. It’s a DIY task that’s perfect for beginners and pros alike, and it ties into our automotive blog vibe—think of it like upgrading your car’s locks for extra peace of mind. So, grab a seat, and let’s dive into this fun, rewarding process together!
Why Choose a Kwikset Deadbolt?
Let’s start with why I picked a Kwikset deadbolt. I wanted something sturdy, affordable, and easy to install. Kwikset is a trusted brand in the USA, known for quality locks that protect homes, garages, and more. I felt safer knowing my front door had a solid deadbolt, just like I lock my car to keep it secure.
These deadbolts come in single-cylinder models—key on the outside, thumb turn inside—or double-cylinder, with keys on both sides. I went with a single-cylinder for my home; it’s simple and safe. They’re durable, resist picking, and some even have SmartKey tech to rekey easily. It’s a great upgrade! Excited to get started? Let’s go!
Tools and Materials You’ll Need
Before we jump in, let’s gather our gear. I learned that preparation is key—having everything ready saved me time. Here’s what I used.
You’ll need a Kwikset deadbolt kit—mine came with the lock, screws, and a template. Grab a drill and drill bits—usually 2-1/8 inch and 1 inch. I used a screwdriver, both Phillips and flathead. A measuring tape and a pencil mark your spots. A chisel helps with the door edge, and a hammer taps it in. I also had a door jig or template, safety glasses, and a cloth for cleanup. A level keeps things straight. Got a workbench? I set mine up in the garage—perfect for this! Ready with your tools? Let’s check the door!
Checking Your Door Compatibility
Okay, let’s make sure your door works with a Kwikset deadbolt. I did this first to avoid headaches.
Measure your door thickness. Most Kwikset deadbolts fit doors 1-3/8 to 1-3/4 inches thick—mine was 1-3/4, standard for exterior doors. Check the backset—the distance from the door edge to the center of the hole. Kwikset uses 2-3/8 or 2-3/4 inches; mine was 2-3/8—check your kit, it’s adjustable.
Look at your door. Wood or metal both work—my front door was wood. If you have an old deadbolt, remove it. I used a screwdriver for that. No damage or cracks? Great! My door was ready, and yours will be too. Let’s prep!
Preparing the Door
Prep is super important, friend! I almost skipped this, but it made my install smooth.
Start by closing the door and securing it. I wedged a towel underneath to keep it steady. Grab the template from your Kwikset kit—it’s a paper guide. Tape it to the door at the right height—about 40 inches from the floor is standard. I measured with my tape to be sure.
Mark the center for the deadbolt hole and the edge for the latch. I used a pencil—easy to erase if I goofed. Double-check your marks! I lined up the template with the door edge—precision matters. Everything lined up? You’re set to drill!
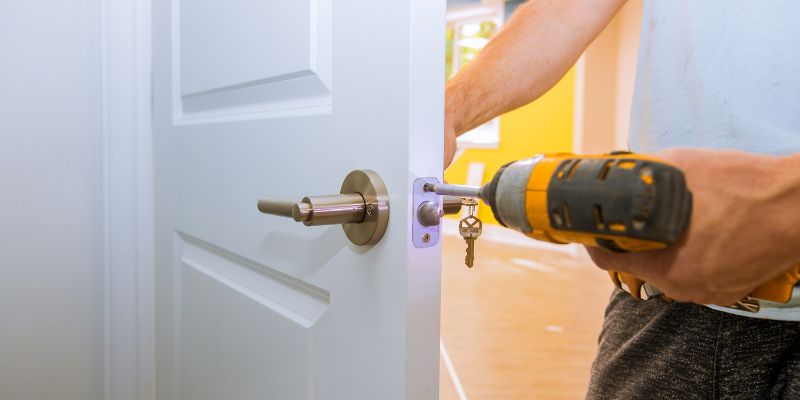
Drilling the Holes
Now, the fun begins—drilling! I was nervous at first, but it’s easy with care. Here’s how I did it.
Put on safety glasses—sawdust flies! Use a 2-1/8-inch hole saw for the main deadbolt hole. I drilled from one side of the door, going slowly to keep it clean. Stop halfway, then drill from the other side—prevents splintering. Mine came out smooth!
Next, grab a 1-inch bit for the latch hole. Drill into the door edge where you marked—keep it straight. I used a level to check. The hole should meet the big one. Test the latch—it slid in perfectly for me. Clean up sawdust with a cloth. Looking good? Let’s chisel!
Chiseling the Latch Area
This part shapes the door for the latch plate. I found it satisfying—like carving a little art!
Take the latch from your Kwikset kit. Slide it into the edge hole—mark around it with your pencil. I traced mine carefully. Now, use a chisel and hammer. I started with shallow cuts, about 1/8 inch deep, to fit the plate. Tap gently—don’t gouge the wood.
Test the fit. My latch sat flush—perfect! If it’s not, chisel a bit more. I cleaned out the chips with my cloth. Screw the latch in with the kit’s screws—mine felt snug. Your door’s taking shape! Ready for the deadbolt?
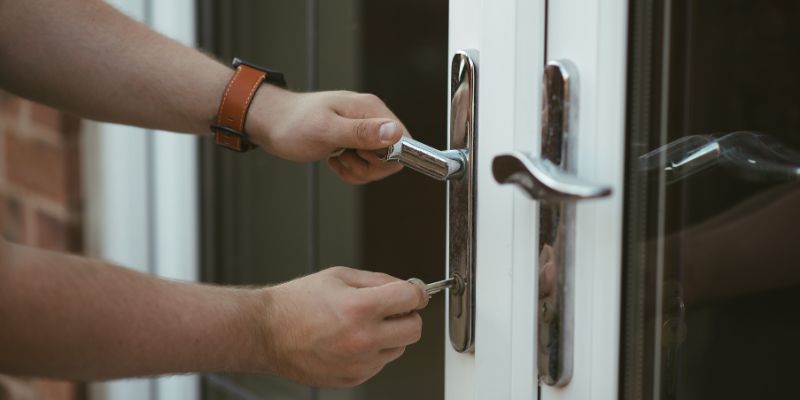
Installing the Deadbolt and Latch
Time to put the pieces together! I got excited seeing it come to life.
Take the deadbolt cylinder—mine had a key side and a thumb-turn side. Slide the cylinder into the big hole from the outside. The tailpiece—a metal bar—goes through the latch in the edge hole. I lined it up carefully. From the inside, place the thumb-turn piece over the tailpiece. It should fit snug.
Use the screws from the kit. I tightened them with a screwdriver—don’t overtighten, or it jams. Turn the key and thumb turn—mine moved smoothly! If yours sticks, check alignment. I adjusted mine once, and it worked. You’re doing awesome!
Attaching the Strike Plate
The strike plate goes on the door frame—it’s where the bolt locks. I almost forgot this—don’t skip it!
Close the door and mark where the bolt hits the frame. I used my pencil—easy to see. Use the 1-inch bit to drill a hole about 1 inch deep for the bolt. Test it—my bolt slid in nicely.
Now, trace the strike plate from the kit. Chisel a shallow spot so it sits flush. I tapped gently with my hammer. Screw it in with the kit’s screws—mine felt secure. Close the door and test the lock. Mine clicked shut—success! Yours will too!
A Handy Table for Installation Steps
I made a table to keep things clear. It helped me—hope it helps you!
| Step | Tool/Material Needed | Action | Tip |
|---|---|---|---|
| Check door | Measuring tape | Measure thickness, backset | Standard is 1-3/4 inch |
| Prep door | Template, pencil, tape | Keep the door steady | The bolt should lock smoothly |
| Drill holes | Drill, 2-1/8 & 1-inch bits | Drill face and edge holes | Go slow, wear glasses |
| Chisel latch | Chisel, hammer | Fit the cylinder and thumb turn | Cut shallow, test fit |
| Install deadbolt | Screwdriver, kit parts | Carve a spot for the latch plate | Align tailpiece |
| Attach strike | Drill, chisel, screws | Drill frame, fit strike plate | Bolt should lock smoothly |
This table was my guide. Use it to stay on track!
Testing Your Installation
Time to test! I was thrilled to see if mine worked.
Turn the key from the outside—does the bolt move? I tried mine—smooth and firm. Test the thumb turn inside—mine locked and unlocked easily. Close the door. The bolt should slide into the strike plate and hold tight. Mine did!
If it sticks, check alignment. I loosened screws once to adjust. No wobble or gaps—mine felt solid. Run the test a few times. I locked and unlocked mine five times—perfect! Yours good? You’re almost there!
Safety and Security Tips
Safety and security matter, friend! I learned a few tricks to keep this right.
Wear glasses when drilling—dust flies. I kept my tools away from kids—safety first! Tighten screws snug, not too hard—stripping them weakens the lock. Check the door frame—mine was sturdy, no cracks.
For security, test the lock daily at first. I did, and it gave me confidence. Don’t share keys—Kwikset’s SmartKey lets you rekey if needed. I love that feature! Keep your garage or home safe, like locking your car. You’ve got this!
Maintenance for Longevity
Keeping your deadbolt working is easy. I’ve got tips from my experience.
Lubricate the bolt yearly—use graphite spray, not oil. I sprayed mine, and it moves smoothly. Check screws—mine loosened a bit after a month, so I tightened them. Clean the lock with a damp cloth—dirt can jam it.
If the key sticks, don’t force it. I wiggled mine gently and added lubricant. Test the strike plate—mine stayed firm. A little care keeps it strong for years. I’m still using mine! Yours will last too!
My Tips for Success
I’ve learned a lot, and I’d love to share. Work slowly—rushing messed me up once. Double-check measurements—my template shifted, but I caught it. Use the Kwikset kit—everything fits perfectly.
Test tools first—my drill bit was dull once, so I swapped it. Keep a towel handy—sawdust gets everywhere. Be patient—my first install took an hour, but it was worth it. You’ll feel like a pro! Try it, friend!
Conclusion
Well, friend, we’ve had a great time together! I’ve walked you through how to install a Kwikset deadbolt—from picking tools to testing the lock. I shared my journey, like drilling holes, chiseling the latch, and securing the strike plate. We even looked at a table to keep it simple. I love my Kwikset deadbolt—it’s sturdy, easy, and keeps my home safe, just like locking my car protects my ride. You can do this! Grab your tools, follow my steps, and boost your security. I’m so proud of you—let’s make your door rock-solid and give you peace of mind!
FAQ
Why use a Kwikset deadbolt?
It’s strong, affordable, and easy to install. I love mine—it keeps my home secure!
What tools do I need?
A drill, bits, a screwdriver, a chisel, and a measuring tape. My Kwikset kit had screws and a template too.
Will it fit my door?
Check thickness—1-3/8 to 1-3/4 inches works. Mine was 1-3/4—perfect for Kwikset!
How do I mark the door?
Use the kit’s template. I taped it at 40 inches and marked it with a pencil.
Is drilling hard?
Not at all! I went slow with a 2-1/8-inch bit—smooth and clean. Wear glasses!
What’s the strike plate for?
It goes on the frame—catches the bolt. I chiseled mine flush—locks tight!
How do I test the lock?
Turn the key and thumb turn. I closed the door—the bolt slid in perfectly!
Is it safe to install?
Yes! I wore glasses, kept tools safe. Tighten screws snug, not too hard.
How do I maintain it?
Lubricate with graphite spray yearly. I check screws and clean it—works great!
Can I do this as a beginner?
Absolutely! I started new, went slow, and nailed it. You’ll do awesome!