
Bolded Quick Summary (Top of Article)
To install engineered hardwood flooring on concrete, you must first ensure the slab is clean, dry, and level. The best method involves using a moisture barrier and an approved adhesive or a floating installation over an underlayment, following the manufacturer’s specific guidelines for a strong, lasting floor.
Laying down beautiful new wood floors over a concrete slab can feel like a huge project. Many homeowners worry about moisture seeping up from the concrete and ruining their new investment. It sounds complicated, right? Not at all! With the right preparation and simple steps, you can confidently install engineered hardwood flooring right over that concrete basement or ground floor. We will walk through every stage, making sure your floor looks great and lasts for years. Let’s get started turning that gray slab into a warm, welcoming floor!
How To Instal Engineered Hardwood Flooring On Concrete: Proven Essential Steps
Welcome to your DIY flooring adventure! I’m Md Meraj, and I believe every homeowner can tackle big projects with the right guidance. Installing engineered hardwood over concrete is totally achievable. Engineered wood is tougher than solid wood when dealing with slight moisture changes, making it a perfect partner for concrete slabs. However, concrete always needs respect—especially when it comes to moisture.
This guide breaks down the process into easy, manageable chunks. We will cover checking your concrete, choosing the right installation method, and finally, locking those planks into place safely.
Understanding Engineered Hardwood vs. Concrete
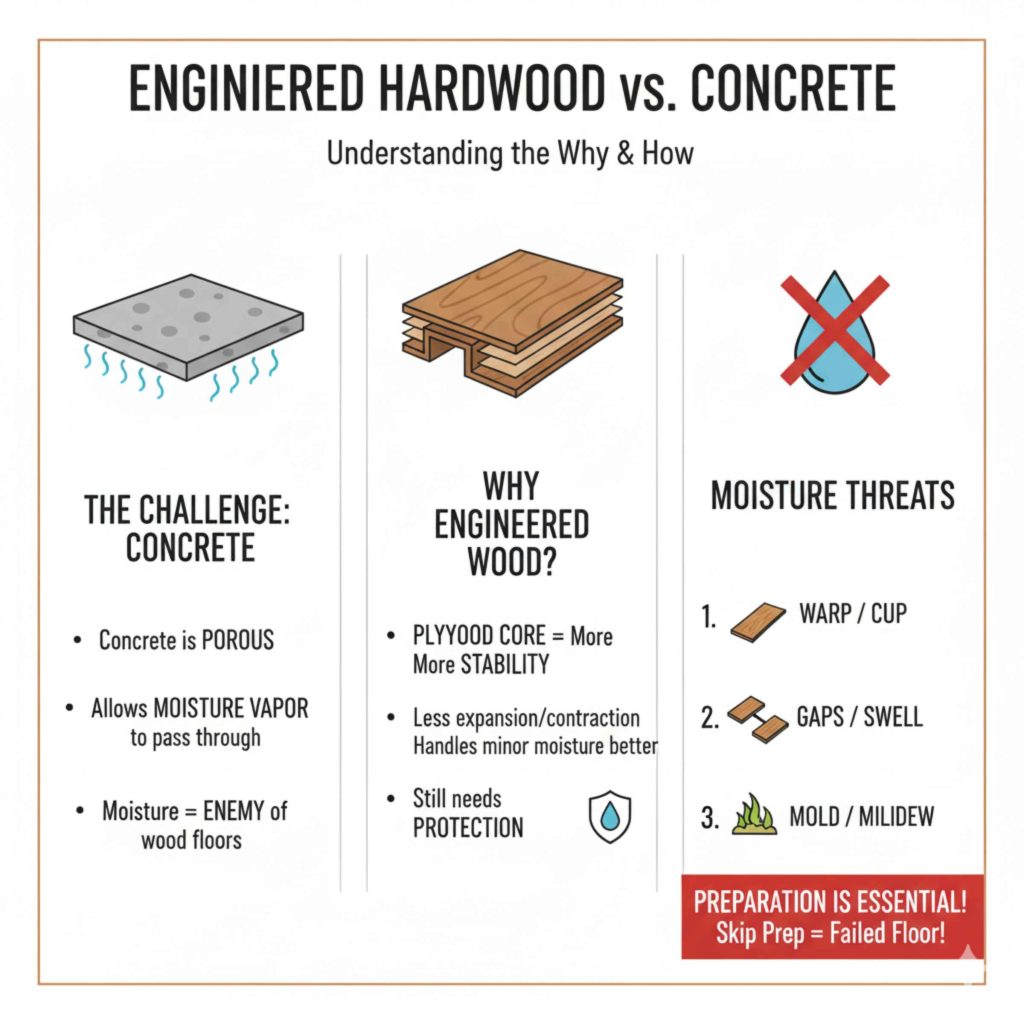
Before we pick up a trowel, let’s quickly understand why this combination needs special care. Concrete is porous, meaning it can allow moisture vapor to pass through, even if it feels dry to the touch. This moisture vapor is the number one enemy of wood flooring.
Why Engineered Wood Works Best Here
Solid hardwood expands and contracts significantly with moisture changes. Engineered hardwood has a core made of plywood layers, making it much more stable. This stability helps it handle minor moisture fluctuations better than solid wood, but it still needs protection.
The Moisture Threat
If moisture gets trapped between the concrete and the wood, it can cause your new floor to:
- Warp or Cup: The edges of the planks curl up.
- Gaps or Swell: Spaces appear between planks, or the wood swells unevenly.
- Mold or Mildew: In severe, trapped cases, organic growth can occur.
That’s why preparation isn’t just important; it’s essential. Skipping the prep work is the quickest way to a failed floor!
Phase 1: Essential Concrete Preparation
This is the most critical phase. Think of this as building a solid foundation for a house—if the base isn’t perfect, nothing built on top will stand straight or last long.
Step 1: Acclimation
Your flooring needs to get used to the temperature and humidity of the room where it will be installed. This prevents major shrinking or swelling right after installation.
- Bring the unopened boxes into the installation room.
- Keep them flat, away from direct sunlight or vents.
- Allow them to sit for at least 48 to 72 hours (check your manufacturer’s guide for the exact time).
Step 2: Clean the Slab
The concrete must be completely free of dust, oil, paint, sealers, or old adhesives. Anything left behind will stop your moisture barrier or glue from sticking properly.
- Sweep thoroughly.
- Use a shop vacuum to remove all fine dust.
- If there are old adhesives, you might need a floor scraper or a grinding machine (rentable from most home centers).
Step 3: Moisture Testing – Non-Negotiable
You absolutely must test for moisture vapor emission rate (MVER) or relative humidity (RH) inside the slab. Surface dampness is not enough; you need to know what’s happening deep inside the concrete.
There are a few common tests:
| Test Type | What It Measures | Beginner Friendliness |
|---|---|---|
| Calcium Chloride Test | Measures the actual amount of moisture vapor passing through the surface. | Moderate (Requires specific testing kits). |
| Relative Humidity (RH) Test | Measures the moisture level inside the concrete slab using probes. | High (Often considered the most accurate for wood flooring). |
| Plastic Sheet Test (Quick Check) | Tape a 2×2 foot square of clear plastic sheeting tightly to the floor for 72 hours. If condensation forms underneath, you have a moisture problem needing mitigation. | Very High (Good initial check, but not official enough for warranties). |
Important Note: Most engineered wood manufacturers require RH readings below 75% or MVER below 5 lbs/1000 sq. ft. over 24 hours. Always check your specific product documentation, as stricter requirements are common for warranties. For more technical guidance on moisture testing, resources like the International Association of Certified Home Inspectors (InterNACHI) offer detailed procedures.
Step 4: Leveling the Concrete
Concrete slabs are rarely perfectly flat. Even a small hump or dip can cause your new planks to rock, squeak, or separate. Most manufacturers require the floor to be flat within 3/16 inch over a 10-foot span.
If your floor is uneven:
- High Spots: Use a floor grinder to carefully shave down high areas.
- Low Spots (Dips): Use a self-leveling underlayment (SLU). This is a cement-based product mixed with water that flows out to create a perfectly flat surface. Follow the SLU instructions precisely—it sets fast!
Phase 2: Choosing Your Installation Method
When installing engineered hardwood over concrete, you generally have three reliable methods. Your choice depends on your subfloor condition, the type of engineered wood you bought, and your budget.
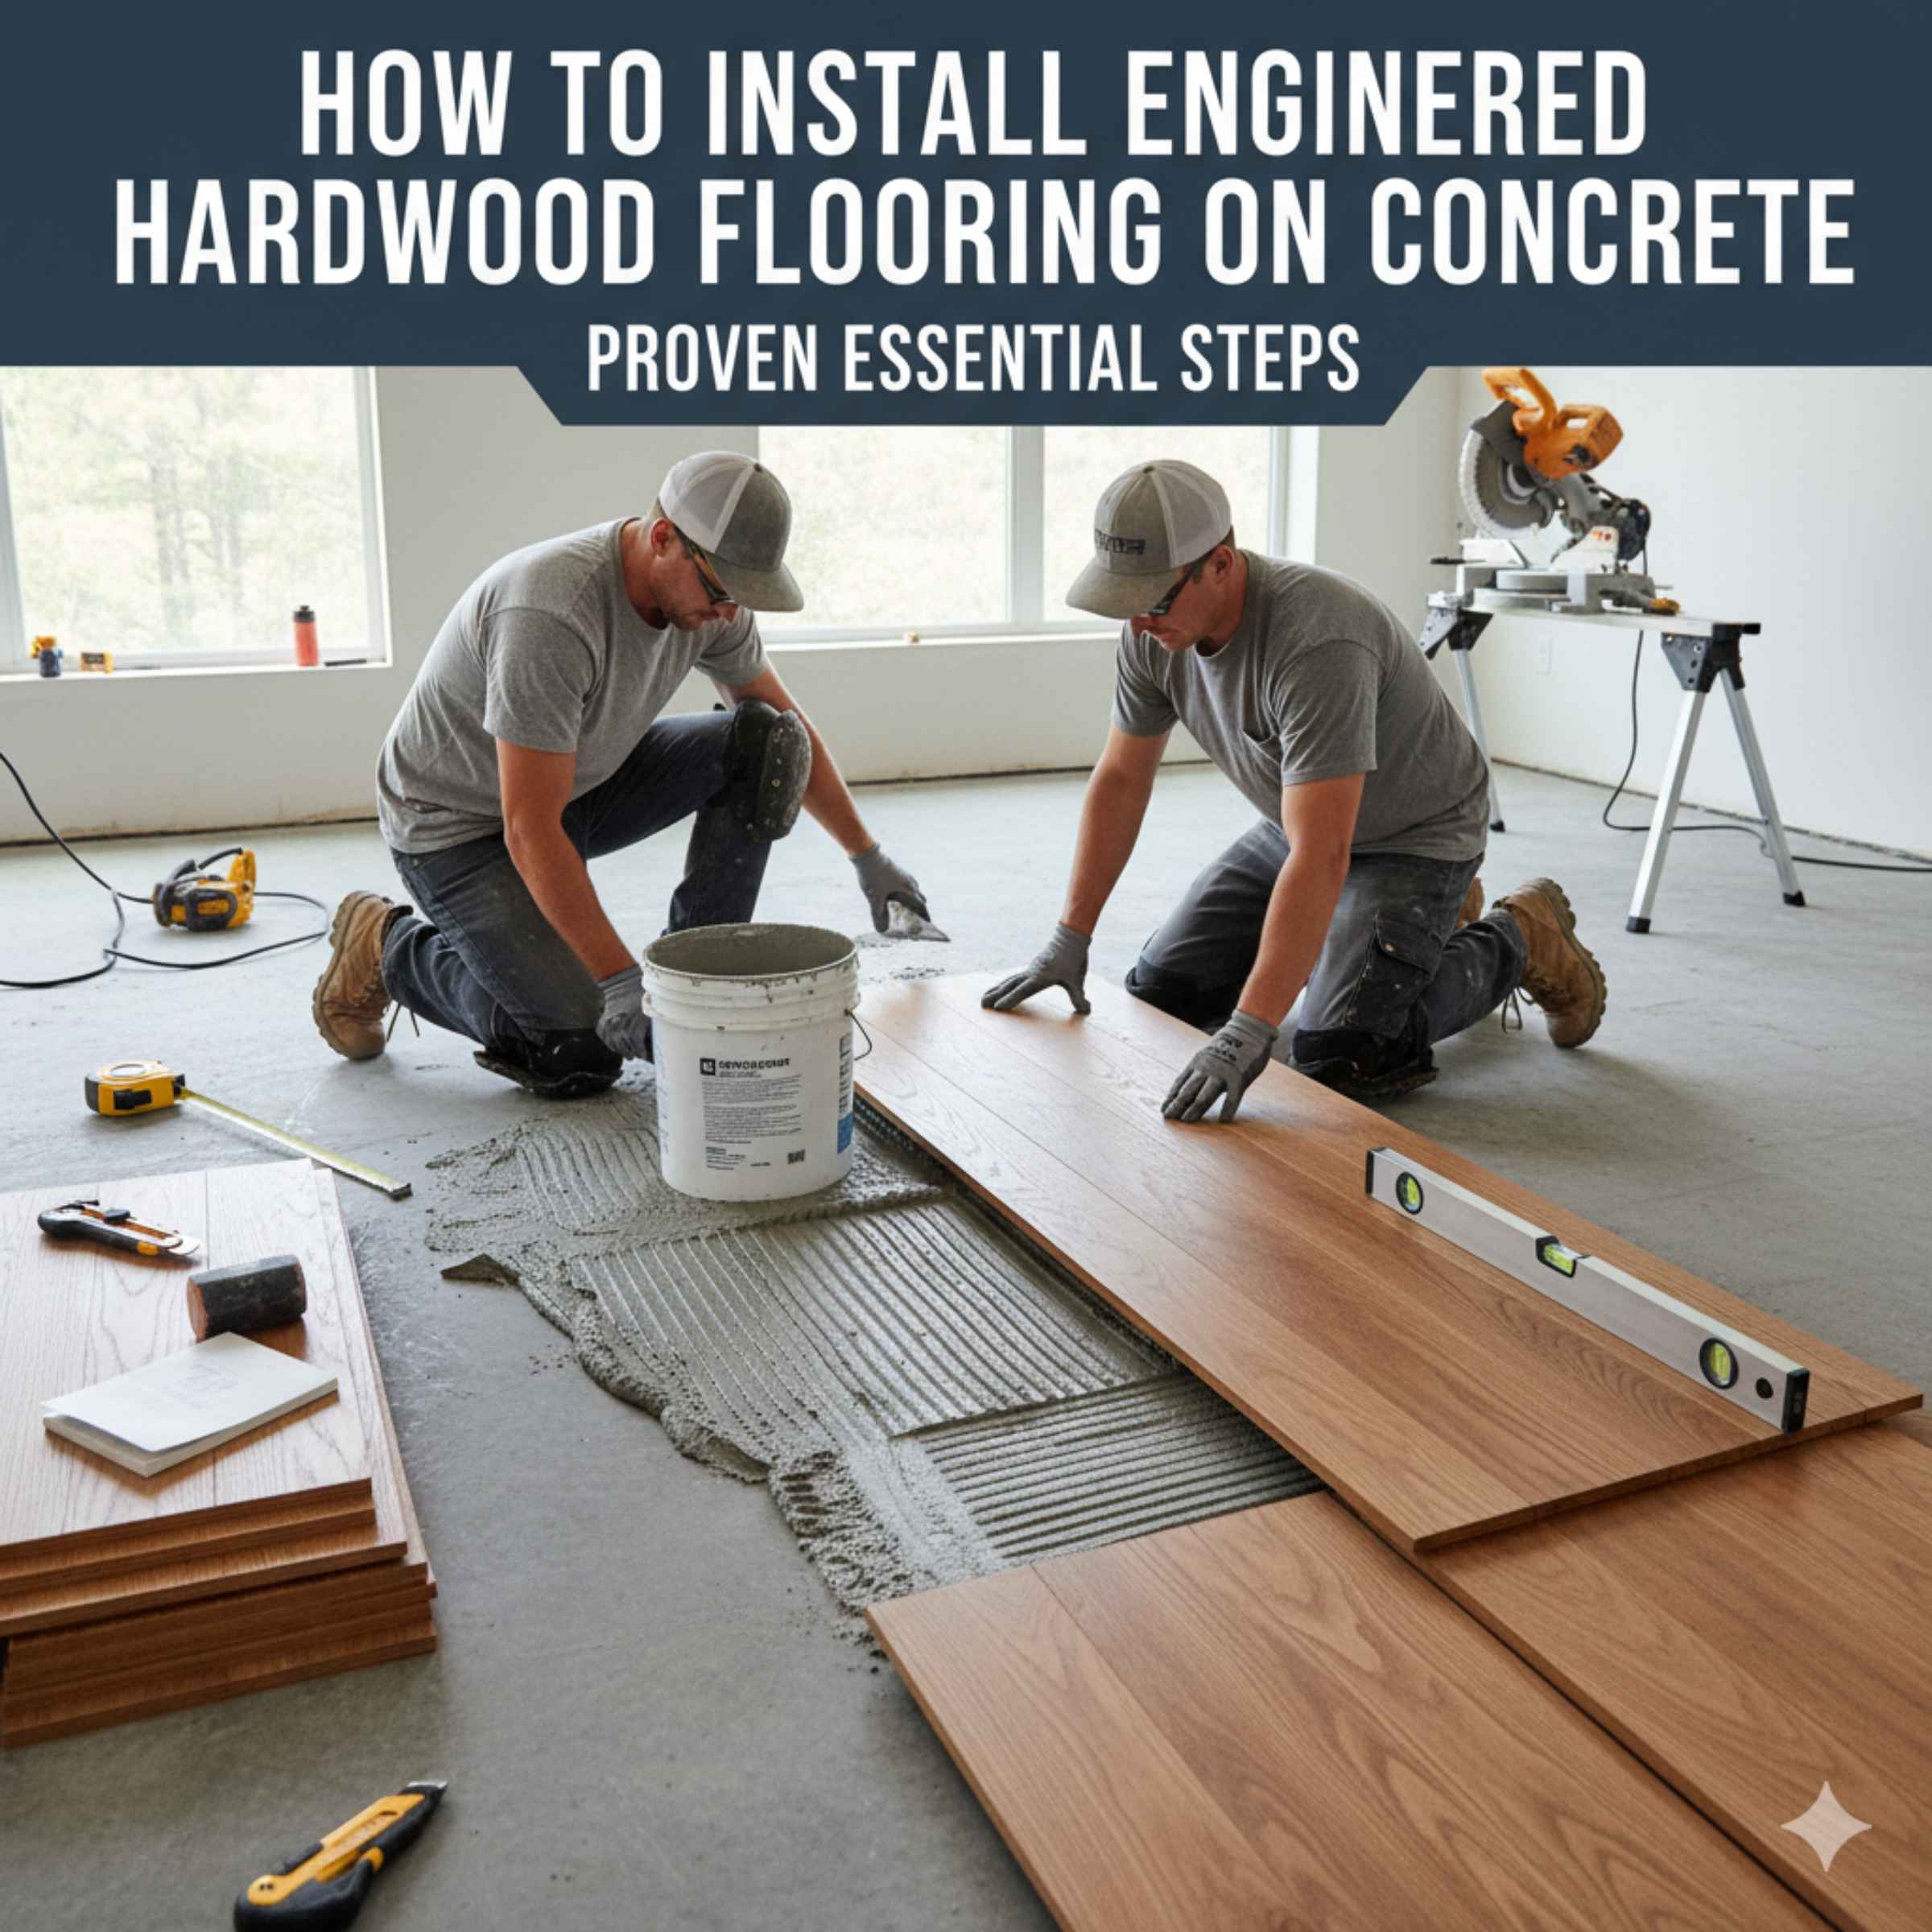
Method 1: Glue-Down Installation (The Direct Bond)
This method glues the wood directly to the concrete. It offers the most solid, quietest floor, as there is no air gap beneath the planks. This is often required if your wood floor is thin or if the manufacturer specifies it.
Pros and Cons of Glue-Down
| Pros | Cons |
|---|---|
| Very stable and quiet underfoot. | Requires high-quality, expensive adhesive. |
| No need for a separate sound-dampening underlayment. | Difficult to remove if replacement is needed later. |
| Excellent for minimizing height gain. | Requires perfect concrete flatness and moisture control. |
The Glue-Down Process Essentials
- Moisture Barrier: Even with glue, you need a vapor retarder. Many modern urethane adhesives are “all-in-one,” acting as both the glue and the vapor barrier. If your adhesive isn’t a vapor barrier, you must first roll on a liquid-applied moisture mitigation system or lay down a sheet vapor barrier.
- Adhesive Application: Use the correct trowel size specified by the adhesive manufacturer. The trowel size determines the “open time” and the amount of glue spread—too little glue means a weak bond.
- Laying Planks: Lay planks into the wet adhesive, ensuring the tongue and groove lock correctly. Immediately wipe off any glue that gets on the surface of the planks using the cleaner recommended by the adhesive maker.
Method 2: Floating Installation (The Most Common DIY Choice)
In a floating installation, the planks are clicked or glued together edge-to-edge, but they are not physically attached to the concrete. The entire floor rests on a specialized underlayment, allowing it to move slightly as one large unit.
Pros and Cons of Floating
| Pros | Cons |
|---|---|
| Easiest for DIYers; faster installation. | Can sound slightly hollow or “clicky” without good underlayment. |
| Allows wood to move naturally over minor slab imperfections. | Requires an expansion gap around the entire perimeter. |
| Easier to remove if you ever want to change flooring. | Height gain is added by the underlayment thickness. |
The Floating Process Essentials
- Underlayment Selection: This is your key component. You need an underlayment that specifically offers a moisture barrier AND sound dampening. Foam underlayments alone are often not enough for concrete; look for products that combine foam with a polyethylene vapor barrier layer.
- Laying Underlayment: Roll out the underlayment, overlapping seams according to instructions, and taping the seams with the recommended tape.
- Laying Planks: Start in a corner, leaving the required expansion gap (usually 1/4 to 1/2 inch) between the wood and all vertical surfaces (walls, cabinets, pipes).
Method 3: Stapling/Nailing (Generally Not Recommended for Concrete)
This method is standard for wood flooring over plywood subfloors. However, you cannot nail engineered wood directly into concrete.
If you want the solid feel of a nailed floor, you must first build a raised wood subfloor (a “sleepers” system) over the concrete. This requires significant height, careful moisture proofing beneath the sleepers, and is much more complex. For beginners working over existing concrete, stick to Glue-Down or Floating methods.
Phase 3: The Installation Day Walkthrough (Floating Method Focus)
Since the floating method is often the most accessible for DIYers, let’s focus on those steps. Remember: always defer to your specific flooring manufacturer’s manual!
Tools You Will Need
Gathering everything beforehand saves time and frustration. Think of this as setting up your personal workstation.
- Moisture testing equipment (as determined in Phase 1).
- Shop vacuum and broom.
- Self-leveling compound (if needed).
- Moisture barrier/underlayment.
- Engineered hardwood planks.
- Miter saw or table saw (for cutting planks).
- Jigsaw (for tricky cuts around door jambs).
- Rubber mallet and tapping block (to gently tap planks into place).
- Pull bar (for tightening the last row).
- Spacers or wedges (to maintain the required expansion gap).
- Tape measure and straight edge/chalk line.
Step-by-Step Installation
Step 1: Final Layout Planning
Determine the direction of your planks. They usually run parallel to the longest wall or perpendicular to the main light source (windows) to hide seams better. Dry-lay a few rows to confirm the look and calculate your final plank width against the far wall. You want the last row to be at least 2 inches wide.
Step 2: Laying the Vapor Barrier/Underlayment
Begin rolling out your underlayment in one corner. If you are using a two-part system (separate plastic sheet and foam pad), lay the plastic sheet first, taping all seams thoroughly. Then, lay the foam pad on top. Keep the underlayment away from the walls—you will trim it later.
Step 3: Starting the First Row
Place your expansion spacers against the wall where you start. Place the first plank with the tongue side facing the wall (this side will be cut off or faces away from the main sightline, depending on your manufacturer’s instructions).
When clicking the second plank into the first, use the tapping block and rubber mallet gently on the short end to ensure a tight, flush fit. Do not hit the edge of the plank directly!
Step 4: Cutting End Pieces and Staggering
When you reach the end of the first row, measure the remaining gap. Remember to subtract the expansion gap required at the wall! Cut the plank to fit. Keep the off-cut piece if it’s longer than 6 inches—this piece will start your second row, ensuring the end joints are staggered randomly for a natural look.
Staggering Tip: End joints should ideally be at least twice the thickness of the plank away from the end joint in the adjacent row.
Step 5: Installing Subsequent Rows
When starting the second row, you must ensure the end joints are staggered correctly. Attach the long side of the second row plank to the first row, then proceed to tap the short ends together. Continue this process row by row.
For rows where the locking mechanism is on the long edge, you may need to slightly lift the entire row and slide the tongue into the groove of the row below it before pressing it down. Always check your manufacturer’s specific click-lock technique.
Step 6: Trimming the Underlayment
As you complete every few rows, use a utility knife to trim the excess underlayment right up against the edge of the flooring. This keeps the floor from buckling against the wall.
Step 7: The Final Row
The last row is often the trickiest because you can’t easily tap the planks into place. You will need a pull bar. Place the hook of the pull bar over the tongue edge of the final plank, hook it against the wall (or baseboard if you left room for trim), and gently tap the other end of the pull bar with your hammer to pull the plank tightly against the previous row.
Crucial Safety and Installation Checkpoints
Safety first! When cutting wood, wear safety glasses. When using power tools, ensure cords are clear. Beyond physical safety, these points ensure floor longevity:
- Do not nail or glue the floating floor to the concrete. It must “float.”
- Maintain the expansion gap around the entire perimeter. This gap will later be covered by baseboards or shoe molding.
- Cleanliness is key. If debris gets trapped between planks during locking, it can cause a high spot or a gap.
Alternative: Installing Over Plywood (If You Must Build Up)
If your concrete is too damaged, too damp even after mitigation, or if you prefer the solid feel of a nailed floor, you will need to build a plywood subfloor first. This is a much larger undertaking.
Steps for Plywood Subfloor Over Concrete
- Moisture Mitigation: Apply a heavy-duty liquid epoxy moisture barrier directly to the clean concrete. This is crucial and must cure fully.
- Install Sleepers (Optional but Recommended): Lay down pressure-treated wood strips (sleepers) over the epoxy barrier, often spaced 12 to 16 inches apart. These are usually held down with construction adhesive or anchors.
- Install Plywood: Screw 3/4-inch tongue-and-groove plywood sheets directly onto these sleepers, staggering the seams. This creates a solid, raised subfloor.
- Install Flooring: You can now install your engineered hardwood using the manufacturer’s recommended nailing schedule over this new plywood subfloor.
While this adds significant height and cost, it results in a floor that feels almost identical to a traditional wood floor installation.
Finishing Touches and Curing
Once the last plank is clicked or glued down, you are almost done!
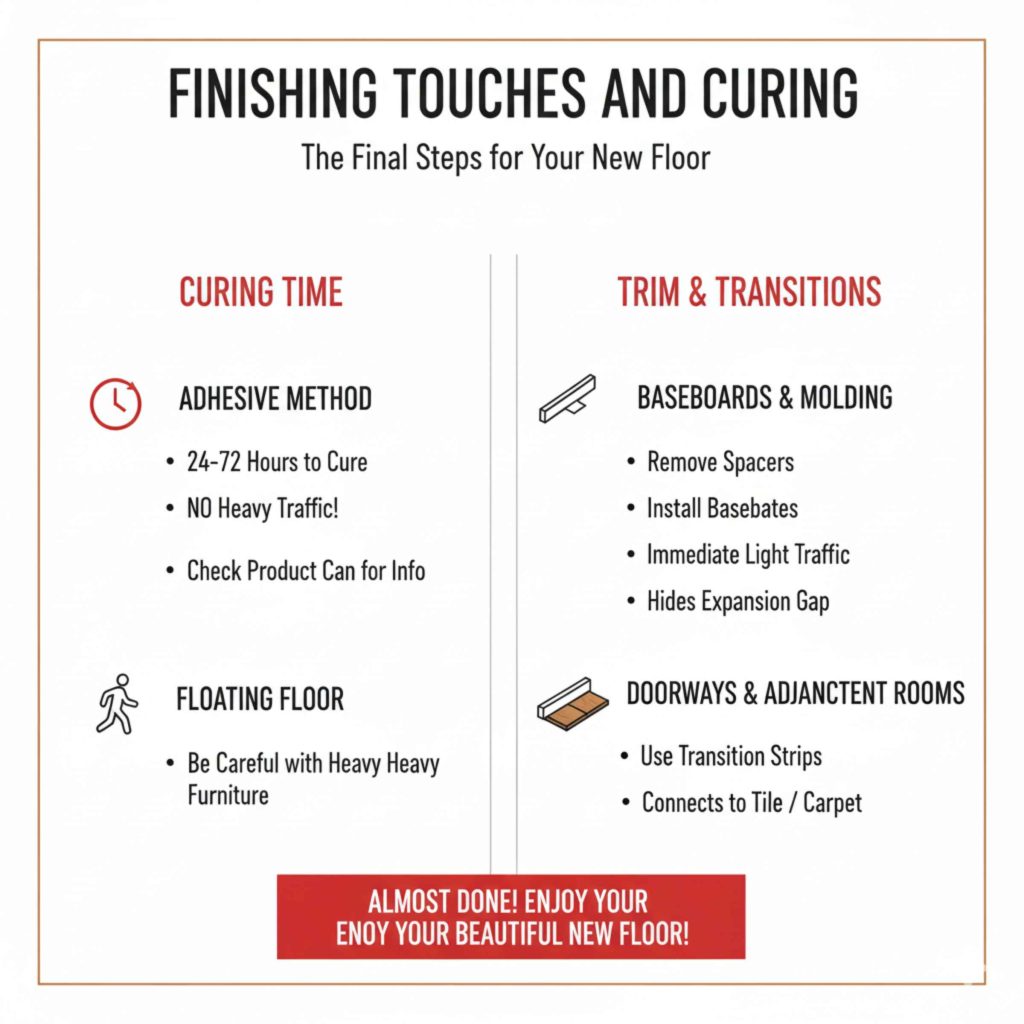
Curing Time
If you used an adhesive, you must let it cure completely before heavy traffic. This can take anywhere from 24 to 72 hours, depending on the humidity and the product. Check the adhesive can!
If you floated the floor, you can walk on it immediately, but be careful not to drag heavy furniture across it until baseboards are installed.
Installing Trim and Transitions
Once cured, remove all your temporary spacers. Now you install the baseboards and quarter-round molding. This trim hides the necessary expansion gap around the perimeter of the room. For doorways, use appropriate transition strips (T-molding or reducers) to connect the new wood floor to any adjacent flooring types (like tile or carpet).
FAQ: Beginner Questions About Concrete and Wood Floors
Q1: Can I install engineered hardwood directly onto a concrete slab that has radiant heating tubes underneath?
A: Yes, many engineered floors are rated for radiant heat, but you must use a glue-down installation method specifically approved for in-floor heating systems. The heat transfer must be direct, and you must follow strict temperature limits (usually not exceeding 80°F surface temperature).
Q2: What happens if I skip the moisture test and my concrete is damp?
A: If you skip the test and the concrete is damp, you risk voiding your flooring warranty immediately. At best, the floor might look fine for a few years, but eventually, trapped moisture will cause the wood to cup, warp, or even develop mildew underneath.
Q3: Can I use a simple plastic painter’s tarp as a moisture barrier for a floating floor?
A: No. Painter’s plastic is too thin and breaks down quickly. You need a specialized polyethylene vapor barrier, usually 6-mil thickness or higher, or an underlayment that has this barrier integrated. Simple plastic sheeting will not meet warranty requirements or provide long-term protection.
Q4: Do I need to remove old ceramic tile before installing engineered wood over concrete?
A: If the tile is firmly adhered and the surface is very flat (within 1/8 inch over 10 feet), some manufacturers allow installing engineered wood over tile using a glue-down method. However, if the tile is loose or uneven, you must remove it and address the slab underneath first.
Q5: How wide should the expansion gap be around the room?
A: This varies by plank width and room size, but generally, for most standard engineered floors, aim for a gap between 1/4 inch and 1/2 inch. Always check your manufacturer’s guidelines, as very wide plank floors require larger gaps.
Q6: Is the glue-down method quieter than the floating method?
A: Generally, yes. Glue-down creates a solid mass bonded to the concrete, which absorbs impact sound better. Floating floors rely entirely on the quality of the underlayment to minimize that hollow sound often associated with floating installations.
Conclusion: Confidence in Your Concrete Floor
Installing engineered hardwood flooring over concrete is a rewarding project that adds tremendous value and beauty to your home. The secret to success isn’t in the hammering or the gluing; it’s entirely in the preparation. By taking the time to clean, test for moisture, and level your concrete slab, you are setting up your beautiful new floor for decades of stability.
Whether you choose the rock-solid glue-down method or the accessible floating installation, remember to read your specific product’s manual—it is your ultimate guide! With careful attention to moisture control and expansion gaps, you’ve got the proven essentials needed to transform that cold concrete into warm, durable hardwood. You can absolutely do this!