
Hey there! I’m thrilled to sit down with you and talk about something I’ve tackled in my backyard: how to frame a shed door. You might be wondering why an automotive blog is diving into shed construction, but trust me, I’ve found some cool connections between building a sturdy shed door and the precision we love in car repairs. As someone who’s framed a shed door for my workshop—where I store my car tools and parts—I’ve learned the ins and outs through trial and error.
I’m excited to share my experience with you, so grab a coffee, get comfy, and let’s walk through this project together. It’s all about planning, measuring, and building something solid, just like tuning up a car. Ready? Let’s get started!
Why Framing a Shed Door Matters
Let me start by saying that a well-framed shed door is the key to a functional shed. I built my shed to store my automotive tools, spare tires, and even some car cleaning supplies. A poorly framed door can sag, stick, or let in rain, which is the last thing I want for my gear. Framing a door right ensures it opens smoothly, stays secure, and lasts for years. It’s like aligning a car’s wheels—do it properly, and everything runs smoothly. Whether you’re building a new shed or fixing an old door, getting the frame right is crucial. Let’s dive into how I did it.
Tools and Materials You’ll Need
Before I started, I gathered everything I needed. I’m a big believer in being prepared, whether I’m working on a car or a shed. For framing a shed door, you’ll need some basic tools and materials. I used a tape measure, level, square, and pencil for precise measurements. A circular saw or handsaw is great for cutting wood. You’ll also need a drill, screws, and a hammer. I like 3-inch deck screws for strength.
For materials, I used 2×4 lumber for the frame, pressure-treated to resist rot. You’ll also need plywood or boards for the door itself, hinges, a latch, and weatherstripping. I spent about $50 on lumber and $20 on hardware at my local home store. It’s like buying parts for a car repair—you want quality but don’t need to overspend. Having everything ready saves time and frustration.
Planning Your Shed Door
Planning is where it all starts. When I built my shed door, I learned that measuring twice is as important here as it is in car repairs. First, I measured the rough opening in my shed wall. Mine was 36 inches wide by 80 inches tall—a standard size. I wanted a door that fit snugly, so I planned for a door about 1/2 inch smaller on all sides to allow for smooth operation.
I sketched my design on paper, noting the frame dimensions and where the hinges would go. I also decided if I wanted the door to swing in or out. I chose out-swing to save space inside my shed, like how I pick car parts for efficiency. Think about your shed’s purpose—mine’s for tools, so I needed a wide, sturdy door. Planning takes time, but it’s like mapping out a road trip: it keeps you on track.
Building the Door Frame
Now, let’s get to the fun part: building the frame. I started with 2x4s for the door’s outer frame. I cut two vertical pieces (the stiles) to 79 inches for my 80-inch opening, leaving room for a small gap. Then, I cut two horizontal pieces (the rails) to 35 inches for the width. I laid them out on a flat surface, like my garage floor, to make sure everything was square.
I used a carpenter’s square to check the corners—90 degrees is key. It’s like aligning a car’s suspension; precision matters. I screwed the pieces together with 3-inch deck screws, pre-drilling to avoid splitting the wood. I added a diagonal brace—a 2×4 cut at an angle—to keep the frame rigid. This brace is like a sway bar in a car—it prevents wobbling. My frame felt solid, and I was pumped to move on.
Adding the Door Panel
Once the frame was done, I added the door panel. I used 1/2-inch plywood because it’s strong and affordable. I cut it to match the frame’s dimensions: 35 inches by 79 inches. I laid the plywood over the frame and secured it with screws every 8 inches along the edges. I made sure the plywood was flush with the frame, checking with my level.
You can also use tongue-and-groove boards for a classic look, but plywood was easier for me. It’s like choosing a simple car part over a fancy one—it gets the job done. I sanded the edges to smooth them out, which took about 10 minutes. This step makes the door look clean and professional, like a freshly waxed car.
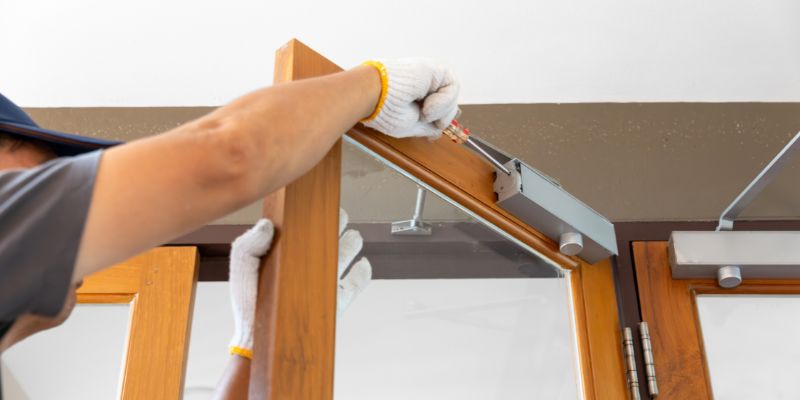
Installing Hinges and Hardware
Next up was attaching the hinges. I used three heavy-duty hinges for strength—think of them like the bolts holding a car’s bumper. I placed them at 6 inches from the top, 6 inches from the bottom, and one in the middle. I marked the spots with a pencil, then screwed the hinges to the door frame first. It’s easier to attach them to the door before hanging it.
For the latch, I chose a simple slide bolt for security. I installed it about 40 inches from the bottom, where it’s easy to reach. I also added a handle for convenience. It’s like adding a new knob to a car’s gear shift—small details make a big difference. I tested the hinges by swinging the door gently; it felt sturdy, like a well-balanced car door.
Hanging the Door
Hanging the door was the trickiest part, but I got it done. I had a buddy help me lift the door into the shed’s rough opening. We propped it up with shims—small wedges of wood—to keep it level. I checked my level to make sure it was plumb, adjusting shims as needed. It’s like aligning a car’s wheels; everything needs to be just right.
Once it was level, I screwed the hinges into the shed’s frame. I used 3-inch screws for a strong hold. Then, I tested the door’s swing. It opened and closed smoothly, with a 1/8-inch gap all around. That gap is key—it prevents sticking, like leaving space for thermal expansion in car parts. I was thrilled when it worked perfectly!
Adding Weatherproofing
Since my shed stores expensive tools, I wanted to keep out rain and dust. I added weatherstripping around the door’s edges—self-adhesive foam strips worked great. I also installed a door sweep at the bottom to block gaps. It’s like sealing a car’s windows to keep out leaks.
I used silicone caulk around the frame’s exterior to seal any cracks. This took about 20 minutes but made a big difference. My shed stays dry, even during heavy rain, just like a well-sealed car keeps water out. If you’re in a wet climate, don’t skip this step—it’s a lifesaver.
Painting or Staining the Door
I wanted my door to look good and last, so I painted it. I chose exterior-grade paint to protect against the weather. First, I sanded the plywood lightly, then applied a primer. After it dried, I added two coats of paint in a dark green color to match my shed. It took a day, but it looked amazing.
You can also stain the door if you prefer a natural look. I tried staining a test piece, but painting was easier for me. It’s like waxing a car—it protects and adds style. Make sure to use exterior-grade products, as they hold up better, just like car wax designed for harsh weather.
The Automotive Connection: Precision and Durability
You might be wondering how this ties to cars. Well, I’ve noticed some awesome parallels. Framing a shed door is all about precision—measuring, cutting, and aligning perfectly. It’s like installing a new car part, where every bolt needs to be tight and aligned. A wobbly door is like a loose suspension component—it’ll cause problems down the road.
Durability is another link. I built my door to last, just like I choose quality parts for my car. The weatherproofing and sturdy hinges are like using rust-resistant bolts or high-grade oil. Both projects need care and attention to detail to perform well over time. Plus, my shed door protects my automotive tools, so it’s part of keeping my car projects running smoothly!
Common Mistakes to Avoid
I made a few mistakes when I started, so let me save you some trouble. First, don’t skip measuring the rough opening. I cut my stitches too long once and had to redo them—such a pain! Always double-check with a square to ensure 90-degree corners. A crooked frame will make the door stick.
Don’t skimp on hinges or screws. I tried cheap hinges once, and they bent after a month. Use heavy-duty hardware for a door that lasts. Also, don’t forget weatherproofing—my first door let in water until I added a sweep. It’s like neglecting your car’s undercoating; you’ll regret it later.
Maintenance Tips for Your Shed Door
Once your door’s up, keep it in good shape. I check mine every few months for loose screws or hinges. Tighten them as needed, like checking bolts on a car. Inspect the weatherstripping yearly—it can wear out, letting in drafts. I replaced mine for about $10.
Repaint or restain every 3 to 5 years to protect the wood. I also clean the door with soapy water to remove dirt, like washing my car, to prevent rust. If the door sticks, check for swelling or misalignment and adjust the hinges. A little maintenance goes a long way, just like with a vehicle.

Cost Breakdown
Here’s a table I put together based on my project costs. It’s a rough guide, but it helped me budget:
| Item | Cost Range | Notes |
|---|---|---|
| 2×4 Lumber | $20–$40 | Pressure-treated for durability. |
| Plywood (1/2-inch) | $15–$30 | For the door panel. |
| Hinges (3 heavy-duty) | $10–$20 | Get strong ones for longevity. |
| Latch and Handle | $10–$15 | Simple slide bolt works well. |
| Weatherstripping | $5–$15 | Foam strips and door sweep. |
| Paint or Stain | $10–$20 | Exterior-grade for weatherproofing. |
| Screws and Shims | $5–$10 | Deck screws for strength. |
My total was about $90, but costs vary by region. It’s like budgeting for a car repair—shop around for deals.
DIY vs. Hiring a Pro
I love DIY projects, so I framed my shed door myself. It took a weekend and saved me money. A pro might charge $200 to $500, depending on the job. I called a local contractor, and their quote was $300 for a basic door. If you’re handy and have tools, DIY is doable. Watch tutorials and take your time.
But if carpentry isn’t your thing, hire someone. A pro ensures the door is level and sealed, like taking your car to a mechanic for complex repairs. I’d rather spend a bit than deal with a leaky, wobbly door. Get multiple quotes to find a fair price.
Safety Tips
Safety’s big for me, whether I’m in the garage or building a door. Wear gloves and safety glasses when cutting wood—sawdust can be nasty. Use a stable ladder if you’re working on a tall ladder. I almost dropped my drill once, so I learned to keep tools secure.
Double-check measurements to avoid accidents, like a door falling because it’s not hung correctly. It’s like torquing a car’s lug nuts—do it right to stay safe. If you’re unsure, ask a friend to help, especially when lifting the door.
Conclusion
Wow, we’ve covered a ton, haven’t we? I’ve loved sharing my experience on how to frame a shed door with you. From measuring and cutting to hanging and weatherproofing, I’ve learned that precision and care make all the difference. My shed door’s been solid for years, protecting my car tools and giving me peace of mind. The connection to cars is clear—whether it’s a door frame or an engine, it’s about building something that lasts.
I hope this inspires you to tackle your shed door project or at least feel confident hiring a pro. Thanks for joining me on this journey—let’s keep building and driving with pride, from the shed to the open road!
FAQs
What tools do I need to frame a shed door?
I used a tape measure, level, square, saw, drill, and screws. A hammer and a pencil help too. It’s like having the right tools for a car repair.
How much does it cost to frame a shed door?
My project cost about $90 for lumber, plywood, and hardware. Prices vary, but expect $70 to $150 for DIY, or $200 to $500 for a pro.
Can I frame a shed door myself?
Yes, I did it! It takes a weekend if you’re handy. Watch tutorials and measure carefully, like aligning a car part.
What size should my shed door be?
I made mine 1/2 inch smaller than the rough opening—mine was 36 by 80 inches. Leave a small gap for smooth swinging.
How do I make my shed door weatherproof?
I added foam weatherstripping and a door sweep. Caulk the frame, too. It’s like sealing a car to keep out rain.
What kind of wood should I use?
I used pressure-treated 2x4s and 1/2-inch plywood. They resist rot, like choosing rust-proof parts for a car.
How do I know if my door is level?
I used a level to check the frame and door. Adjust with shims if needed, like balancing a car’s suspension.