
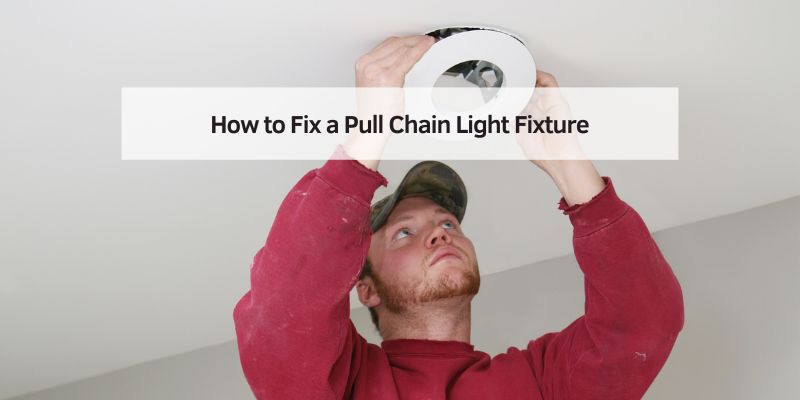
Hey there! If you’ve ever yanked on a pull chain light fixture and found it stuck, broken, or just not working, you’re not alone. I’ve been there, standing in a dimly lit room, wondering why my trusty ceiling fan or closet light decided to give up on me. Fixing a pull chain light fixture might sound daunting, but trust me, it’s something you can tackle with a little patience and the right know-how. In this guide, I’m going to walk you through everything I’ve learned from my own adventures in fixing pull chain light fixtures.
Whether it’s a ceiling fan, a wall sconce, or a simple overhead light, I’ll share step-by-step tips to get that chain pulling smoothly again. Let’s dive in and bring some light back into your space!
Understanding Pull Chain Light Fixtures
Before we get our hands dirty, let’s talk about what a pull chain light fixture actually is. These fixtures are super common in homes across the USA, especially in older houses or spaces like basements, attics, and closets. They’re the kind of lights or fans you turn on and off by tugging a chain or cord. Simple, right? But when that chain gets stuck or the light stops responding, it can feel like a mystery.
Pull chain fixtures work with a switch mechanism inside the fixture. When you pull the chain, it toggles the switch to either complete or break the electrical circuit, turning the light or fan on or off. Over time, the switch can wear out, the chain can break, or other issues like loose wiring can creep in. Knowing how it works helps you figure out what’s gone wrong. In my experience, most problems come down to a faulty switch, a broken chain, or an electrical issue. Let’s break down the common problems and how to fix them.
Common Issues with Pull Chain Light Fixtures
When I first started troubleshooting my own pull chain fixtures, I noticed a few recurring problems. Here’s what you’re likely dealing with if your fixture isn’t working:
- Chain Won’t Pull or is Stuck: The chain feels jammed or doesn’t move at all. This usually means the switch inside is gummed up or broken.
- Light Doesn’t Turn On: You pull the chain, but nothing happens. This could be a dead bulb, a faulty switch, or a wiring issue.
- Light Stays On: The light won’t turn off, even when you pull the chain. This often points to a switch that’s stuck in the “on” position.
- Chain Breaks Off: The chain snaps, leaving you with no way to operate the fixture. This is common with older fixtures or if the chain gets yanked too hard.
- Flickering or Intermittent Light: The light flickers or only works sometimes, which can signal loose wiring or a failing switch.
Each of these issues has a fix, and I’ve tackled them all at one point or another. Let’s go through the tools you’ll need and then dive into the step-by-step repair process.
Tools and Materials You’ll Need
Fixing a pull chain light fixture doesn’t require a ton of fancy tools, which is great news. Here’s what I keep in my toolbox for this job:
| Tool/Material | Purpose |
|---|---|
| Screwdriver (Phillips/Flathead) | To open the fixture and access the switch or wiring. |
| Replacement Pull Chain Switch | To replace a faulty switch (make sure it matches your fixture’s specs). |
| Replacement Pull Chain | For broken or missing chains. |
| Wire Strippers | To trim and prepare wires if needed. |
| Electrical Tape | To secure wire connections safely. |
| Voltage Tester | To check if power is off before working. |
| Light Bulb (if needed) | To replace a burnt-out bulb. |
| Needle-Nose Pliers | For precise work with wires or small parts. |
| Step Ladder | To safely reach ceiling or high fixtures. |
I always double-check that I have these on hand before starting. You can find replacement switches and chains آنلاین at hardware stores like Home Depot or Lowe’s, or even on Amazon. Make sure the switch you buy matches your fixture’s voltage and amperage—most home fixtures are 120V, but it’s worth checking.
Safety First: Preparing to Work on Your Fixture
I can’t stress this enough: safety is number one when working with electricity. I’ve made the mistake of rushing in without turning off the power, and let me tell you, it’s not worth the risk. Here’s how I prepare:
- Turn Off the Power: Head to your breaker box and switch off the circuit that powers the fixture. If you’re not sure which breaker controls it, turn off the main power to be safe.
- Test for Power: Use a voltage tester to confirm the fixture is dead. I touch the tester to the wires or the fixture’s metal parts to make sure no current is flowing.
- Set Up Your Workspace: If the fixture is high up, use a sturdy step ladder. Clear the area below so you have room to work.
- Gather Your Tools: Lay out everything you need so you’re not scrambling mid-repair.
Once you’re set, you’re ready to dig into the fixture. Let’s start with the most common fix: replacing a faulty pull chain switch.

How to Replace a Faulty Pull Chain Switch
In my experience, nine times out of ten, a pull chain light fixture stops working because the switch is busted. The switch is the heart of the mechanism, and it wears out with years of pulling. Here’s how I replace one:
- Remove the Fixture Cover: Most pull chain fixtures have a cover or globe held in place by screws or a twist-off mechanism. Use your screwdriver to remove it and expose the switch and wiring. For ceiling fans, you might need to remove the light kit first.
- Access the Switch: The switch is usually a small cylindrical component with the chain attached. It’s connected to the fixture’s wires. Take a mental note (or a photo) of how the wires are connected—you’ll need to replicate this later.
- Disconnect the Old Switch: Unscrew or unclip the switch from the fixture. Carefully disconnect the wires. If they’re held by wire nuts, twist them off. If they’re soldered, you may need to cut and strip the wires.
- Install the New Switch: Connect the new switch’s wires to the fixture’s wires, matching the setup you noted earlier. Use wire nuts or electrical tape to secure the connections. Make sure everything is tight—no loose wires!
- Reattach the Switch: Secure the new switch in place, threading the pull chain through the designated hole.
- Test Before Closing Up: Before putting the cover back on, turn the power back on and pull the chain to test the light. If it works, turn the power off again and reassemble the fixture. If not, double-check your wiring.
I’ve found that replacing the switch fixes most issues. But sometimes, the problem is simpler, like a broken chain.
Fixing or Replacing a Broken Pull Chain
A broken pull chain is frustrating, but it’s one of the easiest fixes. I’ve had chains snap off in my hand, leaving me staring at a useless stub. Here’s how I handle it:
- Check the Chain: If the chain is completely broken, you’ll likely need to replace the entire switch (follow the steps above). But if it’s just shortened or stuck, you might be able to fix it.
- Remove the Broken Chain: Open the fixture and locate the switch. If the chain is caught or broken inside, use needle-nose pliers to pull it out.
- Attach a New Chain: Most replacement switches come with a new chain, but you can also buy chains separately. Thread the new chain through the switch and secure it with the provided connector (usually a small clip or ball).
- Test the Chain: Pull the chain a few times to make sure it moves smoothly and toggles the switch.
- Reassemble the Fixture: Put the cover back on and test the fixture with the power on.
If the chain keeps breaking, it might be a sign that the switch itself is worn out, so consider replacing both.
Troubleshooting Electrical Issues
Sometimes, the problem isn’t the switch or the chain—it’s the wiring. I’ve run into this with older fixtures where the wires were loose or frayed. Here’s how I troubleshoot:
- Check the Bulb: It sounds obvious, but a burnt-out bulb can mimic a broken fixture. Swap it out for a new one and test it.
- Inspect the Wiring: With the power off, look at the wires inside the fixture. Are they loose, frayed, or disconnected? Tighten any loose connections and replace damaged wires.
- Test Continuity: If you have a multimeter, use it to check for continuity in the wires and switch. This helps confirm if electricity can flow through the circuit.
- Look for Corrosion: In damp areas like basements, corrosion can mess with connections. Clean any corroded parts with a wire brush or replace them.
If the wiring looks seriously damaged, or if you’re not comfortable working with electricity, it’s time to call a professional electrician. I’ve learned that it’s better to be safe than sorry when dealing with complex wiring issues.
Fixing a Flickering or Intermittent Light
Flickering lights are annoying, and I’ve dealt with my fair share. This usually happens because of loose connections or a failing switch. Here’s what I do:
- Tighten the Bulb: A loose bulb can cause flickering. Make sure it’s screwed in snugly.
- Check the Socket: If the bulb is fine, inspect the socket for corrosion or damage. Clean it gently with a dry cloth or replace it if it’s worn out.
- Test the Switch: A failing switch can cause intermittent power. If tightening connections doesn’t help, replace the switch as described earlier.
- Look at the Wiring: Loose or frayed wires can also cause flickering. Secure any loose connections and replace damaged wires.
If the flickering persists, it could be an issue with the circuit itself, which might require an electrician to diagnose.
Maintaining Your Pull Chain Light Fixture
Once your fixture is working again, a little maintenance can keep it running smoothly. I’ve learned a few tricks to extend the life of my fixtures:
- Don’t Yank the Chain: Pull gently to avoid stressing the switch. I’ve broken a chain or two by pulling too hard!
- Clean Regularly: Dust can build up inside the fixture, causing overheating or corrosion. Wipe it down every few months.
- Check the Bulb Wattage: Using a bulb with too high a wattage can damage the switch. Stick to the recommended wattage for your fixture.
- Inspect Periodically: Every year or so, open the fixture and check for loose wires or signs of wear.
These small habits can save you from future headaches and keep your light shining bright.
When to Call a Professional
I love DIY projects, but there are times when it’s best to call in a pro. If you’ve tried the fixes above and the fixture still isn’t working, or if you see signs of serious electrical issues (like burnt wires or sparking), it’s time to get help. I’ve called an electrician for a tricky ceiling fan that had wiring issues beyond my skill level, and it was worth it for peace of mind. Look for a licensed electrician in your area, and don’t hesitate to ask for an estimate upfront.
Conclusion
Fixing a pull chain light fixture is one of those home improvement projects that feels so satisfying once you get it right. I remember the first time I fixed a stubborn ceiling fan light—it was like solving a puzzle! With a few basic tools, a bit of patience, and the steps I’ve shared, you can tackle most pull chain problems yourself. Whether it’s replacing a switch, fixing a broken chain, or tightening some wires, you’ve got this. And if things get tricky, there’s no shame in calling a professional. Now, go flip that breaker back on and enjoy your newly fixed light fixture. You’ve earned that glow!
FAQs
Why won’t my pull chain light turn on?
If your light won’t turn on, first check the bulb—it might be burnt out. If the bulb is fine, the issue could be a faulty pull chain switch or loose wiring. Try replacing the switch or checking the connections as I described earlier. Make sure the power is off before you start poking around!
Can I replace just the pull chain without replacing the switch?
Yes, if the chain is broken but the switch still works, you can replace just the chain. Open the fixture, remove the broken chain, and thread a new one through the switch. Most hardware stores sell replacement chains that are easy to install.
How do I know if my pull chain switch is bad?
If the chain won’t pull, the light doesn’t respond, or it stays on all the time, the switch is likely bad. You can test it with a multimeter for continuity, but honestly, switches are cheap, so I usually just replace them to be safe.
Is it safe to fix a pull chain light fixture myself?
As long as you turn off the power at the breaker and use a voltage tester to confirm the fixture is dead, it’s safe to do these repairs yourself. If you’re unsure about wiring or see signs of serious damage, call an electrician to avoid any risks.
How long does it take to fix a pull chain light fixture?
Most fixes take about 30 minutes to an hour, depending on the issue. Replacing a switch or chain is pretty quick once you get the hang of it. If you’re troubleshooting wiring, it might take a bit longer, but it’s still doable in an afternoon.