
Quick Summary:
Fitting a lampshade is a straightforward DIY task. This guide provides simple, step-by-step instructions to ensure your lampshade is securely and stylishly attached to your lamp base, enhancing your home’s ambiance and your confidence in DIY projects.
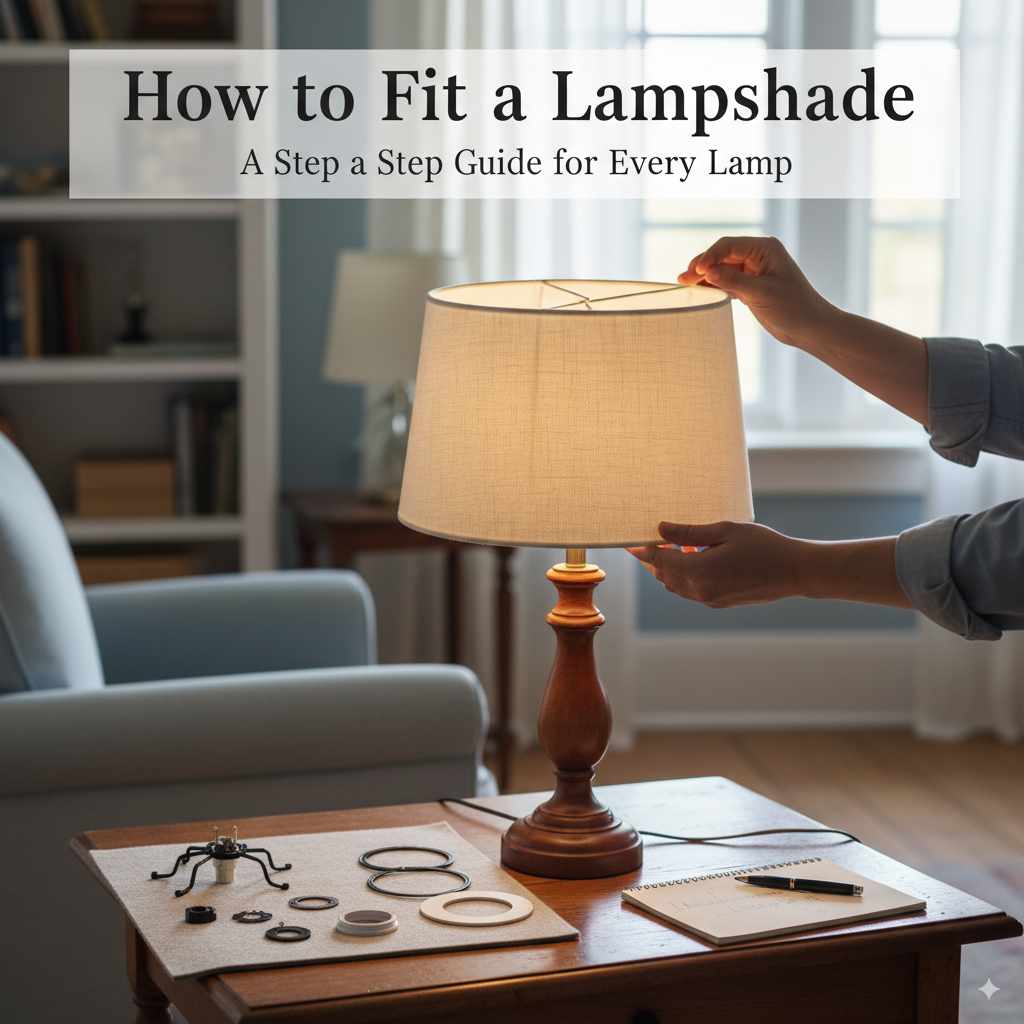
Hello there! Md Meraj here. Ever looked at a lamp and thought, “That shade just doesn’t look quite right,” or maybe you’ve bought a new shade only to find it doesn’t quite fit? It’s a common little hiccup, but thankfully, it’s one we can easily fix together. Getting the right lampshade on your lamp isn’t just about looks; it’s about making sure it’s stable, safe, and casts light just the way you want it to. Don’t worry if you’re new to this; we’ll walk through it step-by-step, making sure you feel confident and capable. Let’s brighten up your space!
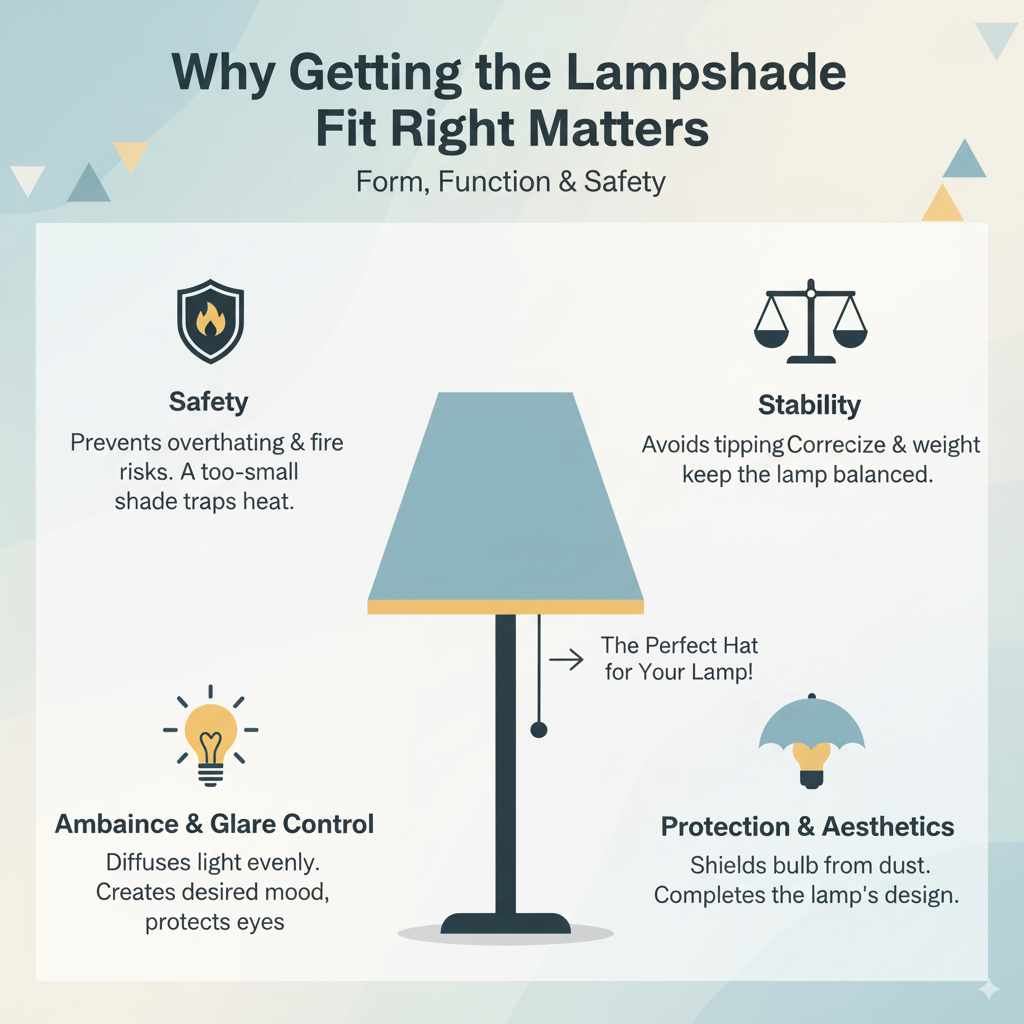
Why Getting the Lampshade Fit Right Matters
Choosing and fitting the correct lampshade is more than just an aesthetic decision; it plays a crucial role in the functionality and safety of your lamp. A shade that’s too small might overheat the bulb, posing a fire risk, while one that’s too large or heavy could unbalance the lamp. The right fit ensures proper light diffusion, creating the desired mood and preventing glare. It also protects the bulb from dust and damage. Think of it as the perfect hat for your lamp – it completes the look and serves a purpose!
Understanding Lampshade Fittings: The Key to a Perfect Match
Before we even think about putting a shade on, we need to talk about how lampshades actually attach to lamps. There are a few common ways this happens, and knowing which one you have is the first big step to a successful fit. It’s like knowing the thread size of a screw before you buy one – essential information!
The Harp and Finial System
This is probably the most common system you’ll find on table lamps and some floor lamps. It involves a metal frame, called a harp, that arches over the bulb socket. The lampshade then attaches to the top of this harp.
- The Harp: This is the curved metal piece that usually screws into the lamp base near the socket. It has a loop or a threaded end at the top.
- The Shade Fitting: The lampshade itself will have a fitting that sits on top of the harp. This is usually a ring that slips over the threaded end of the harp.
- The Finial: This is the decorative knob or cap that screws onto the threaded end of the harp, securing the lampshade in place.
To check if your lamp has a harp system, look for that U-shaped metal piece extending upwards from the bulb socket. You can usually lift it up or unscrew it from its base.
The Uno Fitter
The Uno fitter is a streamlined option, often seen on more modern or minimalist lamps. In this system, the lampshade’s fitting is built directly into the shade itself, and it slides up to meet the bulb socket.
- Integrated Fitting: The lampshade has a ring or frame inside that’s designed to fit directly around the light bulb socket.
- No Harp: There’s no external harp involved. The shade sits directly on the socket.
- Securing Mechanism: Often, the bulb itself helps to hold the shade in place, or there might be a small screw on the socket that presses against the shade’s fitting. Sometimes, the socket has a threaded ring that screws onto the socket, and the shade’s uno fitter sits above this ring, secured by the bulb.
You’ll recognize an Uno fitter by the absence of a harp. The shade’s inner frame will appear to be the only component connecting it to the lamp.
The Clip-On (or Clip-On Shade) System
These are the simplest and often smallest shades. They are designed to clip directly onto the light bulb itself.
- Direct Attachment: The shade has a metal or plastic frame with clips that attach directly to the sides of a standard light bulb.
- Small and Light: Typically used for accent lamps, wall sconces, or candelabra bulbs.
- Bulb Shape Matters: These shades are often shaped to fit specific bulb types, like torpedo or flame-shaped bulbs.
If your shade has a little wire frame with clips designed to grip the bulb, you’ve got a clip-on system. These are often found on decorative lamps where a full harp system would look out of place.
The European Fitter (or European Spider)
This type of fitting is less common in the US but is prevalent in many other parts of the world. It’s similar to the harp system but with a key difference in how the shade attaches.
- Central Ring: The lampshade has a central ring, but it’s usually larger than the ring found on a standard US harp fitting.
- External Support: Instead of the shade fitting over a harp, the harp (or a similar support structure) fits into the shade’s central ring.
- Secured by a Screw Thread: A threaded part of the lamp base extends through the center of the shade’s fitting, and a finial screws onto this thread, holding the shade tightly against the harp.
You’ll often see this on floor lamps or older, imported lamps. The shade’s fitting will look like a ring with a gap, designed to accommodate a threaded rod coming up from the lamp base.
What to Do If You’re Unsure
If you’re still scratching your head, don’t worry! Take a clear photo of the top of your lamp base, around the bulb socket. You can often find helpful diagrams and comparisons online by searching for “types of lampshade fittings” or showing the photo to staff at a lighting store or a well-stocked hardware shop.
Essential Tools and Materials You’ll Need
The great news is that fitting a lampshade is usually a tool-free job! However, having a few basic items handy can make the process smoother and ensure a professional finish.
- Your New Lampshade: Make sure it’s the correct size and has the right fitting type for your lamp base.
- Your Lamp Base: Ensure it’s unplugged for safety!
- A Soft Cloth: For wiping down the lamp base and the new shade, removing any dust or fingerprints.
- A Small Step Stool or Chair (if needed): For safely reaching taller lamps.
- Patience! This is a simple task, but taking your time ensures you do it right.
Step-by-Step Guide: How to Fit a Lampshade
Alright, let’s get that new lampshade on! Remember, safety first – always ensure your lamp is unplugged before you start.
Step 1: Prepare Your Workspace and Lamp
Find a clear, well-lit area to work in. Gently unplug your lamp from the wall socket. If your lamp has been on recently, allow the bulb to cool down completely before touching it.
Step 2: Remove the Old Lampshade (If Applicable)
This is where knowing your fitting type is crucial.
- For Harp Systems: Unscrew the finial from the top of the harp. Lift the harp up slightly (if it’s hinged) or carefully remove it from its base. Then, lift the old lampshade off the harp.
- For Uno Fitter Systems: If there’s a securing ring or screw on the socket, loosen or remove it. Then, carefully slide the shade off the bulb socket.
- For Clip-On Systems: Gently unclip the shade from the bulb.
- For European Fitter Systems: Unscrew the finial that secures the shade to the threaded rod. Then, lift the shade off the rod and harp assembly.
Once the old shade is off, you can also remove the harp itself if it’s detachable from the base. Wipe down the lamp base, socket area, and the harp (if you’re reusing it) with a soft cloth.
Step 3: Attach the Harp (If Necessary)
If your lamp uses a harp system and you removed the harp, it’s time to put it back. Most harps screw into a threaded socket at the base of the lamp. Simply screw it in until it’s snug, but don’t overtighten. Ensure it’s positioned straight and stable.
Step 4: Place the New Lampshade
This is the moment of truth! Carefully align the fitting of your new lampshade with the lamp’s attachment point.
- Harp System: Gently place the new lampshade’s fitting (the ring) onto the top of the harp. Ensure it sits evenly.
- Uno Fitter System: Slide the shade’s uno fitter ring up onto the bulb socket. Make sure it sits flush against the socket or the securing ring.
- Clip-On System: Carefully align the clips with the sides of the light bulb and gently press them on until they are secure.
- European Fitter System: Place the shade’s central ring over the threaded rod extending from the lamp base, resting it on the harp or support structure.
Step 5: Secure the Lampshade
Now, we make sure it stays put!
- Harp System: Screw the finial back onto the threaded end of the harp, tightening it gently until the lampshade is held firmly in place. Don’t overtighten, as this could damage the shade or the harp.
- Uno Fitter System: If there was a securing ring, screw it back onto the socket. Then, carefully screw in the light bulb. The bulb should press firmly against the uno fitter, holding it securely. Some uno fitter sockets have a small screw that tightens against the shade’s fitting – if yours does, tighten it gently.
- Clip-On System: Ensure the clips are firmly holding the bulb.
- European Fitter System: Screw the finial onto the threaded rod. Tighten it until the shade is held snugly against the harp and the base.
Step 6: Final Check and Testing
Gently wiggle the lampshade to ensure it’s stable and doesn’t wobble. Check that it’s centered and straight. Once you’re satisfied, plug your lamp back in and turn it on. Observe how the light is cast. Is it even? Is there any glare? Does the shade look proportional to the base?
Choosing the Right Size and Style of Lampshade
Beyond just fitting, the size and style of your lampshade dramatically impact your lamp’s overall look and how it illuminates your space. It’s like choosing the right frame for a picture – it enhances the subject!
Size Matters: Proportions are Key
A common rule of thumb is that the lampshade’s diameter should be about three times the width of the lamp base. Also, the height of the shade should be about three-quarters the height of the lamp base (from the base to the socket). This isn’t a rigid rule, but it’s a great starting point for achieving visual balance.
Consider these points:
- Base Width: A wider base needs a wider shade to feel stable and proportionate.
- Lamp Height: A shade that’s too short can make a tall lamp look awkward, and vice versa.
- Bulb Coverage: The bottom edge of the shade should typically hide the bulb and socket from direct view when you’re sitting down.
You can find helpful visual guides on lamp and shade proportion by searching for resources from interior design blogs or lighting fixture manufacturers.
Style Harmony: Matching Shade to Base
The style of your lampshade should complement the style of your lamp base and the room’s decor.
- Traditional Lamps: Often pair well with bell, empire, or drum shades. Fabrics like silk, linen, or textured cotton work well.
- Modern Lamps: Might suit clean-lined drum shades, geometric shapes, or even metal shades. Materials like metal, acrylic, or simple fabrics are common.
- Rustic or Farmhouse Lamps: Can look great with burlap, woven materials, or simple linen shades.
- Art Deco or Vintage Lamps: Might benefit from fringed shades, geometric patterns, or shades with unique embellishments.
Think about the materials, colors, and silhouette of both the base and the shade. Do they speak the same design language? For instance, a sleek, minimalist lamp base might look out of place with a heavily fringed, ornate shade, and vice versa.
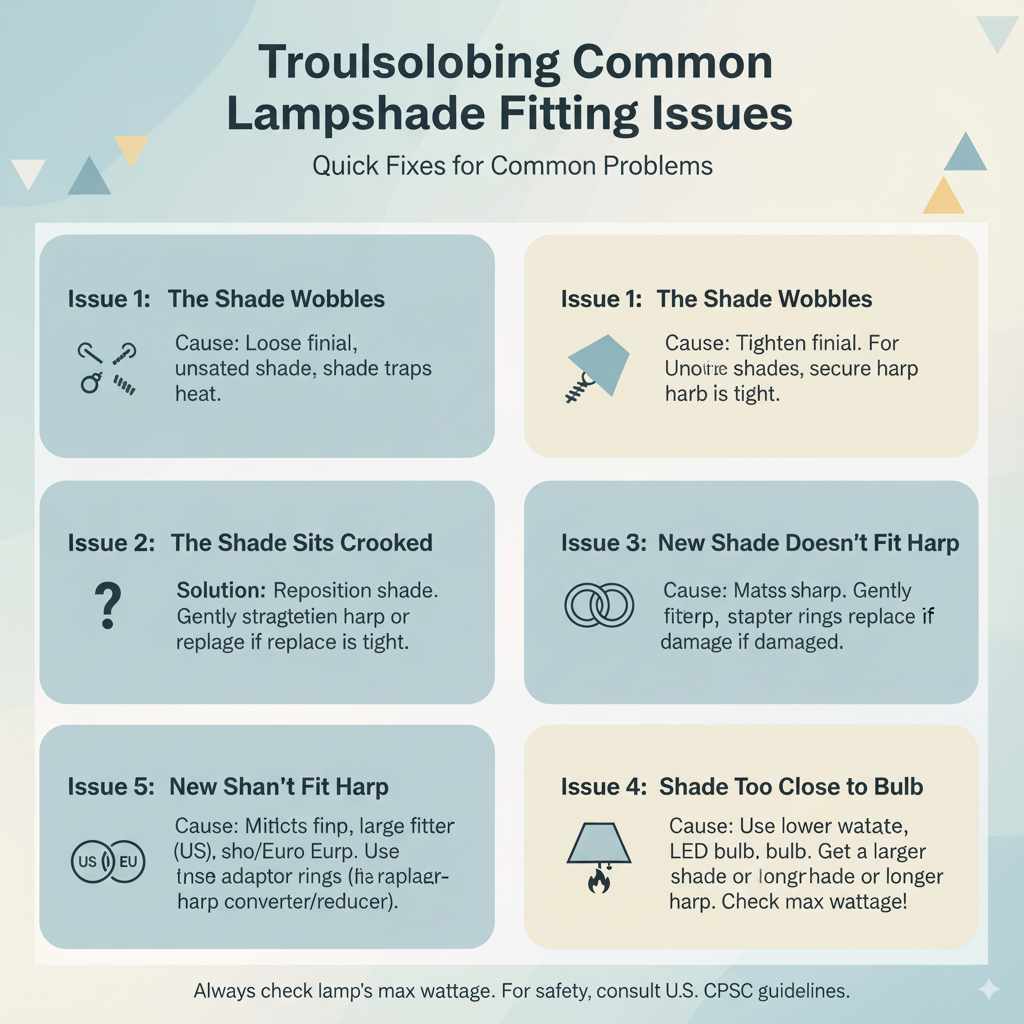
Troubleshooting Common Lampshade Fitting Issues
Even with the best intentions, you might run into a small snag. Here are a few common problems and how to solve them.
Issue 1: The Shade Wobbles
Cause: The finial isn’t tightened enough, or the shade’s fitting isn’t sitting properly on the harp or socket.
Solution:
- Gently tighten the finial. If it’s a harp system, make sure the shade is centered on the harp before tightening.
- For Uno fitter shades, ensure the bulb is screwed in firmly to press against the shade fitting.
- If the harp itself is loose, ensure it’s screwed in tightly to the lamp base.
Issue 2: The Shade Sits Crooked
Cause: Uneven weight distribution, a bent harp, or the shade fitting is not centered.
Solution:
- Try repositioning the shade on the harp or socket.
- Check if the harp is bent. If it is, you might be able to gently bend it back into shape, but be careful not to break it. If it’s significantly damaged, consider replacing the harp. You can find replacement harps at most lighting stores or online.
- Ensure the shade’s fitting is designed to sit flush. Sometimes, the fitter ring might be slightly misaligned with the shade fabric.
Issue 3: The New Shade Doesn’t Fit the Harp
Cause: You may have a European fitter shade with a US harp, or vice versa, or the ring size is incorrect.
Solution:
- Check Fitter Type: Confirm if you have a US standard fitting (shade fits over the harp) or a European fitting (harp fits into the shade). If they don’t match, you’ll need to buy a shade with the correct fitting type for your lamp.
- Adaptor Rings: For some US harp systems, you can buy inexpensive “harp converters” or “shade fitter reducers” that add a ring to a shade designed for a European fitter, allowing it to sit on a US harp. Conversely, you might need a “European fitter adapter” for a US shade. These are readily available online.
Issue 4: The Shade is Too Close to the Bulb
Cause: The shade is too small, the bulb is too large, or the harp is too short.
Solution:
- Check Bulb Wattage: Always use a bulb with a wattage that is safe for your lampshade. Check the label on the shade, or a maximum wattage sticker often found on the lamp socket. Overheating is a fire hazard.
- Use Lower Wattage/LED Bulbs: Consider using lower-wattage incandescent bulbs or switching to LED bulbs. LEDs produce much less heat, making them safer for lampshades and more energy-efficient.
- Get a Larger Shade or Longer Harp: If the shade is simply too small for the lamp base or the bulb, the best solution is to get a larger lampshade or a longer harp. You can measure your current harp and socket to find a compatible replacement.
For more information on safe lighting practices, the U.S. Consumer Product Safety Commission (CPSC) offers valuable safety tips.
Comparing Lampshade Fitting Types
To help you visualize the differences, here’s a quick comparison of the most common lampshade fitting types:
| Fitting Type | How it Attaches | Commonly Found On | Ease of Fit | Notes |
|---|---|---|---|---|
| Harp & Finial | Shade ring sits on top of a harp, secured by a finial. | Table lamps, floor lamps. | Easy | Most versatile; harps are often adjustable or replaceable. |
| Uno Fitter | Shade ring attaches directly to the bulb socket. | Modern table lamps, some desk lamps. | Easy | Streamlined look, no extra parts. |
| Clip-On | Clips attach directly to the light bulb. | Accent lamps, sconces, candelabra. | Very Easy | Best for smaller bulbs and decorative applications. |
| European Fitter | Harp/rod fits into shade ring, secured by a finial. | Imported lamps, some floor lamps. | Moderate | Requires matching shade fitting to lamp rod type. |
Frequently Asked Questions About Fitting Lampshades
Q1: How do I know if my lampshade fitting is the right type for my lamp?
A1: Check the top of your lamp base. If there’s a U-shaped metal piece (a harp) that the shade sits on, and a decorative knob (finial) screws onto it, you have a harp system. If the shade’s frame attaches directly to the bulb socket without a harp, it’s likely an Uno fitter. If the shade has clips to attach to the bulb itself, it’s a clip-on. If a rod extends through the shade’s center and a finial secures it, it’s a European fitter.
Q2: Can I use an adapter to make a lampshade fit if it’s the wrong type?
A2: Yes, for some situations! For instance, you can often use a “harp converter” to adapt a shade with a European fitter to work on a standard US harp system. These are inexpensive and widely available online or at lighting stores. However, for clip-on shades, there are usually no adapters.
Q3: What if my new lampshade is a bit too loose?
A3: If it’s a harp system, try tightening the finial a little more. Ensure the shade is sitting evenly on the harp. If it’s still loose, you might need a shade with a smaller fitter ring or consider using a harp converter/adapter to snug it up.
Q4: My lampshade feels wobbly. What’s the fix?
A4: First, check that the finial is snug. If it’s a harp system, ensure the harp itself is securely attached to the lamp base. Sometimes, a bent harp can cause wobbling; you may need to straighten it gently or replace it. For Uno fitter shades, make sure the bulb is screwed in all the way.
Q5: How do I clean a lampshade after fitting it?
A5: Always check the lampshade’s care label if it has one. For most fabric shades, a gentle dusting with a microfiber cloth or a vacuum cleaner with a brush attachment on a low setting works well. For tougher marks, you might use a slightly damp cloth, but be very careful not to oversaturate or rub too hard, as this can damage the fabric or frame.
Q6: What’s the difference between a US and a European lampshade fitting?
A6: The main difference is how the shade connects to the lamp’s support. In the US, the lampshade’s fitting ring sits on top of a harp, and a finial screws down onto the harp to hold the shade. In Europe, the lamp base has a threaded rod that extends through the center of the lampshade’s fitting ring, and a finial screws onto this rod to secure the shade against the support structure.
Conclusion
There you have it! Fitting a lampshade is a simple yet satisfying DIY project that can instantly refresh the look and feel of a room. By understanding the different types of fittings, choosing the right size and style, and following these straightforward steps, you can confidently tackle this task. Remember to always prioritize safety by unplugging your lamp and using appropriate bulbs. With a perfectly fitted lampshade, your lamp will not only be a functional light source but also a beautiful decorative element in your home. Happy decorating!