
In the realm of woodworking and carpentry, the integrity of wooden structures often hinges on the meticulous addressing of imperfections such as cracks. Understanding how to fill cracked wood is essential for both aesthetic enhancement and structural preservation. The choice of filler materials, ranging from epoxy resins to wood fillers, plays a pivotal role in achieving seamless repairs, while knowledge of expansion and contraction dynamics is crucial for long-lasting results.
Furthermore, the application techniques and finishing methods can significantly affect the final appearance. Delve into this article to uncover the intricacies and master the art of restoring your cracked wood surfaces effectively.
How To Fill Cracked Wood: A Step-By-Step Guide
Cracked wood can detract from the aesthetics and integrity of wooden furniture, floors, or fixtures. Understanding how to fill cracked wood effectively not only restores the beauty of the surface but also prolongs its lifespan. Various methods and materials can be employed to tackle this issue, depending on the severity of the cracks and the type of wood involved. This summary provides insights into techniques, tools, and tips for achieving a smooth and lasting finish.
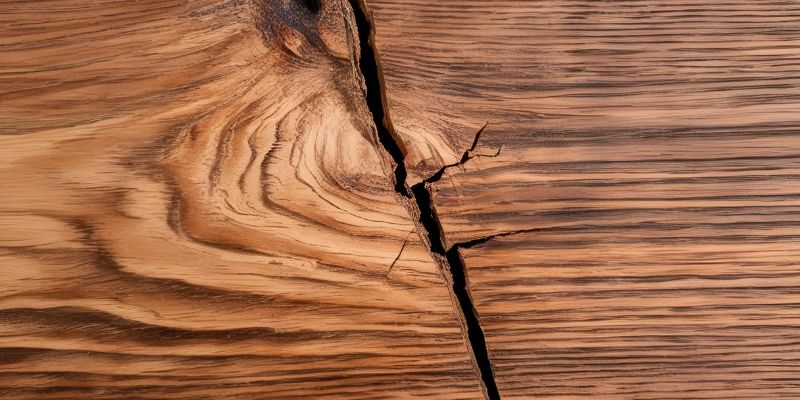
Understanding Wood Cracks
Types of wood cracks (shrinkage, checking, splits). Causes of cracking in wood.
Wood can crack for several reasons. It’s important to know the types of cracks to fix them properly. Here are some common types:
- Shrinkage: This happens when wood dries and gets smaller.
- Checking: Small splits on the surface often appear as the wood shrinks.
- Splits: These are larger cracks that can go deep into the wood.
Cracking occurs due to changes in moisture, temperature, or pressure. Understanding these types helps you take care of the wood better.
Tools and Materials Needed
Essential tools for filling cracks. Types of wood fillers and their applications.
To fill cracked wood effectively, gather a few essential tools and materials. You will need:
- Putty knife: For spreading filler evenly.
- Sandpaper: To smooth the surface after filling.
- Brush or cloth: For cleaning the area before application.
As for wood fillers, there are different types to choose from:
- Water-based fillers: Great for indoor use and easy to clean.
- Oil-based fillers: Durable and suitable for outdoor projects.
- Epoxy fillers: Best for deep cracks and structural repairs.
Each type serves specific needs, so pick the right one for your project!
Preparing the Surface
Cleaning the cracked area. Assessing the depth and width of the cracks.
Before filling cracks in wood, it’s important to prepare the surface properly. Start by cleaning the cracked area to remove dirt and dust. This helps the filler stick better. Use a soft cloth or brush for this task.
Next, check the cracks closely.
- Look for depth and width of each crack.
- Use a ruler to measure them if needed.
- Note any large gaps that may need more filler.
Proper preparation will lead to a better finish.
Filling Cracks in Wood
Stepbystep process for applying wood filler. Tips for smoothing and leveling the filler.
To repair cracks in wood, follow these simple steps:
- Clean the crack thoroughly to remove dust and debris.
- Choose a suitable wood filler.
- Apply the filler with a putty knife, pressing firmly into the crack.
- Allow it to dry completely, as per the instructions.
For a smooth finish, sand the area gently. Use fine-grit sandpaper to level the filler with the wood. Finally, clean the surface to remove any dust.
This way, your wood will look as good as new!
Drying and Curing Process
Recommended drying times for different fillers. Factors affecting curing efficiency.
Drying times can vary based on the filler used. Here are some recommended times:
- Wood glue: 24 hours
- Epoxy filler: 6-8 hours
- Wood putty: 1-2 hours
Factors that affect curing efficiency include:
- Humidity levels: High moisture delays curing.
- Temperature: Warm conditions speed up the process.
- Type of wood: Some woods absorb fillers differently.
Understanding these factors helps you choose the best filler and time for strong repairs.
Finishing the Repaired Area
Sanding the filled area. Staining and sealing options to match wood.
After repairing the cracks in your wood, it’s time to make the area look great. Start by sanding the filled spots. This smoothens the surface and helps the repair blend in.
Use fine-grit sandpaper to avoid scratches.
Next, choose a stain that matches your wood. This will help hide the repairs. There are many options, like:
- Water-based stains
- Oil-based stains
After staining, apply a good sealant.
This protects the wood and keeps it looking nice. Follow these steps for a perfect finish!
Preventive Measures to Avoid Future Cracking
Proper storage and maintenance of wood. Environmental factors that impact wood integrity.
To keep wood strong and crack-free, proper storage is essential. Always store wood in a cool, dry place. Keep it off the ground using pallets or risers.
Humidity can cause wood to swell or crack, so use a dehumidifier if needed. Protect wood from direct sunlight as UV rays can damage its surface. Regularly check for signs of wear and treat the wood with oil or sealant to maintain its integrity.
- Keep wood away from heat sources.
- Avoid placing wood in damp areas.
- Inspect and treat wood regularly.
Common Mistakes to Avoid
Common pitfalls in the filling process. How to identify and fix these mistakes.
Filling cracks in wood can be tricky. One common mistake is using too much filler. This can lead to messy results that look like a bad art project! Always start small and add more if needed.
Another pitfall is ignoring the wood grain. If you don’t follow it, the repair will stand out like a sore thumb.
To fix these mistakes, sand the area first, so the filler adheres better.
Also, choose a filler that matches the wood color—unless you want it to look like a clown at a fancy party!
| Common Mistake | How to Fix It |
|---|---|
| Using too much filler | Start with a small amount and layer as needed |
| Ignoring wood grain | Always follow the grains when applying the filler |
| Choosing the wrong filler color | Select a filler that matches the wood |
Conclusion
In summary, effectively filling cracked wood requires careful preparation, choosing the right filler, and applying it skillfully for a seamless finish. By following the outlined steps—cleaning the crack, applying the filler, sanding, and finishing—you can restore the beauty and integrity of your wooden surfaces. With patience and attention to detail, even the most damaged wood can be rejuvenated.
FAQs
What Are The Best Materials For Filling Cracks In Wooden Surfaces?
The best materials for filling cracks in wooden surfaces include wood filler, epoxy, and caulk. Wood filler is ideal for small to medium cracks, as it can be sanded and stained to match the wood. Epoxy is excellent for larger gaps or structural repairs due to its strength and durability. Caulk can be used for minor cracks or joints where flexibility is needed, especially in areas exposed to moisture.
How Do You Prepare Cracked Wood For Repair Before Applying Filler?
To prepare cracked wood for repair, first clean the area around the crack to remove any dirt or debris. Use a utility knife or chisel to widen the crack slightly if needed, ensuring better adhesion for the filler. Sand the surrounding surface gently to create a smooth base for the filler to adhere to. Finally, vacuum or wipe away any dust to ensure a clean and dry surface before applying the filler.
What Techniques Can Be Used To Ensure A Smooth Finish After Filling Wood Cracks?
To ensure a smooth finish after filling wood cracks, start by sanding the filled area with fine-grit sandpaper to achieve an even surface. Follow up with a damp cloth to remove dust and debris before applying additional filler if necessary. Once satisfied with the smoothness, use a stain or finish compatible with the wood to blend the repair with the surrounding area. Lastly, consider applying a clear topcoat for added protection and uniformity.
Are There Specific Products Recommended For Filling Large Versus Small Cracks In Wood?
Yes, there are specific products recommended for filling large versus small cracks in wood. For large cracks, epoxy fillers or wood patching compounds are ideal, as they provide strength and durability. For small cracks, a wood filler or putty can be used, which is easier to apply and sand down. Always ensure that the product you choose is compatible with the type of wood and the finish you plan to use.
How Can I Prevent Future Cracking In Wood After It Has Been Repaired?
To prevent future cracking in repaired wood, ensure it is properly dried before any repairs are made, as excess moisture can lead to further issues. Apply a high-quality wood sealer or finish to protect against humidity changes and moisture absorption. Store wood in a stable environment with consistent temperature and humidity levels to minimize stress on the material. Finally, regularly maintain the wood with appropriate cleaning and conditioning to keep it healthy and resilient.