
Quick Summary: Learn how to cover lamp shades with fabric easily by measuring your shade, choosing the right adhesive and fabric, and applying it smoothly using simple cutting and wrapping techniques. This guide makes refreshing old lamps simple and affordable, giving you professional results without stress.**
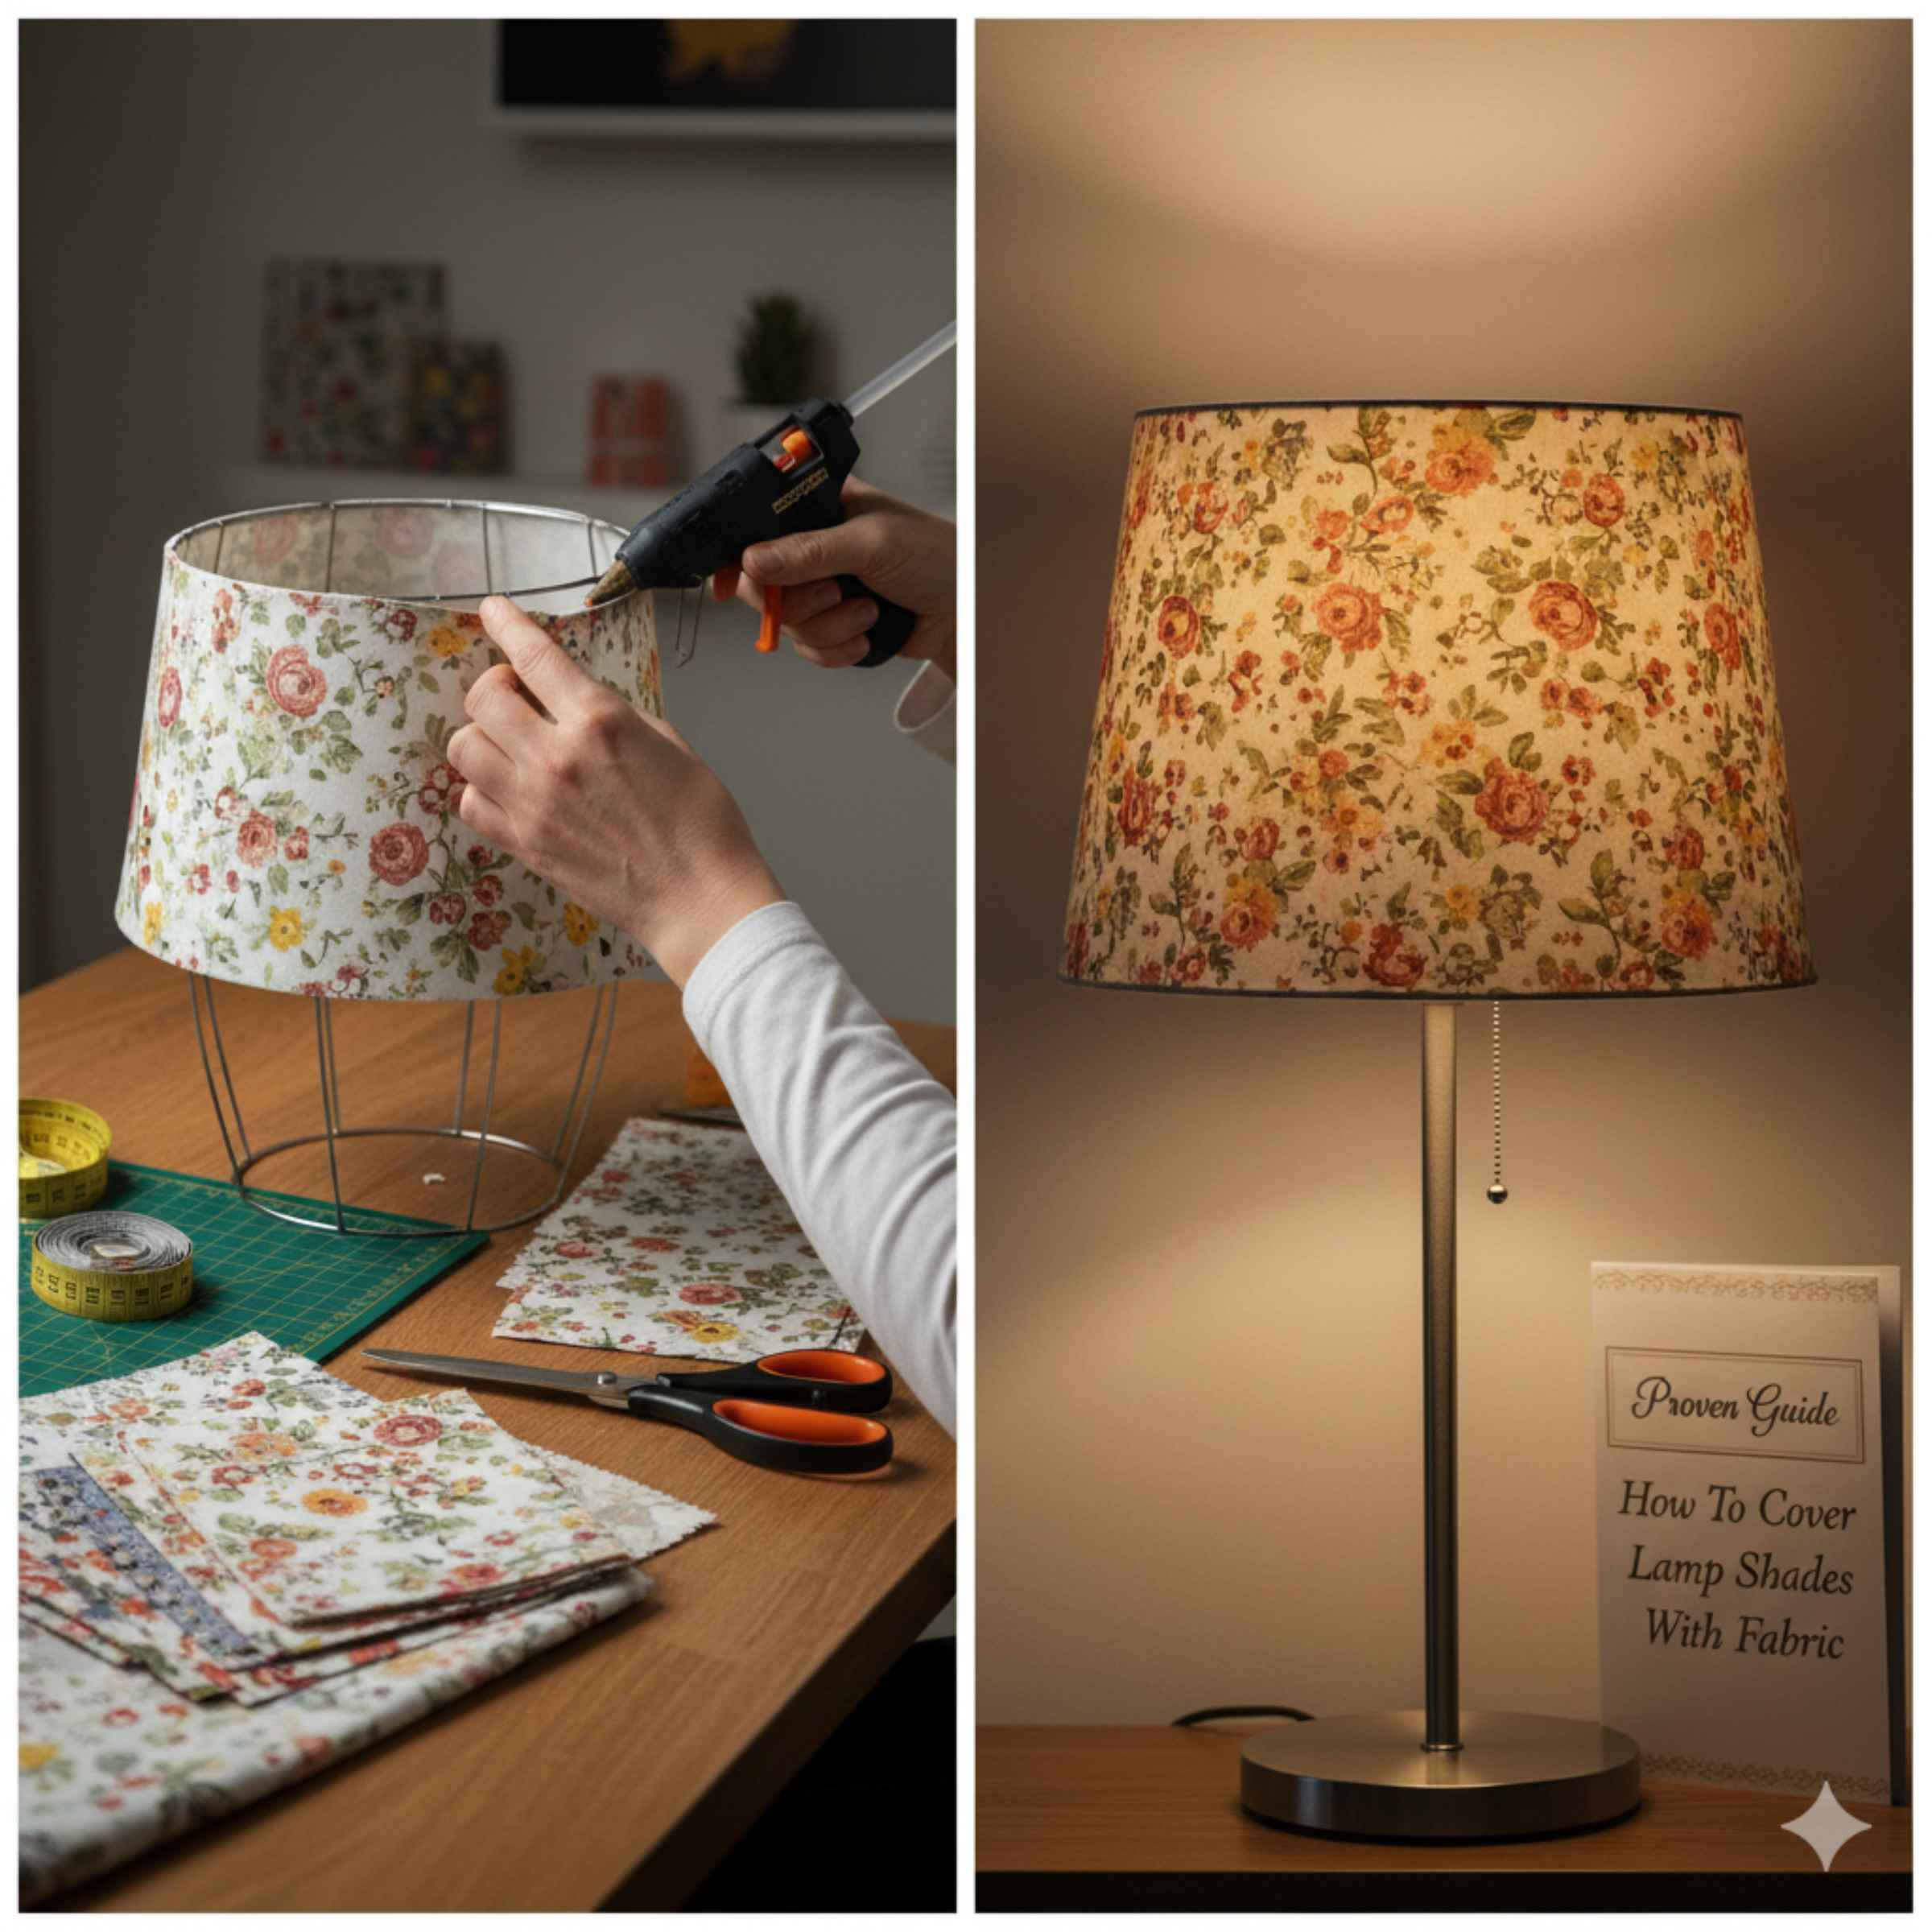
Is your favorite lamp looking tired or dated? Maybe the old shade is stained, or the color just doesn’t match your new decor. Replacing a lamp shade can be expensive, but recovering it is a fantastic, budget-friendly DIY trick! Don’t worry if you’ve never done this before. This project is much simpler than it looks. We will walk through every step, making sure you have the right tools and the confidence to get a smooth, beautiful finish. Ready to give that old lamp a stunning makeover? Let’s dive into how to cover lamp shades with fabric!
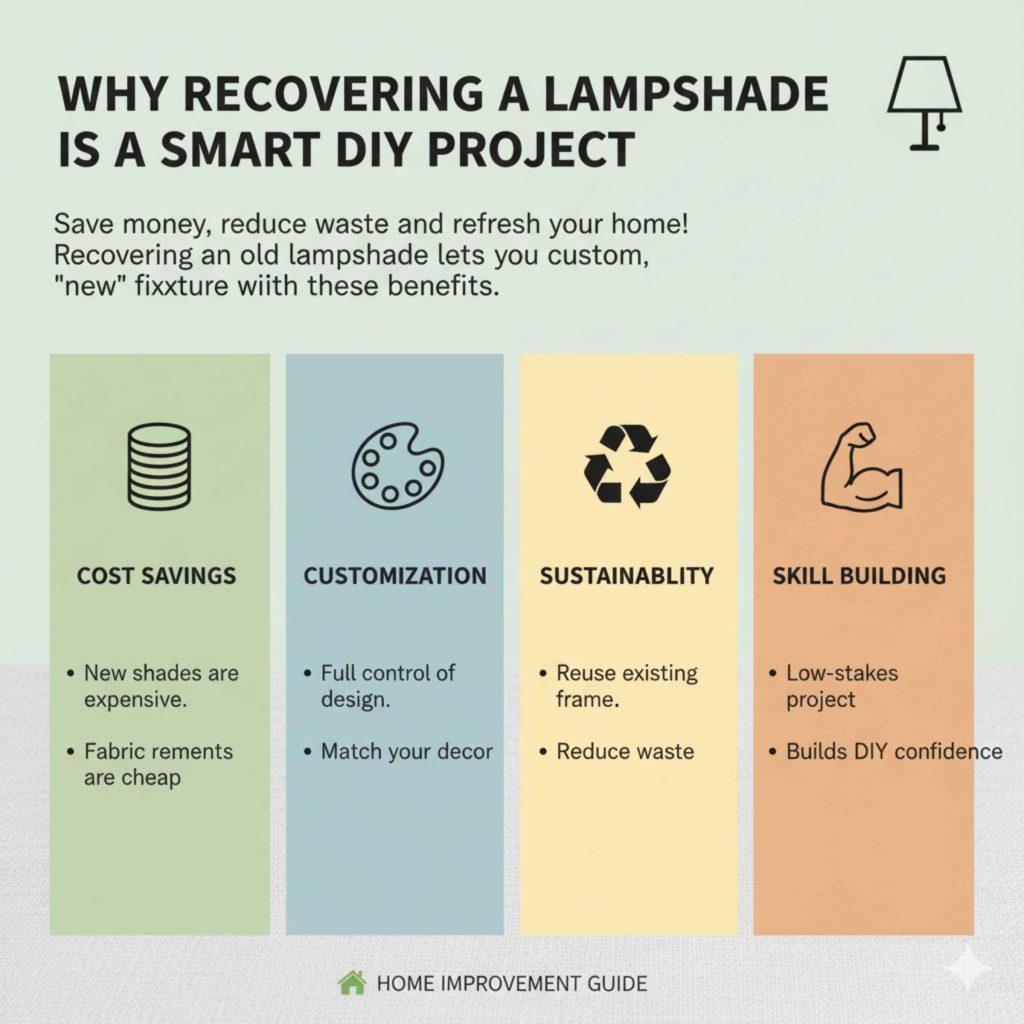
Why Recovering a Lampshade is a Smart DIY Project
As a home improvement guide, I always look for ways to save you money while improving your space. Recovering a lampshade fits this perfectly. It takes an old, perhaps ugly, fixture and makes it look brand new or completely custom. It lets you use high-end fabric remnants you might not be able to afford for a whole new shade.
Here are the main reasons homeowners choose to recover:
- Cost Savings: New shades, especially large or custom ones, cost a lot. Fabric remnants are often very cheap.
- Customization: You control the color, pattern, and texture entirely. Match drapes, rugs, or artwork perfectly.
- Sustainability: You reduce waste by reusing the sturdy existing frame of the shade.
- Skill Building: It’s a low-stakes project that builds confidence for bigger DIY tasks later on.
Gathering Your Supplies: Tools for Fabric Lampshade Success
Before we start cutting, we need to make sure our workspace is set up and we have all the necessary tools. Think of this as laying out your materials before a woodworking cut—preparation is key to a clean finish!
Essential Tools Checklist
You don’t need specialized tools for this job. Most of these items are likely already in your craft or toolbox.
- The Lamp Shade: The frame you are recovering.
- Fabric: Choose a medium-weight fabric (cotton, linen blends work well). Avoid very heavy or very sheer materials for your first try.
- Adhesive: Fabric glue (like Aleene’s Tacky Glue) or a spray adhesive specifically for fabric projects.
- Cutting Tools: Sharp fabric scissors or a rotary cutter and cutting mat.
- Measuring Tools: Tape measure or flexible ruler.
- Application Aids: Clips (binder clips work great), clothespins, or painter’s tape to hold fabric taut while drying.
- Smoothing Tools: A plastic scraper, credit card edge, or a smooth wooden dowel to press out air bubbles.
- Safety Gear: Safety glasses (always good practice!) and gloves if using strong spray adhesive.
Choosing the Right Fabric and Glue
The success of this project hinges on your materials. Since light needs to pass through, the fabric choice matters.
| Material | Best For | Beginner Tip |
|---|---|---|
| Medium-Weight Cotton/Linen | Maximum color saturation and easy handling. | Pre-wash and iron to prevent shrinkage after gluing. |
| Lightweight Upholstery Fabric | Durability and a richer texture. | Ensure it is not too thick, or it might buckle at the edges. |
| Fabric Glue (Tacky Type) | Precision gluing on seams and edges. | Allows time for adjustments before setting. |
| Spray Adhesive | Quick, even coverage over large, flat areas. | Use in a well-ventilated area, perhaps outside or in a garage. |
A Note on Safety: When using any spray adhesive, always follow the manufacturer’s instructions for ventilation. Good airflow is crucial for safety and to ensure the glue dries properly without fumes lingering. For more information on safe adhesive use in home projects, resources like the CDC on Aerosol Safety can offer helpful guidance.
Step 1: Preparing the Old Lampshade Frame
We need a clean, bare canvas to work with. If your old shade has paper or fabric attached, it must come off. This step is crucial for good adhesion.
Removing Old Covering Material
If the existing shade is paper or thin fabric, you can often gently peel it away. If it’s stubborn or glued on tightly, use a putty knife or a plastic scraper to gently lift the edges. Work slowly to avoid bending the metal frame underneath.
- Inspect the Frame: Once bare, look at the metal rings (the top and bottom hoops) and the vertical supports. Check for any loose wires or wobbly joints.
- Make Repairs: If you find a loose wire, a small amount of strong epoxy or super glue can secure it. If the frame is bent, gently use pliers to coax it back into a true circle.
- Clean the Surface: Wipe down the entire frame—especially the top and bottom rings where the new fabric will adhere—with a slightly damp cloth to remove dust or old adhesive residue. Let it dry completely.
Step 2: Measuring and Cutting Your New Fabric
Accurate measurements mean less trimming and a smoother final look. Measure twice, cut once—it’s a classic for a reason!
Measuring for a Perfect Fit
Lampshades are generally cylinder or drum shapes, or they taper (a cone shape). The process is slightly different for each.
Measuring a Drum (Cylinder) Shade:
This is the easiest shape. You need two measurements:
- Height: Measure the vertical height of the shade from the bottom ring to the top ring.
- Circumference: Measure the distance all the way around the shade (the side edge).
Calculating Fabric Size:
- Width needed: Circumference + 1.5 inches (for overlap).
- Height needed: Height + 3 to 4 inches (to cover the top and bottom edges).
Measuring a Tapered (Cone) Shade:
Tapered shades require a bit more math, but we can simplify it by treating it like a flattened trapezoid when unwrapped.
- Height: Measure the vertical height.
- Top Circumference (C1) & Bottom Circumference (C2): Measure both rings.
When you lay your fabric out, you will cut a large rectangle, but you will need to gently curve the top and bottom edges slightly during application to match the taper of the frame. For beginners, it is often easier to cut a large rectangle that covers the entire side, and then trim the top and bottom edges after the fabric is glued onto the sides.
Cutting the Fabric
Lay your fabric pattern-side down on a clean, flat surface. Use your measurements to draw the required rectangle onto the back of the fabric using tailor’s chalk or a very light pencil mark.
- Use your sharp scissors or rotary cutter to carefully cut out the marked rectangle.
- Remember to leave that extra 1.5 inches on the width for overlap—this is where you’ll secure the seam.
Step 3: Applying the Fabric to the Shade Sides
This is where the magic happens. We need to attach the main body of the fabric to the vertical wires or supports of the frame.
The Gluing Strategy
Decide whether you are using glue or spray adhesive. For a beginner, fabric glue applied carefully might offer more control, especially around the metal ribs.
If Using Fabric Glue (Recommended for Beginners):
- Start Small: Apply a thin, even layer of glue to a small section (about 3 to 4 inches wide) of the shade frame’s side supports, or directly onto the metal ring if your shade has no vertical supports.
- Attach the Edge: Place the edge of your fabric onto the glued area. Ensure the fabric is perfectly straight vertically.
- Smooth Immediately: As you glue, use your scraper or card edge to smooth the fabric outward from the center line. This pushes out any trapped air, preventing unsightly bubbles.
- Work in Sections: Continue applying glue in small strips, pressing the fabric firmly onto the frame, and smoothing constantly.
- The Overlap: When you reach the end, overlap the starting edge by about 1.5 inches. Glue this seam down securely. Use clips or tape to hold this seam tightly together while the glue sets according to the bottle’s instructions.
Pro Tip for Bubbles: If you see a small bubble after the glue has started to set, you can often pierce it very carefully with a tiny pin or needle, then press the air out and seal the hole with a tiny dab of glue underneath the fabric.
Step 4: Finishing the Top and Bottom Edges
This is often the trickiest part because the fabric has to wrap neatly around the curve of the top and bottom rings.
Creating a Clean Hemline
For this step, we need the fabric to adhere smoothly to the top and bottom rims of the shade structure.
- Trim Excess Fabric: If you left 3 to 4 inches of overhang on the top and bottom, trim this down to about 1.5 inches all the way around the top and bottom rims.
- Notching for Tapered Shades: If you have a tapered shade, you will need to make small, angled relief cuts (notches) radiating from the center of the excess fabric toward the rim. This allows the fabric to fold neatly around the curve without bunching up.
- Gluing the Top Rim: Apply glue evenly to the top metal rim of the shade. Gently fold the excess fabric edge over the rim.
- Folding Technique: Start at one point (perhaps directly opposite your side seam). Press the fabric edge firmly onto the top of the rim. Work your way around, pulling the fabric taut (but not so tight it distorts the pattern) as you fold it over.
- Securing the Fold: Use small binder clips or clothespins spaced every few inches to hold the edge of the fabric tightly against the top rim while it dries. If your shade has a fabric covering on the very top surface, you will need to smooth the folded edge down onto that surface cleanly.
- Repeat for the Bottom: Repeat the folding and securing process for the bottom rim.
If you are using a spray adhesive for the edges, spray the rim lightly, wait for it to become tacky (check the can!), and then carefully press the fabric edge down. Spray adhesives dry fast, so speed is essential here.
Step 5: Final Touches and Curing Time
Your shade is now covered! But we aren’t quite done. Patience during the curing phase ensures a professional, long-lasting finish.
Inspection and Curing
Once all the edges are glued and clipped, take a moment to inspect your work under good light.
- Look closely at the side seam. Is it tight? Are there any gaps? Add a tiny drop of glue if needed.
- Check the top and bottom edges. Are they flat and smooth against the rim? Adjust any clips that look loose.
Curing Time: This is the most important part for longevity. Depending on the glue you used, the shade needs to cure undisturbed. Fabric glue often requires 12 to 24 hours to reach full strength. Resist the urge to touch or move the clips too soon. A sturdy cure prevents sagging or peeling when the lamp heats up during use.
Attaching the Shade to the Lamp
Once fully cured, you can attach the shade. Most lamps use a “washer” system or a “spider fitter.”
- Washer Fitter: The shade has a ring in the middle that sits on the harp. A cap nut screws onto the light bulb socket stem to hold the shade in place.
- Spider Fitter: The shade has three arms that rest on top of the lamp’s harp (the U-shaped wire frame above the bulb).
If you are unsure how your lamp fixture works, look up guides specific to your lamp type. For instance, the Department of Energy provides general guidance on lighting fixture maintenance, which can be a good starting point for understanding lamp hardware.
Troubleshooting Common Beginner Lampshade Covering Issues
Even the best plans hit a snag. Here are the most common issues beginners face and how to fix them, keeping your confidence high.
Problem 1: Visible Air Bubbles
Cause: Fabric was applied too quickly, or the surface underneath wasn’t perfectly smooth.
Fix: If the glue is wet, gently peel back the affected area and re-smooth it. If the glue is dry, carefully use a pin to puncture the bubble, press the air out, and seal the tiny hole with a small drop of glue applied with a toothpick.
Problem 2: Fabric Pattern Distortion
Cause: The fabric was pulled too tightly around the circumference.
Fix: This is hard to fix once dry. If the distortion is minor, you might be able to gently ease the tension by slightly lifting the edge at the top or bottom and re-gluing with less pull. For severe distortion, you may need to trim the side seam, slightly overlap the fabric less, and re-glue that section.
Problem 3: Wrinkles or Buckling at the Top/Bottom Edges
Cause: Too much fabric overhang, or not enough relief cuts (notches) were made on tapered shades.
Fix: If the wrinkles are on the very edge, carefully peel back that edge, trim away the excess fabric causing the bulk, and re-glue neatly. If the fabric is buckling on the top surface, you need to make tiny, precise relief cuts into the folded edge until it lies flat.
| Issue | Remedy | Timeframe |
|---|---|---|
| Loose Side Seam | Apply more glue underneath and clamp tightly. | Requires full curing time. |
| Fabric Sags When Light On | The fabric may be too heavy, or the glue wasn’t strong enough. | Re-glue using a stronger adhesive (like contact cement designed for fabric). |
| Glue Seepage Visible | Too much glue was used. | If wet, gently blot with a damp cloth. If dry, try carefully scraping the excess off with a razor blade held at a very low angle, or try covering the spot with a decorative trim later. |
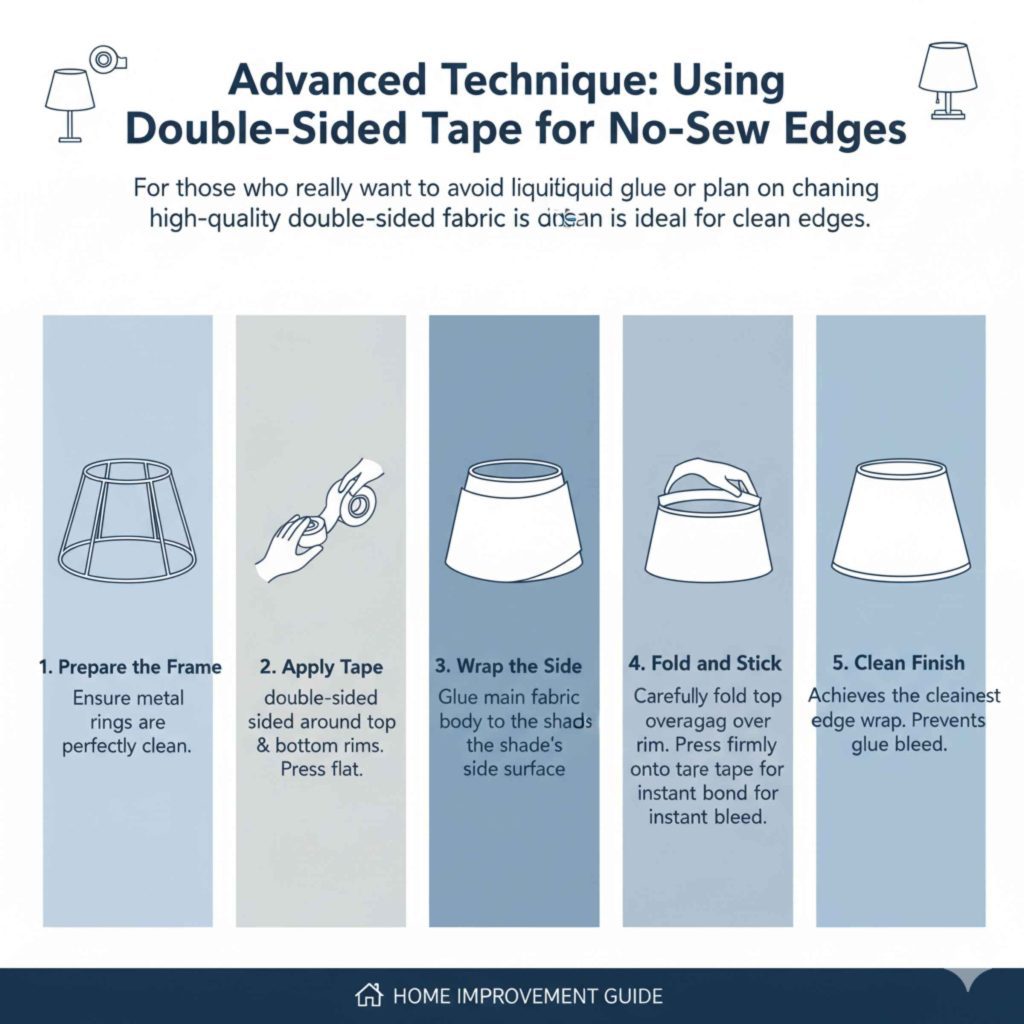
Advanced Technique: Using Double-Sided Tape for No-Sew Edges
For those who really want to avoid liquid glue on the edges, or if you plan on changing the fabric again soon, high-quality double-sided tape designed for heavy crafts or upholstery can be a lifesaver.
When to Use Tape
Tape works best on simple drum shades where the edges don’t have a severe curve or angle. It provides a very clean finish because there’s no risk of glue bleeding through.
- Prepare the Frame: Ensure the top and bottom metal rings are perfectly clean and dry.
- Apply Tape to the Rim: Apply strips of strong double-sided tape around the entire circumference of the top rim and the bottom rim. Make sure the tape adheres perfectly flat to the metal.
- Wrap the Side: Glue the main body of the fabric to the sides as described in Step 3.
- Fold and Stick: Once the side fabric is secure, carefully fold the top overhang over the rim, pressing firmly onto the tape. The tape creates an instant, strong bond on the edge.
- Clean Finish: This method often yields the cleanest edge wrap, provided your fabric doesn’t shift while you are applying the main body glue.
Frequently Asked Questions (FAQ) for Fabric Lampshade Recovery
Q1: Can I use any fabric I find in my home?
A: It is best to use medium-weight fabrics like cotton, linen, or light upholstery material. Very thick fabrics might not wrap around the edges well, and extremely sheer fabrics might not look right unless you line them first.
Q2: Do I need to remove the old fabric completely?
A: Yes, always remove the old covering. If the old covering is paper or vinyl, leaving it on can cause the new fabric to bubble or peel because the old material may not accept the new glue properly.
Q3: How long does the glue need to dry before I can use the lamp?
A: While some areas might feel dry in an hour, most fabric glues require a full 12 to 24 hours to cure completely. Using the lamp too soon can cause the warm air from the bulb to weaken the adhesive, leading to sagging.
Q4: What should I do if my fabric has a large pattern repeat?
A: If your fabric has a distinct pattern (like stripes or large florals), you must pay close attention to alignment when wrapping the side seam overlap. Before gluing the seam shut, hold the shade up to the light to ensure your pattern lines up perfectly across the seam.
Q5: Can I use this method on lamps with plastic shades?
A: Yes, but be cautious with the adhesive. Plastic can sometimes be slicker than metal frames. You might need a specialized adhesive meant for plastics, or you may need to lightly scuff the plastic surface with fine-grit sandpaper first to help the glue grip better.
Q6: Is it safe to use fabric over a high-wattage incandescent bulb?
A: Safety is paramount. Always check the maximum wattage rating listed on your lamp fixture itself. If you use a very high-wattage bulb, the heat can degrade the glue and potentially scorch the fabric. Using LED bulbs is recommended, as they produce significantly less heat, making fabric covering much safer.
Conclusion: Enjoy Your Custom Creation
See? You’ve done it! Covering a lamp shade with fabric is one of the most rewarding, visible DIY upgrades you can tackle. You took an ordinary, perhaps forgotten, piece of home decor and transformed it into a custom accent that perfectly suits your style, all while saving money. Remember the key steps: measure accurately, prep your frame thoroughly, and be patient during the crucial curing time.
The next time you look around your room and feel like something is missing, don’t rush out to buy new accessories. Often, the solution is right there, waiting for a little fabric and your own two hands. Feel proud of the skill you just used. Go ahead and turn that lamp on—that beautiful, custom glow is all yours!