
To choose vanity lighting, focus on three key areas: brightness (lumens), color temperature (Kelvin), and fixture placement (side sconces are best for even light). A good setup needs at least 75 watts of incandescent equivalent light or 1,500 total lumens for a standard bathroom.
Picking the right lights for your bathroom vanity can feel tricky. You want to look great when you’re getting ready, but often, the lighting is too dim, casts harsh shadows, or just looks plain wrong. Bad vanity lighting causes makeup mistakes and frustration every morning. Don’t worry! As your guide, I’m here to show you that choosing great lighting is simple once you know a few basic rules. We will break down the technical terms into easy steps so you can confidently select fixtures that make your bathroom look fantastic and work perfectly. Ready to banish those bathroom shadows for good? Let’s dive into the essentials of how to choose vanity lighting.
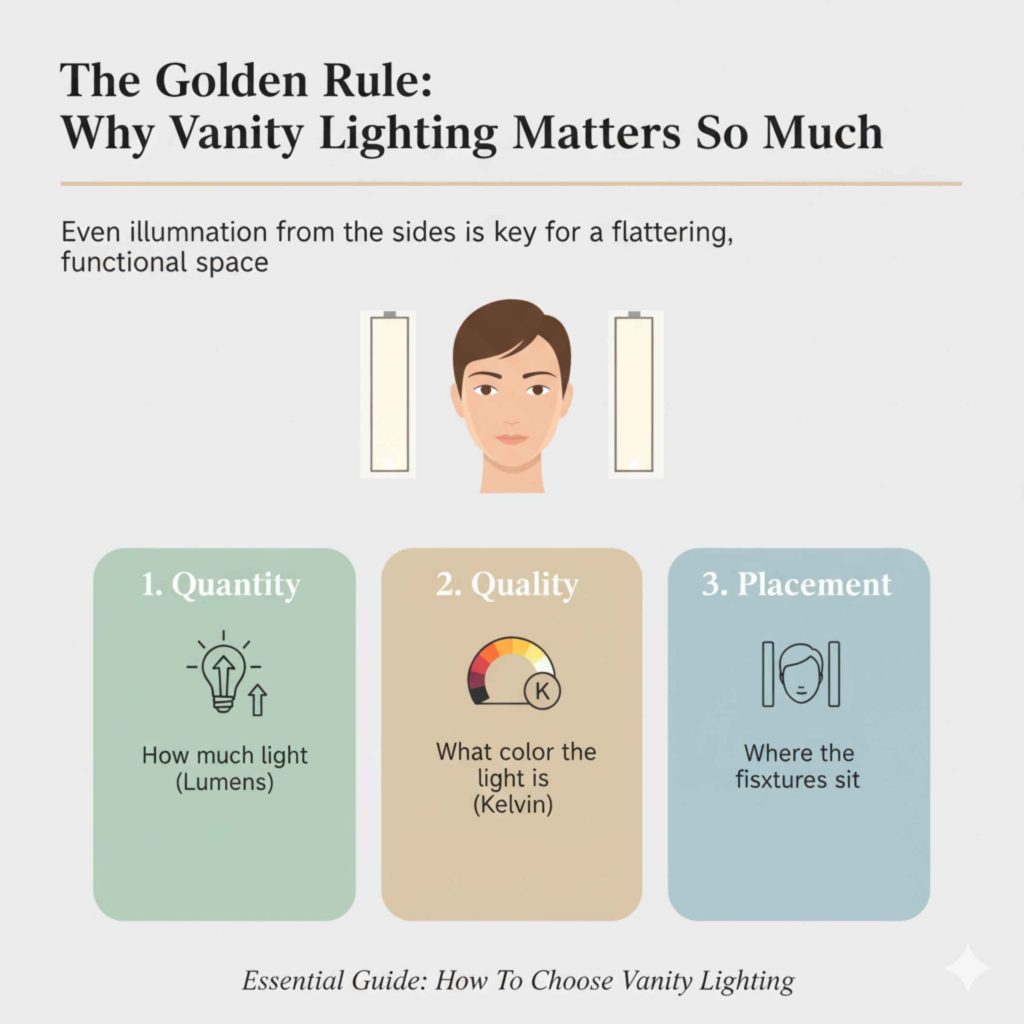
The Golden Rule: Why Vanity Lighting Matters So Much
The bathroom vanity area is where you perform your most detailed grooming tasks: shaving, applying makeup, styling hair, and checking your appearance. Unlike overhead ceiling lights, which cast shadows right down your face (making you look tired or uneven), good vanity lighting illuminates you evenly from the sides. This is the secret to a flattering, functional space.
When we talk about choosing vanity lighting, we are really talking about three main things:
- Quantity: How much light you need (measured in lumens).
- Quality: What color the light looks like (measured in Kelvin).
- Placement: Where the fixtures sit relative to your face.
Getting these three right means you’ll never struggle to see clearly in your bathroom again. Safety and good looks go hand-in-hand here!
Step 1: Understanding Light Output (Brightness and Lumens)
When you shop for light bulbs today, you rarely see wattage anymore—you see lumens. Wattage tells you how much energy a bulb uses; lumens tell you how much light it actually puts out. For your vanity, you need enough lumens to see clearly without being blindingly bright.
Lumens: Your New Best Friend
Think of lumens as the amount of light power. More lumens mean a brighter bulb. For general bathroom lighting, experts often recommend a base level of light. For task lighting like a vanity, you need more concentrated brightness.
Here is a simple guideline for the total lumens you should aim for above and around your vanity:
| Bathroom Size (Approximate) | Recommended Total Lumens | Equivalent Incandescent Wattage |
|---|---|---|
| Small (Under 40 sq ft) | 1,500 – 2,000 Lumens | 100W – 150W |
| Medium (40 – 100 sq ft) | 2,000 – 3,000 Lumens | 150W – 200W |
| Large (Over 100 sq ft) | 3,000+ Lumens | 200W+ |
Pro Tip for DIYers: If you are replacing old fixtures, look at the existing light output and try to match or slightly exceed it, especially if you feel the current light is too dim. Always check the packaging of the new fixture to see the total lumen output it provides.
Dimmers: Controlling the Power
One of the best investments you can make is installing a dimmer switch. Dimmers let you control the lumens based on the task. You might want 100% brightness for tweezing eyebrows, but only 30% for a relaxing evening bath.
When buying bulbs or LED fixtures, make sure they are explicitly labeled as “Dimmable.” If you use non-dimmable LEDs on a dimmer switch, they will buzz, flicker, or burn out quickly. It’s a common mistake, so double-check!
Step 2: Choosing the Right Color Temperature (Kelvin)
This is where many homeowners get confused, but it’s crucial for how you look in the mirror. Color temperature is measured in Kelvin (K) and describes whether the light appears warm (yellow/orange) or cool (blue/white).
For the bathroom vanity, you need light that mimics natural daylight as closely as possible so that your makeup or shave looks correct indoors and outdoors.
The Kelvin Scale Breakdown
Here is what you need to know about Kelvin ratings:
- 2700K (Warm White): This is a cozy, yellowish light, perfect for living rooms or bedrooms. It’s too warm for a vanity as it can make skin tones look sallow or yellow.
- 3000K (Soft/Neutral White): This is a great starting point for bathrooms. It’s a clean, slightly warm light that feels inviting but still offers good visibility.
- 3500K – 4000K (Cool White/Daylight): This range is generally considered the sweet spot for task lighting in a bathroom. It’s bright, crisp, and shows true colors. This is what professional makeup artists often prefer.
- 5000K+ (Bright Daylight/Blue-White): This is very cool and can sometimes feel harsh or clinical, like an office or hospital. While great for detail work, it might be too stark for everyday use unless you prefer a very modern, bright look.
My Recommendation: Aim for light bulbs or integrated LEDs between 3000K and 4000K for the most flattering and accurate illumination at your vanity.
Color Rendering Index (CRI): Seeing True Colors
Another important, though less talked about, factor is the Color Rendering Index (CRI). This measures how accurately a light source reveals the true colors of objects compared to natural sunlight (which has a CRI of 100).
For tasks where color accuracy is vital—like matching foundation or checking clothing colors—a high CRI is essential. Look for bulbs or fixtures with a CRI of 90 or higher. Anything below 80 can distort colors, meaning your foundation might look fine in the bathroom but terrible once you step outside.
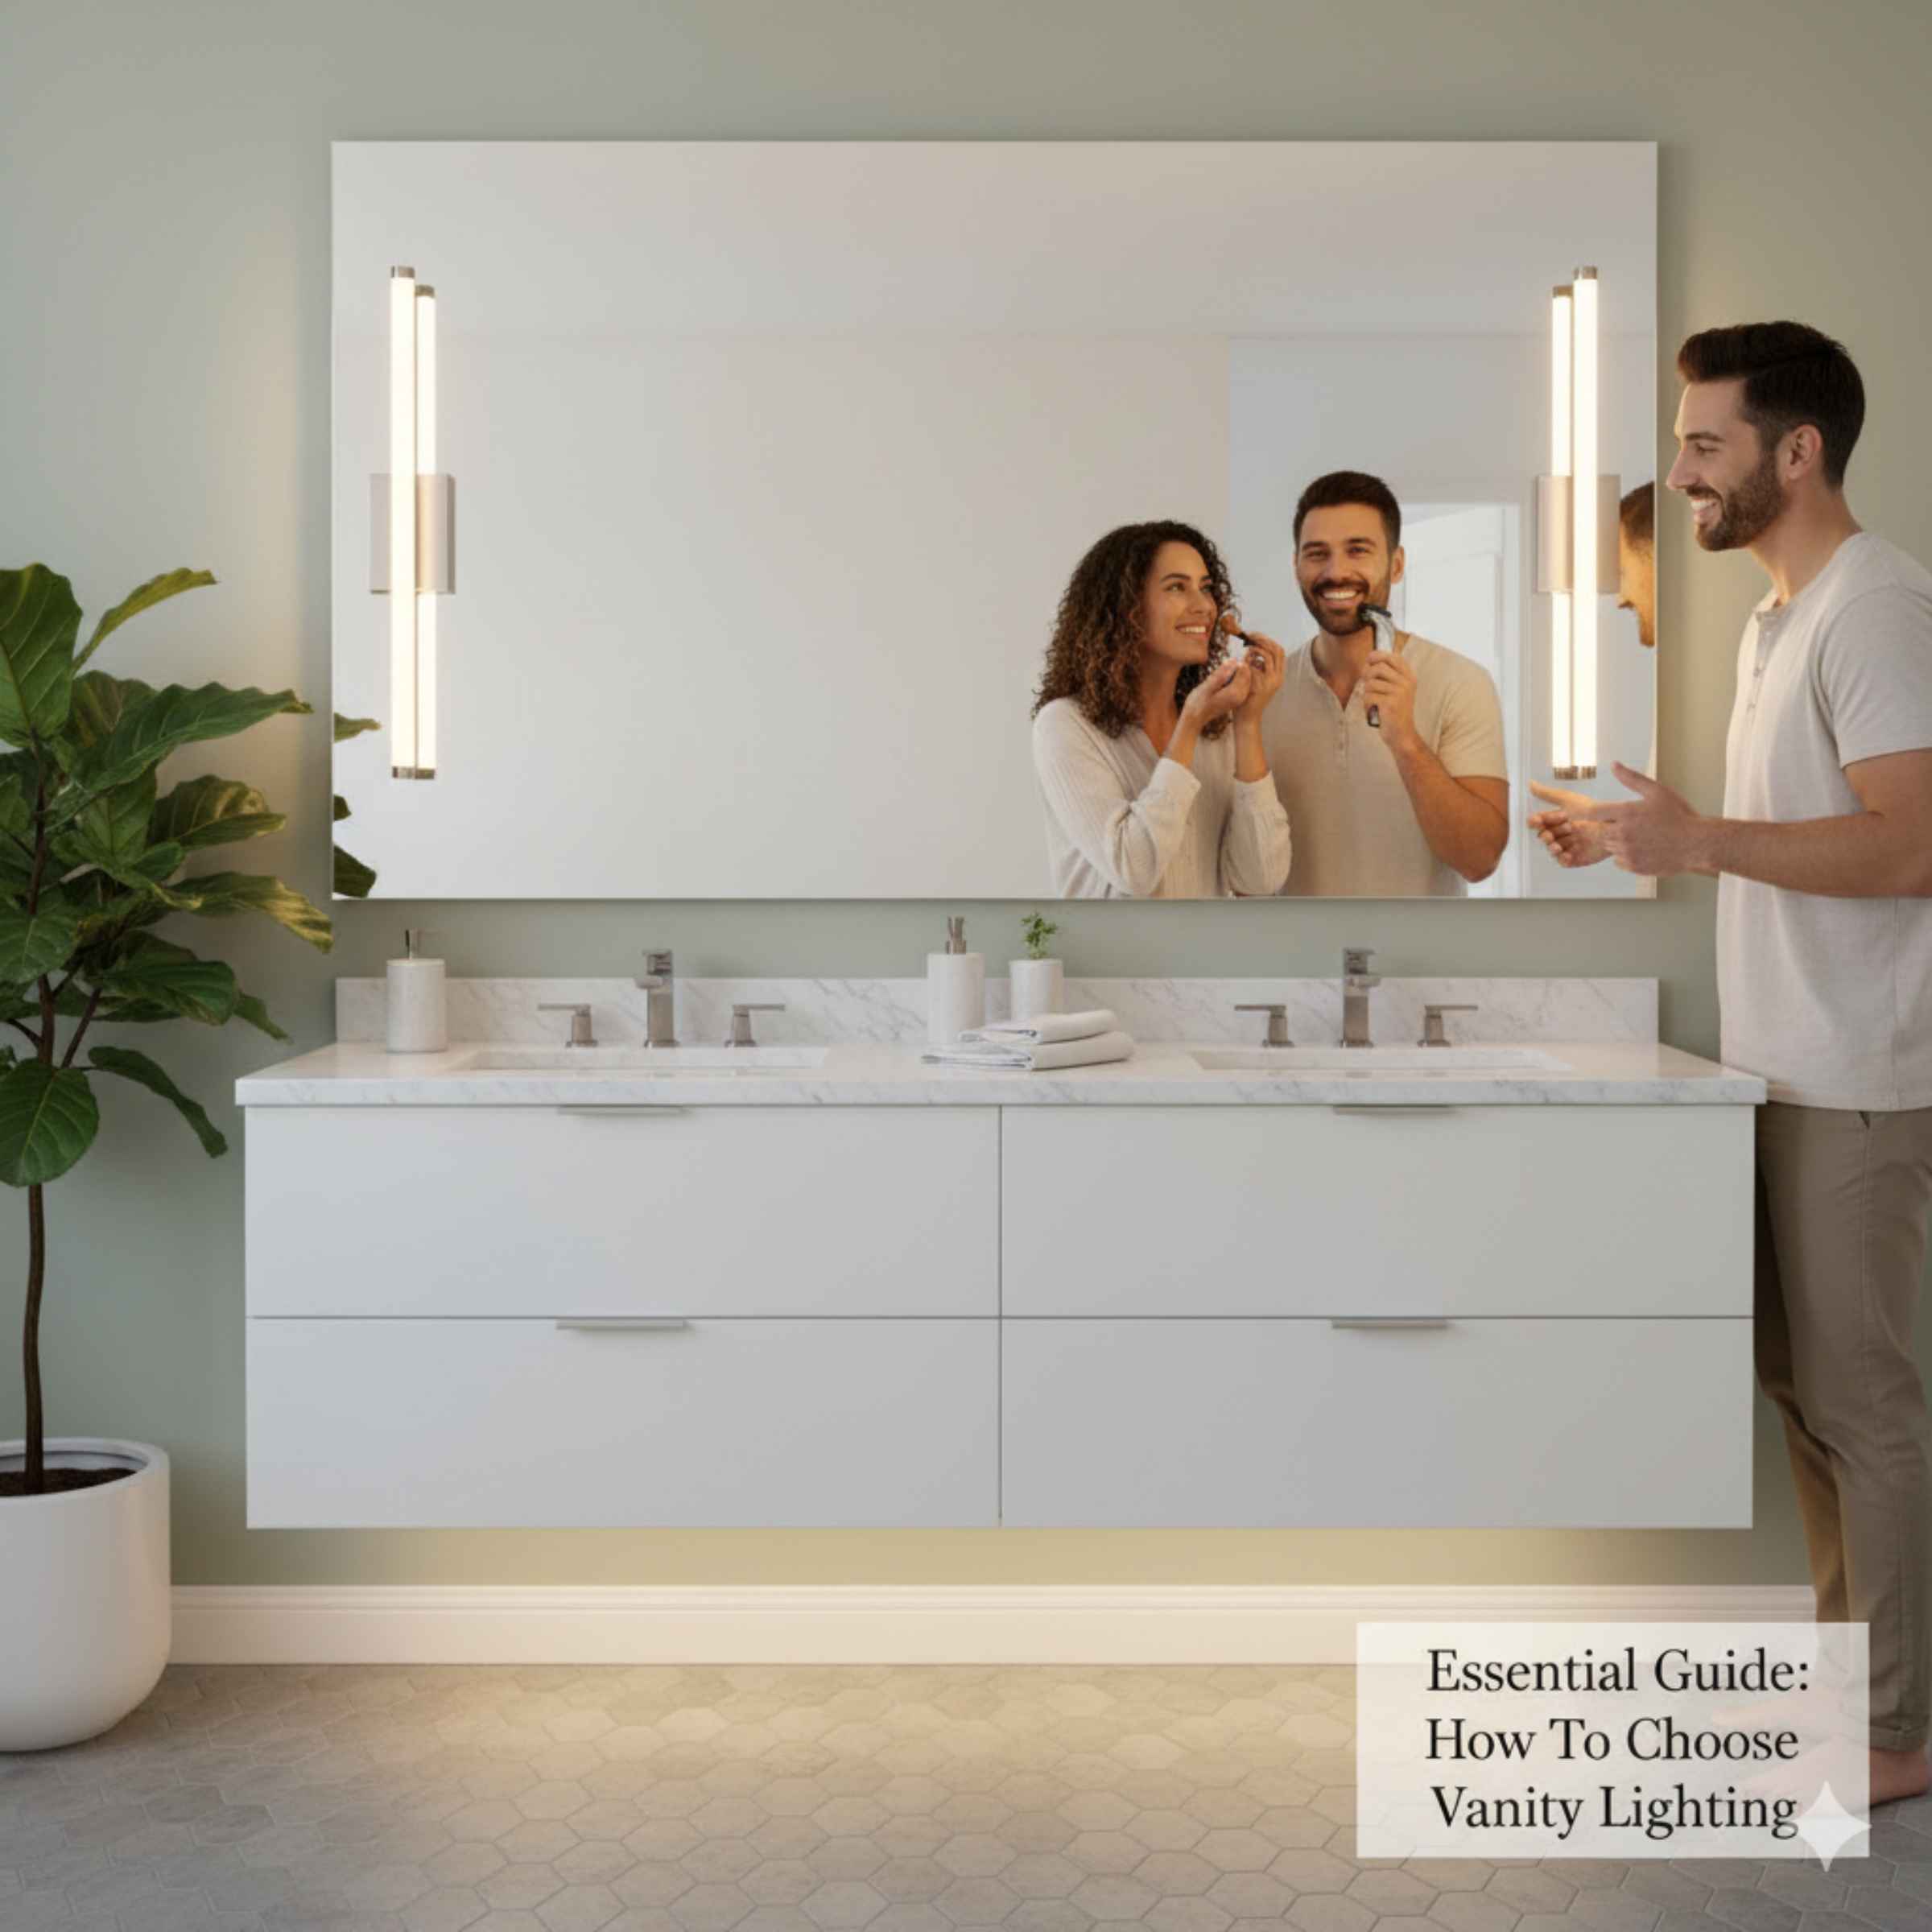
Step 3: Mastering Fixture Placement and Style
The best bulbs in the world won’t help if the light fixture is placed incorrectly. Placement is critical for avoiding shadows on your face. This is the biggest mistake DIYers make when upgrading their vanity lighting.
The Shadow Problem: Why Overhead Only Fails
If you only have a single light fixture directly above the mirror (a “Hollywood strip” light or a recessed can light), the light shines straight down. This creates deep, unflattering shadows under your eyes, nose, and chin. It’s like standing under a single spotlight!
The Ideal Solution: Sconces on Both Sides
The gold standard for vanity lighting is having two fixtures placed on either side of the mirror, at eye level.
- Even Illumination: Side lighting washes light evenly across your face from both directions, eliminating harsh shadows.
- Height Matters: The center of the light source should generally be positioned about 60 to 65 inches from the floor, which is usually right around eye level for most adults.
- Distance: The sconces should ideally be 28 to 32 inches apart, flanking the mirror, and usually 4 to 6 inches away from the edge of the mirror.
If side sconces are impossible due to space or plumbing, the next best option is a long horizontal bar fixture mounted above the mirror, positioned about 77 to 80 inches from the floor, and it must be wide enough to cover the width of the mirror and the person standing in front of it.
Choosing Fixture Styles
Now that you know where the light needs to come from, you can choose the style. Remember, the fixture is also part of your bathroom décor!
Types of Vanity Fixtures:
- Wall Sconces: These are mounted vertically on either side of the mirror. They look custom and provide the best light quality.
- Vanity Bars/Strip Lights: These mount horizontally above the mirror. They are popular in smaller bathrooms or over medicine cabinets.
- Medicine Cabinet Lights: Modern recessed medicine cabinets often include integrated LED lighting that is designed to provide good front-facing light.
When selecting a fixture, consider the finish (chrome, brushed nickel, matte black) to match your faucets and hardware. Also, think about the shade material. Glass shades diffuse the light softly, while metal shades direct it more specifically. For makeup application, diffused light is usually kinder.
Step 4: Sizing Fixtures to Your Vanity and Mirror
The size of your lighting fixture should relate directly to the size of your mirror and vanity cabinet. You don’t want a tiny light over a huge mirror, or a massive fixture crowding a small sink.
Mirror-to-Fixture Ratio Guidelines
A good rule of thumb is that the total width of your lighting fixture (or the combined width of two sconces) should be between 2/3 and 3/4 the width of the mirror below it.
| Mirror Width | Recommended Total Fixture Width (or combined sconce width) |
|---|---|
| 24 inches | 16 to 18 inches |
| 36 inches | 24 to 27 inches |
| 48 inches | 32 to 36 inches |
| 60 inches (Double Sink) | 40 to 45 inches |
If you are using two side sconces, measure the distance between the centers of the sconces—this is the width you are balancing against the mirror size. Always look at the physical dimensions of the fixture before purchasing!
Step 5: Considering Bathroom Environment and Safety
The bathroom is a wet environment, so safety is non-negotiable. You must look for fixtures rated for damp or wet locations.
Understanding IP Ratings and UL Listings
When installing electrical components near water, look for these safety certifications:
- UL Listed: This means the product has been tested by Underwriters Laboratories (a recognized safety organization) and meets US safety standards.
- Damp-Rated or Wet-Rated: Fixtures designed for bathrooms should be at least “damp-rated,” meaning they can handle humidity and moisture. If the light is very close to a shower or bathtub area, it must be “wet-rated.” For standard vanity placement (away from direct spray), damp-rated is usually sufficient, but always check the manufacturer’s specifications.
For peace of mind regarding electrical safety standards in construction and renovation, you can reference guidelines from organizations like the International Association of Plumbing and Mechanical Officials (IAPMO), which helps set standards for safe installation practices.
LED vs. Traditional Bulbs
Today, most new vanity fixtures use integrated LEDs, meaning the light source is built into the fixture and isn’t replaceable. If the fixture uses standard sockets (like E26), you can choose LED replacement bulbs.
Why LEDs are generally better for vanities:
- Longevity: They last for years, meaning less ladder climbing to change bulbs.
- Instant On: No warm-up time needed to reach full brightness.
- Efficiency: They use much less energy to produce the same amount of light (lumens).
- Heat: They run much cooler than old incandescent bulbs, which is safer and more comfortable when standing close to them.
Quick Comparison: Lighting Styles for Different Needs
Depending on your specific needs—whether you have a tiny powder room or a large master bath—different layouts might work best. Here is a quick guide based on common bathroom scenarios:
| Scenario | Best Placement Strategy | Why It Works |
|---|---|---|
| Small Powder Room (No space for sconces) | Single wide bar light centered above the mirror. | Maximizes light spread across a small area without crowding the sink. |
| Standard Bathroom (Single sink) | Two vertical sconces flanking the mirror. | Provides the optimal, shadow-free illumination for grooming tasks. |
| Large Master Bath (Double sink) | Two pairs of sconces, or one large fixture above each sink area. | Ensures both users have adequate, dedicated task lighting. |
| Modern/Minimalist Design | Integrated LED strips hidden behind the mirror (backlighting). | Creates a floating, diffused glow, though side lighting might still be needed for task work. |
DIY Installation Confidence: What You Need to Know
If you are comfortable working with basic electrical fixtures (and you always turn off the power at the breaker first!), installing new vanity lighting is a very achievable DIY project. Here are the tools you’ll likely need:
Essential Tools for Light Fixture Swap:
- Non-contact voltage tester (Crucial for safety!)
- Screwdrivers (Phillips and flathead)
- Wire strippers/cutters
- Electrical tape
- Ladder or sturdy step stool
- Wire nuts (often provided with the new fixture)
Safety First Reminder: Before touching any wires, locate the correct circuit breaker and switch the power OFF. Use your non-contact voltage tester on the existing fixture wires to confirm absolutely no power is running to them. This simple step prevents serious injury.
When installing new sconces, you will often need to patch or paint drywall if the new fixture doesn’t perfectly cover the old mounting holes. A little drywall repair makes the finished job look truly professional!

Frequently Asked Questions (FAQ) About Vanity Lighting
Q1: What is the standard height to hang vanity lights above a mirror?
A: If you are using side sconces, the center of the light should be about 60 to 65 inches from the floor (eye level). If you are using a single bar light above the mirror, aim for 77 to 80 inches from the floor.
Q2: Can I use bright, blue-toned lights (5000K) in my bathroom?
A: You can, but most people find them too harsh for daily use. 5000K light is excellent for detail work, but 3500K to 4000K provides bright, clear light that is much more flattering to skin tones for everyday grooming.
Q3: Do I need special bulbs if my fixture has a glass shade?
A: Yes, especially if the shade is frosted or opaque. Frosted glass diffuses light, which is good, but you might need a higher lumen bulb to compensate for the light being slightly blocked. Also, ensure the bulb shape (like a standard A19 or a torpedo shape) fits inside the glass enclosure.
Q4: What is the difference between task lighting and ambient lighting in the bathroom?
A: Ambient lighting is the general, overall light in the room (usually a ceiling fixture). Task lighting is focused, bright light meant for specific jobs, like the illumination provided directly at the vanity mirror for applying makeup or shaving.
Q5: If my vanity is very narrow (less than 24 inches wide), what light setup is best?
A: For very narrow vanities, avoid two wide sconces. Instead, use one narrow, vertical light fixture on each side of the mirror, or opt for a compact, vertically oriented bar light mounted above the mirror that matches the scale of the sink area.
Q6: How do I ensure my vanity light matches the overhead light color?
A: The easiest way is to use the same Kelvin rating (e.g., 3500K) for all primary visible lights in the bathroom. If your overhead fixture is fixed LED and your vanity light uses replaceable bulbs, simply buy bulbs with the matching Kelvin rating.
Conclusion: Lighting Your Way to a Better Morning
Choosing the perfect vanity lighting isn’t about following complex electrical codes; it’s about balancing light output, color quality, and placement to suit your daily routine. Remember the core lessons we covered: aim for adequate brightness (1500+ lumens), select a crisp, neutral color temperature (3000K–4000K), and prioritize side lighting for shadow-free results.
By focusing on these practical steps, you move beyond just buying a fixture and start designing a truly functional space. You now have the knowledge to confidently select lights that flatter you, illuminate your tasks perfectly, and add a polished, professional touch to your bathroom upgrade. Go ahead, pick out those beautiful new fixtures—you’ve earned a bright start to every day!