
Hey there! So, your toilet’s water supply valve is leaking or not working properly, and you’re wondering how to replace it? I’ve been in your shoes, and let me tell you, fixing it yourself is such a rewarding project. A couple of years ago, I noticed water pooling around the base of my toilet, and it turned out to be a faulty valve. Instead of calling a plumber, I rolled up my sleeves and replaced it for under $20. Now, I’m excited to share everything I’ve learned with you!
Whether you’re dealing with a drip, a stuck valve, or an old one, this guide will walk you through how to change a toilet water supply valve step by step. It’s perfect for anyone in the USA who wants to save money and feel like a home repair champ. Grab a wrench, and let’s get that toilet fixed!
Why Changing a Toilet Water Supply Valve Matters
Let’s start with why this little valve is such a big deal. The water supply valve controls the water flow to your toilet’s tank. If it’s leaking or broken, you could have a mess on your hands—literally. I learned this when my valve started dripping, wasting water and increasing my bill. A faulty valve can also make it hard to shut off water for repairs, which is a headache if your toilet starts acting up.
Fixing it yourself saves money. Plumbers can charge $100-$200 for this job, but I did it for the cost of a new valve and some basic tools. It also prevents water damage to your floor and gives you confidence in handling home repairs. Plus, it’s a quick project that makes your bathroom work like a dream. Ready to get started? Let’s figure out what’s wrong first.
Diagnosing the Issue with Your Valve
Before you replace the valve, you need to know what’s wrong. I made the mistake of buying a new valve without checking, and it turned out my old one just needed tightening. Here’s how I diagnose the problem:
- Look for leaks: Check around the valve for water. I found a small puddle under my toilet where the valve connected to the pipe.
- Test the shut-off: Turn the valve handle clockwise to see if it stops water flow. Mine wouldn’t turn fully, which meant it was corroded inside.
- Check for stiffness: If the valve is hard or stuck, it’s likely rusted or mineralized. My old valve was so crusty it barely moved.
- Inspect connections: See if the valve’s connection to the tap or supply line is loose. I noticed my supply line was frayed, so I replaced it too.
Understanding the issue helps you choose the right fix. It’s like figuring out why your car’s making a funny noise—you need to know the problem to solve it.
Tools and Materials You’ll Need
Having the right tools makes this job a breeze than my first attempt. I tried using a kitchen spoon at one point—don’t do that! Here’s what I use now:
- Adjustable wrench: To loosen and turn bolts and fittings. I bought one for $10.
- New water supply valve: A 1/4-turn or compression ball valve for $5-$15, depending on your setup.
- Replacement supply line: A flexible braided hose, about $8. I got one to match my new faucet.
- Plumber’s tape (Teflon tape): To seal threaded connections. A $2 roll of tape is plenty.
- Bucket and towel: To catch water spills. I learned this after soaking my floor.
- Pipe cutter or hacksaw: If cutting pipe is needed, I used a $15 pipe cutter.
- Gloves: To keep your hands clean from rust or grime. I use cheap rubber gloves.
- Optional: Pipe brush or sandpaper: To clean pipe ends. I had these at home.
My total cost was about $25, and most tools are reusable. Check your toilet’s pipe size (usually ½ inch) and valve type before buying to avoid trips to the store.
Preparing to Replace the Valve
Before you start wrenching, you need to set up your workspace. I skipped this once, and water went everywhere. Here’s how I prep now:
- Turn off the main water supply: Find the main shut-off valve for your house, usually in the basement or near the water meter. I turned mine off to stop all water flow.
- Drain the toilet: Flush the toilet to empty the tank and hold the flush valve down. I also opened a nearby faucet to drain pipes.
- Place a bucket and towel: Put a bucket under the valve to catch drips and a towel to mop up. This saved my floor from a small spill.
- Remove standing water: If water’s pooled around, use a towel or sponge to dry the area. I had a little puddle from the leak.
This prep takes 5 minutes but makes the job cleaner and safer. It’s like setting up your toolbox before working on your car—organization is key!
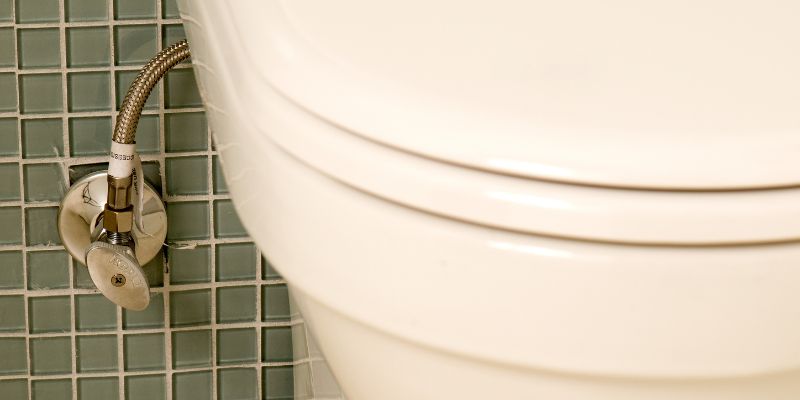
Method 1: Replacing a Compression Valve
Most toilets have a compression valve, and this is what I replaced in my bathroom. It’s straightforward if you take it slow. Here’s how I did it:
- Shut off water: Confirm the main water is off. I double-checked by trying to flush—no water meant I was good.
- Disconnect the supply line: Use a wrench to loosen the nut connecting the supply line to the valve. I turned it counterclockwise and caught drips with my bucket.
- Remove the old valve: Loosen the compression nut where the valve meets the pipe. Mine was tight, so I used two wrenches—one to hold the pipe, one to turn the nut. Slide the valve off.
- Clean the pipe: I used a pipe brush to clean the pipe end. This ensures a tight seal for the new valve.
- Install the new valve: Slide the new compression nut and ring onto the pipe, then attach the valve. I tightened the nut by hand, then used a wrench for a snug fit.
- Attach the supply line: Wrap plumber’s tape around the valve’s threads and screw on the new supply line. I tightened it with a wrench but didn’t overtighten.
- Turn on water and test: Slowly turn the main water back on and check for leaks. I found a small drip and tightened the nut a bit more.
This took me about 30 minutes, and my toilet was leak-free. It’s the most common method and works for most home toilets.
Method 2: Replacing a Quarter-Turn Ball Valve
Some newer toilets use a quarter-turn ball valve, which I replaced in my guest bathroom. It’s similar but slightly different. Here’s the process:
- Turn off water: Make sure the main water supply is off. I flushed the toilet to confirm.
- Remove the supply line: Loosen the nut connecting the supply line with a wrench. I caught a few drops with my towel.
- Remove the old valve: These valves often screw directly onto the pipe. I turned mine counterclockwise with a wrench to remove it. If it’s soldered, you’ll need to cut the pipe (see Method 3).
- Prep the pipe: I cleaned the pipe threads with a wire brush to ensure a good seal.
- Install the new valve: Wrap plumber’s tape around the pipe threads and screw on the new valve. I tightened it by hand, then used a wrench for a firm hold.
- Reconnect the supply line: Attach the new supply line with plumber’s tape on the valve’s threads. I tightened it securely.
- Test for leaks: Turn the water back on slowly and watch for drips. Mine was perfect, but I checked all connections just in case.
This took 25 minutes and was a bit easier than the compression valve. It’s great for newer homes with modern plumbing.
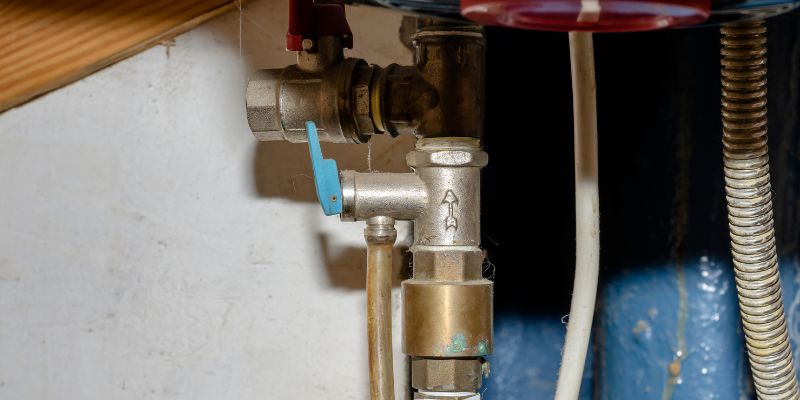
Method 3: Replacing a Soldered Valve
If your valve is soldered onto a copper pipe, it’s a bit trickier. I had to do this in an older rental house. Here’s how I managed:
- Shut off water: Turn off the main water supply and drain the pipes. I opened a faucet to make sure.
- Disconnect the supply line: Loosen the nut with a wrench and remove the supply line. I set it aside with my bucket underneath.
- Cut the pipe: Use a pipe cutter or hacksaw to cut the pipe just below the valve. I used a $15 pipe cutter for a clean cut.
- Remove the old valve: Heat the soldered joint with a propane torch to melt the solder, then pull off the valve. I wore gloves and worked in a ventilated area for safety.
- Clean the pipe: I sanded the pipe end with sandpaper to remove old solder and make it smooth.
- Install a new compression valve: Since soldering is tricky, I used a compression valve instead. I slid on the nut and ring, attached the valve, and tightened it with a wrench.
- Reconnect the supply line: Wrap plumber’s tape on the valve’s threads and attach the supply line. I tightened it securely.
- Test the system: Turn the water on and check for leaks. I had to tighten the compression nut a bit to stop a small drip.
This took about 45 minutes and was the hardest method. If you’re not comfortable with a torch, stick to a compression valve or call a pro.

Testing and Troubleshooting
After replacing the valve, you need to make sure it works. I had a few hiccups, but here’s how I test and fix issues:
- Turn on water slowly: Open the main valve gradually to avoid pressure surges. I watched for leaks as the pipes filled.
- Check for drips: Look at all connections—valve, pipe, and supply line. I found a leak at the supply line and added more plumber’s tape.
- Test the valve: Turn the new valve on and off to ensure it works smoothly. My quarter-turn valve was so easy to use compared to the old one.
- Flush the toilet: Fill the tank and flush to confirm water flows properly. I did this a few times to be sure.
- Fix loose connections: If you see leaks, tighten nuts slightly. I also rewrapped plumber’s tape on a leaky thread.
Testing takes 5 minutes but saves you from future problems. It’s like checking your car’s oil after a change—don’t skip it!
Comparing Valve Replacement Methods
To help you choose the best method, here’s a table based on my experiences:
| Method | Best For | Cost | Time Needed | Tools Needed | Difficulty |
|---|---|---|---|---|---|
| Compression Valve | Most toilets, easy install | $15-$25 | 30 min | Wrench, plumber’s tape, bucket | Medium |
| Quarter-Turn Ball Valve | Newer homes, smooth operation | $15-$30 | 25 min | Wrench, plumber’s tape, brush | Easy |
| Soldered Valve | Older homes, copper pipes | $20-$40 | 45 min | Pipe cutter, torch, wrench | Hard |
I love the quarter-turn valve for its ease, but compression valves are great for most setups. Choose based on your plumbing and comfort level.
Maintaining Your New Valve
Once your valve is replaced, a little care keeps it working great. Here’s what I do:
- Test regularly: I turn the valve on and off every few months to prevent seizing. It takes 10 seconds.
- Check for leaks: I look under the toilet monthly for drips. Catching them early saves trouble.
- Clean the valve: I wipe it with a damp rag to remove dust or grime. It keeps it looking new.
- Replace supply lines: If the line looks worn, I swap it out. I replaced mine after 5 years for $8.
These habits keep my valve reliable and my bathroom dry. It’s like checking your car’s tires—small steps prevent big problems.
Safety Tips for Replacing the Valve
Working with water and tools requires caution. Here’s what I keep in mind:
- Turn off water completely: Double-check the main shut-off to avoid surprises. I learned this after a small spray.
- Wear gloves: Protect your hands from rust or sharp pipes. I cut my finger once without gloves.
- Ventilate if soldering: If using a torch, open windows and keep a fire extinguisher nearby. I did this in my rental house.
- Keep tools organized: I lay out my tools on a towel to avoid losing them. It makes the job smoother.
These tips keep you safe and your project on track. Safety first, always!
Why I Love This Project
Changing a toilet water supply valve is one of those projects that makes you feel like a home repair hero. Every time I flush my toilet and see no leaks, I grin, knowing I did it myself. It’s not just about saving money, though I saved over $100—it’s about taking control of your home. This repair is doable for anyone with a bit of patience, and it’s so satisfying to fix a problem that could’ve been a disaster. Whether you’re stopping a leak or upgrading an old valve, you’ll love the confidence boost.
Conclusion
There you have it—a complete guide to changing a toilet water supply valve! I’ve been through the stress of a leaky valve, and I’m thrilled to share these tips with you. From picking the right valve to installing it like a pro, you’ve got everything you need to make your bathroom leak-free. This is a fun, budget-friendly project that anyone can tackle with a few tools and some time. So, grab that wrench, shut off the water, and get ready to feel like a plumbing superstar. Your toilet will work perfectly, and you’ll love the peace of mind. Happy fixing!
Frequently Asked Questions
How do I know if my toilet valve needs replacing?
If it’s leaking, stiff, or won’t shut off water, it’s time to replace it. I noticed a drip under my toilet, and that was my clue.
Can I replace the valve without turning off the main water?
No, you need to turn off the main water to avoid flooding. I tried skipping this once, and it was a wet mess.
How long does it take to change a toilet valve?
It took me 30 minutes for a compression valve and 25 for a quarter-turn. Soldered valves take about 45 minutes.
Do I need a professional for this job?
Not usually! I did it with basic tools and saved $100. If you’re nervous about soldering, a plumber can help, but it’s doable.
What if my new valve leaks after installation?
Check for loose connections and tighten them. I added more plumber’s tape to a leaky thread, and it fixed the issue.