
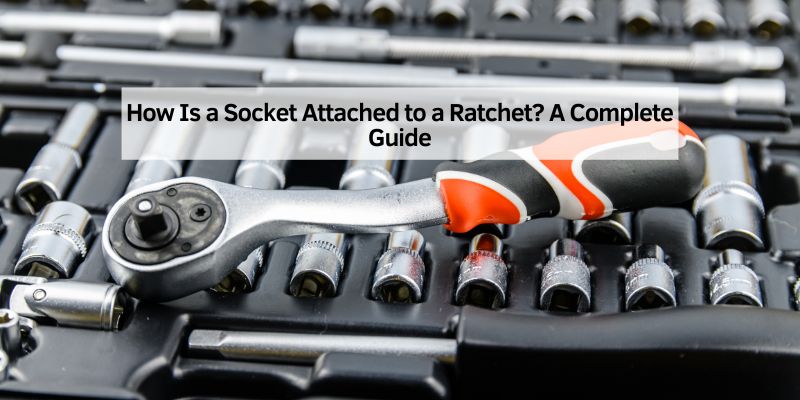
Hey there! I’m so thrilled you’re here to dive into a topic that’s near and dear to my heart: how is a socket attached to a ratchet? A few years ago, I was tinkering in my garage, trying to fix my old pickup truck, when I first picked up a ratchet and socket set. I fumbled around, unsure how to connect them properly, but after some trial and error—and a few tips from my mechanic buddy—I got the hang of it. Let me tell you, it was a game-changer!
Let’s sit down together, and I’ll walk you through everything I’ve learned about attaching a socket to a ratchet in a way that’s clear and fun, like we’re chatting over a cold soda in the shop. Whether you’re a car enthusiast or just starting with tools, you’ll be ready to tackle any bolt with confidence. Ready? Let’s get those tools clicking!
What Is a Ratchet and Socket?
First, let’s talk about the tools. A ratchet is a hand tool with a handle and a square drive head. It lets you turn bolts or nuts without removing the tool. I love how it clicks when I turn it, saving me time. The square drive is where the socket attaches.
A socket is a small, cylindrical tool that fits over a bolt or nut. It comes in different sizes to match different fasteners. My socket set has sizes from ¼ inch to 1 inch. Together, the ratchet and socket make tightening or loosening bolts a breeze. Knowing this helped me understand why attaching them correctly is so important.
Why Proper Attachment Matters
Getting the socket attached right is a big deal. When I first started, I loosely attached a socket, and it fell off mid-turn. Not only was it frustrating, but it could’ve damaged my truck’s bolts. A secure connection ensures the socket stays put, so you work efficiently.
It’s also about safety. A loose socket can slip, causing injury to your hand or damaging the bolt. I learned this when I rounded a bolt head by mistake. Proper attachment saves time, protects your tools, and keeps your project on track. I always double-check the connection now.
Types of Ratchet Drives
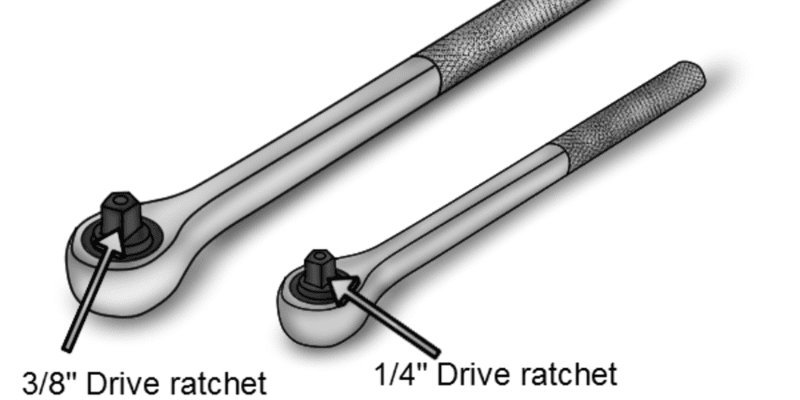
I found out ratchets come with different drive sizes. The drive is the square part where the socket attaches. Here’s what I learned:
- ¼-Inch Drive: Small and great for tiny bolts, like on my motorcycle. It’s delicate but precise.
- ⅜-Inch Drive: The most common for car repairs. I use it for most jobs on my truck.
- ½-Inch Drive: Heavy-duty for big bolts, like on my trailer hitch. It’s strong but bulky.
- ¾-Inch Drive: Rare for home use, more for industrial work. I’ve never needed one.
Each drive size matches the sockets of the same size. I check the drive size on my ratchet before picking a socket. Mixing sizes won’t work, so I keep them organized.
Types of Sockets
Sockets vary, too, and I explored a bunch. Here’s what I use:
- Standard Sockets: Fit most bolts, like on my car’s battery. They’re 1-2 inches deep.
- Deep Sockets: Longer for bolts with long threads, like on my wheel hubs. They’re 3-4 inches deep.
- Impact Sockets: Tough for use with power tools. I got one for my impact wrench.
- Spark Plug Sockets: Thin with a rubber insert for spark plugs. I used one on my truck’s engine.
- Swivel Sockets: Flexible for angled bolts. I tried one on a tight engine bolt.
Each socket has a square hole that fits the ratchet’s drive. I make sure the socket’s drive size matches my ratchet’s.
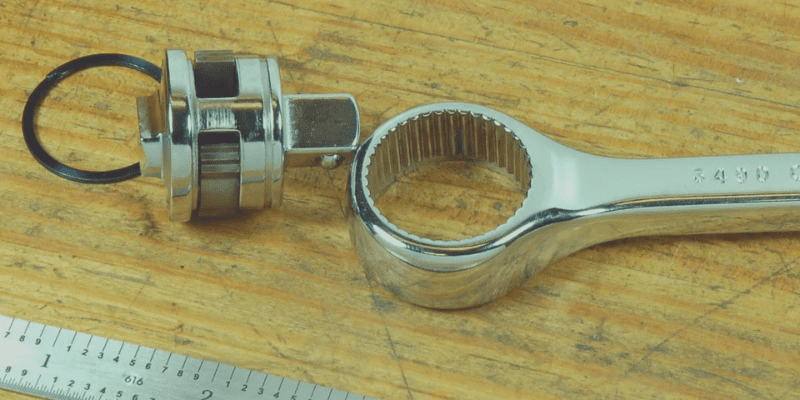
How a Socket Attaches to a Ratchet
Attaching a socket is simple once you know how. The ratchet’s drive has a spring-loaded ball, called a detent. I push the socket onto the drive, and the ball clicks into a groove inside the socket. It locks in place with a satisfying snap.
To attach it, I line up the socket’s square hole with the ratchet’s drive. I push firmly until I hear the click. I give it a gentle tug to check it’s secure. To remove it, I pull the socket off. Some ratchets have a release button—I press it to make removal easier. I practiced this in my garage, and it’s second nature now.
Step-by-Step Guide to Attaching a Socket
Here’s how I do it, step by step:
- Pick the Right Socket: I choose a socket that matches the bolt size. For a ½-inch bolt, I grab a ½-inch socket.
- Check Drive Size: I ensure my ratchet’s drive (like ⅜ inch) matches the socket’s drive.
- Align the Socket: I hold the socket’s square hole over the ratchet’s drive.
- Push to Click: I press the socket onto the drive until it snaps in place.
- Test the Connection: I tug lightly to confirm it’s locked.
- Set Ratchet Direction: I flip the ratchet’s switch to tighten or loosen.
- Use on Bolt: I place the socket over the bolt and turn the ratchet.
This takes 10 seconds once you’re used to it. I always check the fit before starting work.
Table: Ratchet Drive and Socket Compatibility
Here’s a table I made to keep things clear:
| Drive Size | Common Uses | Socket Types Available | My Experience |
|---|---|---|---|
| ¼ Inch | Small bolts, electronics | Standard, deep, spark plug | Perfect for my motorcycle |
| ⅜ Inch | Car repairs, general use | Standard, deep, impact | My go-to for most truck fixes |
| ½ Inch | Large bolts, heavy equipment | Standard, deep, impact | Used on my trailer hitch |
| ¾ Inch | Industrial, heavy machinery | Standard, impact | Never needed, too big for home |
This helps me pick the right combo for any job.
Tools and Supplies You Need
I gathered a few things for attaching sockets. Here’s my list:
- Ratchet Wrench: I use a ⅜-inch drive ratchet. It cost $20.
- Socket Set: Mine has ¼ to 1-inch sockets for $30.
- Extension Bar: Reaches tight spots. I got one for $10.
- Universal Joint: For angled bolts. It was $8.
- Gloves: Protect my hands. I spent $5.
- Rag: Cleans grease off tools. I used an old one.
I spent $73 total, but these tools last for years. A good socket set is worth every penny.
Common Mistakes to Avoid
I made some rookie errors at first. Here’s what to watch out for:
- Wrong Drive Size: I tried a ¼-inch socket on a ⅜-inch ratchet. It didn’t fit.
- Loose Connection: A socket fell off because I didn’t push hard enough. I check the click now.
- Wrong Socket Size: I grabbed a 13mm socket for a ½-inch bolt. It slipped and rounded the bolt.
- Forcing the Ratchet: I turned the wrong way once, stripping a bolt. I set the direction first.
- Dirty Tools: Grease made my socket slip. I clean them with a rag.
Avoiding these saves time and frustration. I learned to slow down and double-check.
Using Extensions and Accessories
Sometimes, I need extra reach. That’s where extensions come in. I attach a 3-inch extension between the ratchet and socket. It clicks onto the ratchet’s drive, then the socket clicks onto the extension. I used one to reach a bolt deep in my engine bay.
A universal joint is another helper. It bends for angled bolts. I used it on my truck’s transmission. Both accessories use the same click-on system as sockets. They cost $8-$15 and make tough jobs easier. I keep them in my toolbox for tricky spots.
Maintaining Your Ratchet and Sockets
I want my tools to last, so I take care of them. Here’s my routine:
- Clean After Use: I wipe grease off with a rag. It takes 2 minutes.
- Lubricate Ratchet: I add a drop of oil to the ratchet head yearly. Oil costs $5.
- Store Properly: I keep my set in a toolbox to prevent rust. It was $50.
- Check for Wear: I inspect sockets for cracks. I replaced a worn one for $3.
- Organize Sockets: I use a socket organizer for $10 to avoid losing them.
This takes 10 minutes a month and keeps my tools like new. A clean ratchet clicks better.
Safety Tips for Using a Ratchet and Socket
I stay safe while working. Here’s how:
- Wear Gloves: Protect my hands from sharp bolts.
- Use Safety Glasses: Shield my eyes from debris. They cost $5.
- Check Connection: I ensure the socket’s locked to avoid slips.
- Don’t Force It: I stop if a bolt’s stuck and use penetrating oil.
- Work on Stable Surface: I secure my car with jack stands. They’re $30.
These keep me injury-free. I learned safety first after a close call with a slipping socket.
Troubleshooting Attachment Issues
Sometimes, things go wrong. Here’s how I fix them:
- Socket Won’t Click On: Dirt was in the drive. I cleaned it with a rag.
- Socket Stuck: The detent ball jammed. I pressed the release button and wiggled it off.
- Wrong Size Socket: I grabbed a metric socket for a standard bolt. I switched to the right one.
- Ratchet won’t turn: The direction was wrong. I flipped the switch.
- Socket Falls Off: I didn’t push hard enough. I reattached and checked the snap.
Taking a moment to troubleshoot saves headaches. I keep a calm head and check the basics.
Costs of Using a Ratchet and Socket
I tracked my expenses. Here’s the breakdown:
- Ratchet: $15-$50. I paid $20.
- Socket Set: $20-$100. Mine was $30.
- Accessories: Extension ($10), universal joint ($8). Total: $18.
- Tools: Gloves ($5), glasses ($5), toolbox ($50). Total: $60.
- Maintenance: Oil ($5), rag ($0), organizer ($10). Total: $15.
I spent $143 total. These tools last decades, so it’s a great investment. Borrowing from a friend can save cash if you’re starting out.
Environmental Impact of Using Ratchets and Sockets
I care about the planet, so I looked at the impact. My steel tools are recyclable. I reuse them for years, reducing waste. I use a rag instead of disposable wipes for cleaning. I also fix my truck instead of buying a new one, saving resources. It’s a small way to keep my garage green.
When to Upgrade Your Ratchet and Socket Set
I love my set, but sometimes an upgrade helps. I’d get a new one if:
- Worn Ratchet: Mine clicks smoothly, but a loose one needs replacing.
- Missing Sizes: I bought extra sockets for odd bolts. They’re $3 each.
- Heavy-Duty Jobs: A ½-inch drive is better for big bolts. I got one for $25.
- Power Tools: An impact wrench needs impact sockets. I spent $40 on a set.
- Better Grip: A comfort-grip ratchet is easier on the hands. I’m eyeing one for $30.
I upgraded my ⅜-inch set with deep sockets for $20. It made the engine work easier.
Why Mastering This Skill Rocks
Attaching a socket to a ratchet is a skill I’m proud of. It’s simple but opens up endless repairs. I fixed my truck’s brakes, saved hundreds on mechanic fees, and felt like a pro. It’s empowering to tackle car projects yourself. Plus, it’s fun to hear that ratchet click!
Wrapping It Up
So, how is a socket attached to a ratchet? It’s as easy as pushing the socket onto the ratchet’s drive until it clicks, thanks to a spring-loaded ball. I went from fumbling with my first socket set to confidently fixing my truck in my garage. By picking the right socket, checking the drive size, and giving it a firm push, you can master this in seconds. Grab your ratchet, snap on a socket, and start turning those bolts—you’ve got this! Your car will thank you, and you’ll love the DIY pride. Thanks for diving into this with me—here’s to clicking ratchets and smooth repairs!
FAQs
How do I know if my socket is attached properly?
I push it onto the ratchet’s drive until it clicks. I tug gently to make sure it’s locked.
Can I use a ¼-inch socket on a ⅜-inch ratchet?
No, it won’t fit. I match the socket’s drive size to the ratchet’s, like ⅜ inch to ⅜ inch.
Why does my socket keep falling off?
It might not be pushed on fully. I ensure it snaps in place. Dirt in the drive can also cause issues, so I clean it.
How much does a ratchet and socket set cost?
I spent $50 on a ratchet and socket set. Basic sets start at $30, but fancy ones can hit $100.
Do I need special sockets for a power tool?
Yes, I use impact sockets with my impact wrench. They’re tougher and cost $5-$10 each.