
Fret saws are best for intricate, detailed curves and delicate work, while coping saws excel at cutting curves in larger pieces, especially for joinery. Both are hand saws, but their blade types and frame designs make them suited for different tasks.
Ever stood in the hardware store, staring at two saws that look pretty similar, wondering which one is right for your project? You’re not alone! Fret saws and coping saws often get mixed up, and for good reason – they’re both fantastic hand saws for making curved cuts. But knowing the difference between a fret saw vs coping saw can save you a lot of frustration and lead to much cleaner, more accurate results. Whether you’re crafting a delicate wooden inlay, building a birdhouse, or tackling some basic joinery, picking the right saw is key. Let’s dive in and clear up the confusion so you can confidently choose the perfect saw for your next woodworking adventure!
We’ll break down exactly what each saw is, what they’re great at, and how to use them effectively. By the end, you’ll be a pro at spotting the differences and knowing which tool to grab!
Understanding the Basics: What is a Fret Saw?
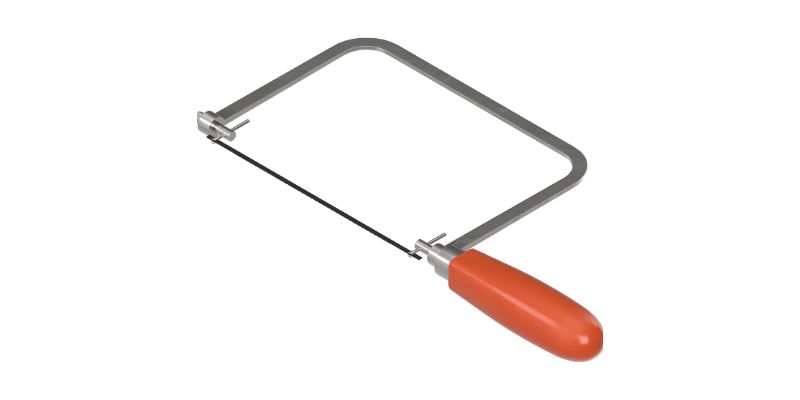
A fret saw is a specialized hand saw designed for extremely fine and intricate curved cuts. Think of it as the artist’s brush of the saw world. Its defining feature is a very thin, narrow blade held under tension by a C-shaped frame.
Here’s what makes a fret saw special:
- Thin Blade: The blades are incredibly thin, often only a millimeter or two wide. This allows for very tight turns and delicate patterns.
- Tensioning Mechanism: Most fret saws have a mechanism (like a wingnut) to adjust the tension of the blade. Proper tension is crucial for clean cuts and preventing blade breakage.
- Deep Frame: The characteristic C-shaped frame is typically quite deep, allowing you to cut well into the center of a workpiece.
- Fine Teeth: Fret saw blades have very fine teeth, usually with 10 to 32 teeth per inch (TPI). This high TPI produces smooth, precise cuts with minimal tear-out.
What is it best for?
- Intricate scrollwork and decorative patterns.
- Cutting fine details in marquetry and inlay work.
- Creating delicate shapes in thin wood, veneer, or even thin plastic.
- Model making and intricate craft projects.
Because the blade is so thin and the teeth are so fine, a fret saw provides exceptional control for detailed work. However, it’s not designed for speed or cutting through thick material.
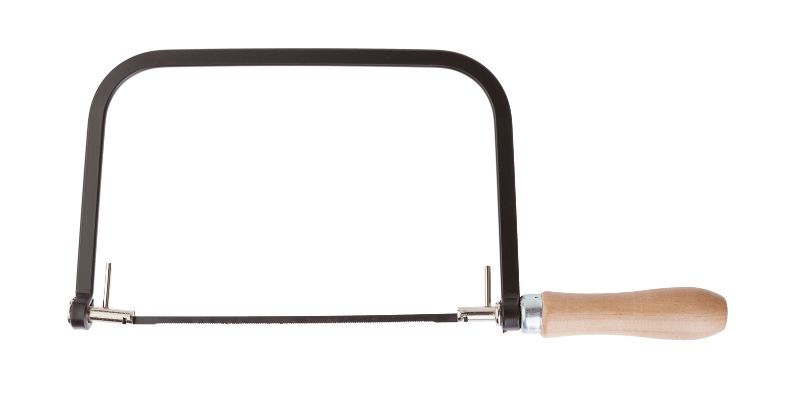
Understanding the Basics: What is a Coping Saw?
A coping saw is another type of hand saw used for cutting curves, but it’s generally more robust than a fret saw. It also features a thin blade held in tension by a C-shaped frame, but there are key differences in blade thickness, tooth count, and frame construction.
Here’s what defines a coping saw:
- Thicker Blade: Coping saw blades are wider and sturdier than fret saw blades. This makes them more durable and less prone to breaking when used with more force.
- Adjustable Tension: Like fret saws, coping saws use a tensioning mechanism. The handle often swivels to adjust the blade’s orientation.
- Variable Frame Depth: While still C-shaped, coping saw frames can vary in depth, but they are generally less deep than fret saws.
- Coarser Teeth: Coping saw blades typically have fewer teeth per inch (often 10-18 TPI) compared to fret saws. This allows for faster cutting but results in a slightly rougher finish.
What is it best for?
- Cutting curves and shapes in medium-thickness wood.
- Making precise internal cuts, especially for woodworking joints like coping joints in molding.
- Trimming small pieces of wood.
- General-purpose curved cutting in DIY projects.
A coping saw offers a good balance between the ability to cut curves and a reasonable cutting speed, making it a versatile tool for many home woodworking tasks.
Fret Saw vs Coping Saw: Key Differences Explained
When you look at a fret saw and a coping saw side-by-side, the most obvious similarities are the C-shaped frame and the use of a thin, tensioned blade. However, their subtle design differences dictate their best uses. Understanding these distinctions is crucial for choosing the right tool for your specific cutting task.
Let’s break down the core differences:
| Feature | Fret Saw | Coping Saw |
|---|---|---|
| Blade Thickness | Very thin, narrow (e.g., 0.5mm – 1mm) | Thicker, wider (e.g., 1mm – 2mm) |
| Teeth Per Inch (TPI) | High TPI (10-32 TPI) for fine, smooth cuts | Lower TPI (10-18 TPI) for faster, slightly rougher cuts |
| Frame Depth | Generally deeper frame to allow cuts further into the workpiece | Variable, often less deep than fret saws |
| Blade Tension | Crucial for precision; blades are more prone to breaking if not tensioned correctly | Important, but blades are more forgiving and durable |
| Primary Use | Intricate detail, fine scrollwork, delicate patterns | General curved cuts, joinery (like coping joints), medium-thickness wood |
| Cutting Speed | Slower, requires more delicate handling | Faster, more robust for general use |
| Best for | Marquetry, inlay, model making, delicate craft projects | Molding, birdhouses, simple furniture curves, DIY projects |
The choice between a fret saw vs coping saw really comes down to the level of detail and the thickness of the material you’re working with. If you need surgical precision for tiny curves, the fret saw is your go-to. If you need to make a smooth curve in a piece of plywood or trim some baseboard molding, the coping saw is likely the better choice.
When to Use a Fret Saw: The Master of Detail
Imagine you’re creating a beautiful wooden picture frame with a delicate, winding pattern carved into its surface, or perhaps assembling a miniature wooden ship model with tiny, precise parts. These are the kinds of tasks where a fret saw truly shines. Its design is optimized for control and precision, allowing you to execute the most intricate cuts imaginable.
Here are the scenarios where a fret saw is your best friend:
- Intricate Scrollwork: If your design involves tight curves, sharp turns, and fine lines, a fret saw is indispensable. The thin blade can navigate these complexities with ease.
- Marquetry and Inlay: These techniques involve cutting thin pieces of wood or other materials to fit together precisely. The fine teeth and thin blade of a fret saw ensure a clean, gap-free fit, crucial for beautiful results. For more on marquetry, explore resources from organizations like the Woodworking UK, which often feature detailed techniques.
- Model Making: When building detailed models, whether it’s architectural, ship, or airplane models, you often work with thin materials and require extremely precise cuts. A fret saw is perfect for this scale of work.
- Delicate Craft Projects: For any craft project that demands fine detail, such as custom jewelry boxes, decorative screens, or intricate wooden toys, the fret saw offers the control needed.
- Cutting Thin Materials: Fret saws work wonderfully on veneers, thin plywood, balsa wood, and even thin plastics or metal sheets where a very fine cut is required.
Pros of using a Fret Saw:
- Unmatched precision for intricate curves.
- Produces very smooth cuts with minimal tear-out.
- Allows for very tight turns and complex patterns.
- Ideal for thin materials and delicate work.
Cons of using a Fret Saw:
- Blades are fragile and can break easily if too much force is applied or if tension is incorrect.
- Cutting is slower due to the fine teeth and delicate nature of the tool.
- Not suitable for thicker or harder woods.
- Requires a steady hand and careful technique.
When to Use a Coping Saw: The Versatile Workhorse
Now, let’s talk about the coping saw. This is the saw you’ll reach for when you need to cut a curve in a piece of solid wood for a chair leg, trim the edge of a shelf, or, as the name suggests, create a “cope” joint in molding. It’s a more general-purpose curved-cutting saw, designed to handle a bit more pressure and slightly thicker materials than a fret saw.
Here are the situations where a coping saw is the ideal choice:
- Cutting Wood Joints: The most classic use is creating coping joints in molding. This involves cutting a precise 45-degree angle on one piece of molding so it fits snugly against the profile of another piece. This technique is common in interior trim work. For guidance on making these joints, you might find resources from carpentry experts helpful, such as those found on sites like This Old House.
- General Curved Cuts: Need to cut a gentle arc for a shelf, a rounded corner on a small table, or a curved back for a simple stool? A coping saw is perfect for these tasks.
- Trimming and Shaping: If you have a piece of wood that needs a slightly curved edge trimmed or shaped, a coping saw can do the job efficiently.
- Working with Medium-Thickness Wood: Coping saws can handle wood up to about 1 inch thick quite effectively, provided you use the right blade and technique.
- DIY and Home Projects: For most home improvement and DIY woodworking projects that involve cutting curves, a coping saw is usually the most practical and versatile tool.
Pros of using a Coping Saw:
- More durable and less prone to breaking than fret saw blades.
- Cuts faster than a fret saw due to coarser teeth.
- More forgiving with less precise tensioning.
- Versatile for a range of DIY and joinery tasks.
- Can handle slightly thicker materials than a fret saw.
Cons of using a Coping Saw:
- Less precise for extremely intricate or fine detail work.
- Cuts will be slightly rougher than those from a fret saw.
- The frame depth might limit how far into a large piece you can cut.
Choosing the Right Blade: The Key to Success
Both fret saws and coping saws rely on their blades for their cutting action, and selecting the correct blade is just as important as choosing the right saw. The blade determines the smoothness of the cut, the speed of cutting, and the types of material you can work with.
Blade Types for Fret Saws:
Fret saw blades are typically sold in small packs and come in a variety of tooth configurations:
- Fine-Tooth Blades (20-32 TPI): These are the most common for detailed woodworking. They produce exceptionally smooth cuts, ideal for hardwoods, veneers, and intricate patterns.
- Medium-Tooth Blades (12-20 TPI): A bit faster than fine-tooth blades, these can be useful for slightly larger details or softer woods where a very fine finish isn’t paramount.
- Jeweler’s Blades: Even finer than standard fret saw blades, these are for the most delicate work, often used with precious metals or very thin materials.
Blade Types for Coping Saws:
Coping saw blades are generally more robust and readily available. They also come in different TPI counts:
- General Purpose Blades (12-15 TPI): These offer a good balance of cutting speed and a reasonably smooth finish, suitable for most common woodworking tasks.
- Fine-Tooth Blades (16-18 TPI): For smoother cuts on harder woods or when more control is needed, these are a good choice.
- Coarse-Tooth Blades (10-12 TPI): These blades cut faster but will leave a rougher finish. They are best for softwoods or when speed is more important than finish quality.
- Metal-Cutting Blades: Some coping saw frames can also accept blades designed for cutting thin metal.
Blade Orientation:
A key feature of many coping saw handles is that they can swivel. This allows you to orient the blade so the teeth are cutting in the direction you need them to, especially useful when cutting internal curves. The teeth should always point away from the handle, meaning they cut on the push stroke.
For fret saws, the blade is typically held perpendicular to the frame. You might need to adjust the tension and blade direction to suit the curve you’re cutting.
How to Use a Fret Saw: Precision in Practice
Using a fret saw requires patience and a gentle touch. Because the blades are so delicate, improper technique can lead to frustration and broken blades. Here’s a step-by-step guide to get you started:
Step 1: Prepare Your Saw and Blade
- Select the Right Blade: Choose a blade with the appropriate TPI for your material and desired finish. Fine-tooth (20+ TPI) is usually best for wood.
- Install the Blade: Insert the blade into the saw frame, ensuring the teeth point away from the handle. The pins at the end of the blade should fit into the slots on the saw’s clamps.
- Tension the Blade: Adjust the tension using the wingnut or other mechanism. The blade should be taut, like a guitar string. Too loose, and it will wander; too tight, and it might snap. A good rule of thumb is that it should sing when plucked lightly.
- Set Blade Orientation (if applicable): Some fret saws allow you to set the blade perpendicular to the frame for easier cutting of internal curves.
Step 2: Mark Your Cut Line
Clearly mark the line you intend to cut on your workpiece. For very intricate work, consider drawing a guide line or pattern directly onto the wood.
Step 3: Start the Cut
- For Internal Cuts: You’ll need to drill a small pilot hole inside the waste area of your cut. Thread the blade through this hole before securing it in the saw frame.
- For External Cuts: Position the saw so the blade is on the waste side of your cut line.
- Begin Sawing: Use smooth, controlled strokes. Let the saw do the work; don’t force it. Focus on moving the saw, not just pushing hard.
- Follow the Line: Gently guide the saw along your marked line. For tight curves, you might need to make short, rocking strokes.
- Turn the Workpiece: Whenever possible, it’s easier to turn the workpiece to follow the curve than to try and maneuver the saw in awkward angles.
- Keep Tension: Be mindful of blade tension. If it feels loose, stop and re-tension.
Step 5: Complete the Cut
As you reach the end of the cut, slow down and use very gentle strokes to avoid chipping or breaking the wood on the exit.
Pro Tip: If you’re cutting a sharp internal corner, you might need to make two relief cuts from the edge of the material into the corner to remove the waste material more easily.
How to Use a Coping Saw: Efficient Curve Cutting
The coping saw is more forgiving and generally used with more vigor than a fret saw. Its robust nature makes it suitable for a wider range of tasks. Here’s how to use it effectively:
Step 1: Prepare Your Saw and Blade
- Choose Your Blade: Select a blade based on the wood and the desired finish. For most tasks, a 12-15 TPI blade is a good starting point.
- Install the Blade: Place the blade pins into the frame slots, with the teeth pointing away from the handle (this means they cut on the push stroke).
- Tension the Blade: Ensure the blade is taut. Most coping saws have a handle that can be twisted to achieve the correct tension. A properly tensioned blade won’t flex or buckle easily.
- Orient the Blade: If you’re cutting an internal curve, you can often swivel the handle to orient the blade parallel to the desired cut direction.
Step 2: Mark Your Cut Line
Draw a clear, precise line on your workpiece. For joinery, ensure your lines are exact.
Step 3: Start the Cut
- Internal Cuts: Drill a pilot hole through the waste material. Thread the blade through the hole and secure it.
- External Cuts: Position the saw on the waste side of your line.
- Begin Sawing: Use a steady, moderate pressure. Make smooth, forward strokes. Avoid jerky movements. The teeth are designed to cut on the push stroke, so use your arm and shoulder for power.
Step 4: Follow the Curve
- Guide the Saw: Keep the blade following your marked line. The coarser teeth will remove material fairly quickly.
- Turn the Workpiece: Just like with a fret saw, turning the workpiece is often the easiest way to navigate curves.
- Maintain Control: Keep the saw blade upright and perpendicular to the wood surface for the cleanest cut.
Step 5: Finish the Cut
As you approach the end of the cut, ease up on the pressure and use shorter strokes to prevent tear-out or splintering on the exit.
Pro Tip: For very tight curves, you might need to make small relief cuts from the edge into the curve. Also, remember that you can pivot the blade using the handle to cut in different directions without having to reposition the entire saw.
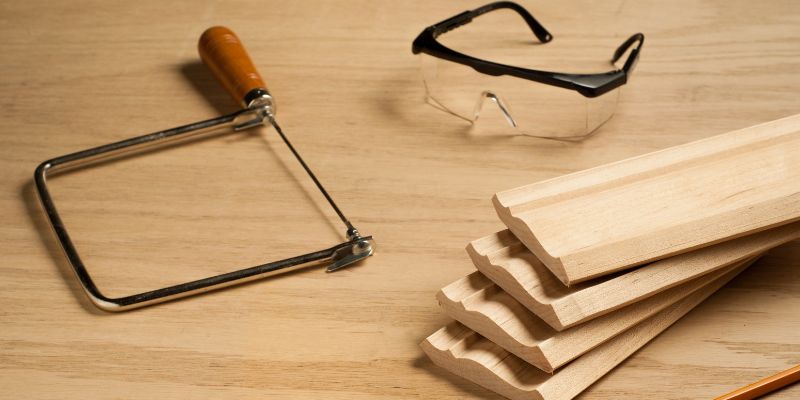
Safety First: Essential Precautions
Woodworking tools, even hand saws, require respect and proper safety measures. Whether you’re using a fret saw or a coping saw, keeping yourself safe should always be your top priority. Here are some essential safety tips:
- Wear Safety Glasses: Always wear safety glasses or goggles to protect your eyes from flying wood chips or broken blades.
- Secure Your Workpiece: Use clamps or a vise to firmly hold your workpiece. This prevents it from moving unexpectedly during sawing and keeps your hands away from the blade.
- Proper Blade Tension: Ensure the blade is properly tensioned. A loose blade can wander and cause inaccurate cuts or break unexpectedly. A blade that’s too tight might snap.
- Keep Blades Sharp: Sharp blades cut more easily and safely, reducing the amount of force you need to apply.
- Use the Right Saw for the Job: Don’t force a tool beyond its intended capability. Using a fret saw for thick material or a coping saw for ultra-fine detail can be inefficient and unsafe.
- Keep Fingers Clear: Always be aware of where your fingers are in relation to the blade, especially when starting a cut or working on internal cuts.
- Work in a Well-Lit Area: Good lighting helps you see your cut lines clearly and avoid mistakes.
- Maintain a Clean Workspace: A tidy workspace reduces tripping hazards and makes it easier to focus on your task.
By following these simple safety guidelines, you can enjoy your woodworking projects with confidence and peace of mind.
FAQ: Your Questions Answered
Q1: Can I use a coping saw for fine scrollwork?
While a coping saw can cut curves, it’s not ideal for very fine, intricate scrollwork. Its blades are thicker and have coarser teeth, which produce a less precise and smoother finish than a fret saw. For delicate patterns, a fret saw is a much better choice.
Q2: Which saw is better for cutting molding joints?
A coping saw is the traditional and best tool for cutting molding joints, particularly coping joints. Its ability to make precise curved cuts and its slightly more robust blade make it ideal for this task.
Q3: Do I need to drill a hole to start an internal cut with either saw?
Yes, for any internal cut (a cut that doesn’t start from the edge of the workpiece), you will need to drill a pilot hole large enough to thread the saw blade through. After threading, re-secure the blade in the saw frame.
Q4: How do I know if my fret saw or coping saw blade is tensioned correctly?
A properly tensioned blade should be taut, similar to a guitar string. When plucked lightly, it should produce a clear ringing sound, not a dull thud. If the blade is too loose, it will wander and flex; if it’s too tight, it risks snapping. It often takes a little practice to get the feel for it.
Q5: Can I use a fret saw blade in a coping saw frame, or vice versa?
Generally, no. Fret saw blades are much thinner and narrower than coping saw blades. While they might fit into the clamps, they won’t have the necessary rigidity or appropriate tooth count for the types of cuts a coping saw is designed for. Conversely, a coping saw blade is too thick and wide for most fret saw frames.
Q6: What’s the difference in the finish between a fret saw and a coping saw cut?
A fret saw, with its very fine teeth and thin blade, will produce a very smooth, clean cut with minimal tear-out. A coping saw, having coarser teeth, will cut faster but leave a slightly rougher finish that may require sanding.
Conclusion: Making the Right Choice for Your Project
So, there you have it! The fret saw vs coping saw dilemma is now much clearer. Remember, the fret saw is your specialist tool for intricate, detailed work where precision is paramount, like marquetry or delicate scrollwork. It’s like a surgeon’s scalpel for wood.
On the other hand, the coping saw is your versatile, everyday workhorse for cutting curves in a variety of woodworking projects, from joinery in molding to shaping simple furniture pieces. It’s your reliable multi-tool for curved cuts.
Understanding the nuances of their blades, frames, and intended uses will empower you to select the right saw for any task. With a little practice, you’ll be confidently making beautiful, clean curved cuts, bringing your woodworking visions to life. Happy sawing!