
Finish Nailer Angled vs Straight: The Proven Choice for Your Projects. For most DIYers and home projects, an angled finish nailer offers superior access and versatility, making it the generally preferred choice over a straight finish nailer. Understand the key differences to pick the best one for your needs.
Picking the right nailer can feel a bit like choosing a favorite tool – everyone has an opinion! When you’re looking at finish nailers, you’ll quickly see two main types: straight and angled. This might leave you wondering, “Which one is actually better for my projects?” It’s a common question, and honestly, it can be a bit confusing at first. But don’t worry, we’re going to break it down in a way that makes perfect sense, helping you choose the tool that will make your DIY projects smoother and your results cleaner. Let’s get your finishing jobs done right, without the guesswork!
Why the Angled vs. Straight Finish Nailer Debate Matters
As a DIYer, you want tools that make your life easier and your projects look professional. When it comes to trim work, cabinetry, or even simple furniture assembly, a finish nailer is your best friend. It drives thin, small-headed nails that are almost invisible once they’re in, giving your work a clean, polished look without the need for excessive filling.
The choice between an angled and a straight finish nailer isn’t just about what looks cool; it’s about functionality. The angle of the magazine holding the nails directly impacts where you can get the nailer, how easily you can reach tight spots, and even the types of materials you can work with. Making the wrong choice can mean awkward angles, scraped trim, and frustrating rework. We’ll help you understand the core differences so you can confidently select the right nailer for your toolbox.
Understanding the Basics: What is a Finish Nailer?
Before we dive into the angled versus straight debate, let’s quickly recap what a finish nailer is and what it does.
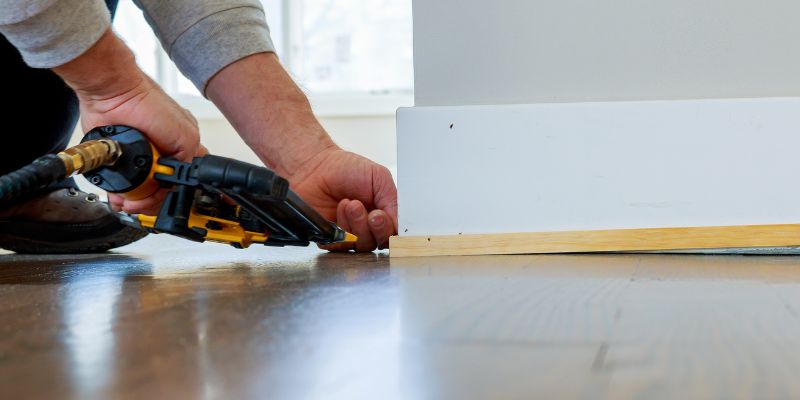
A finish nailer is a type of pneumatic (air-powered) or battery-powered tool designed to drive finishing nails. These nails are typically slender and have small heads, which are less noticeable on the surface of your wood. They are ideal for attaching trim, molding, baseboards, chair rails, and other decorative or structural wood pieces where a clean, hidden fastener is desired.
Think of it as a more refined, precise cousin to a framing nailer, which drives much larger nails for structural framing. A finish nailer is all about finesse and appearance.
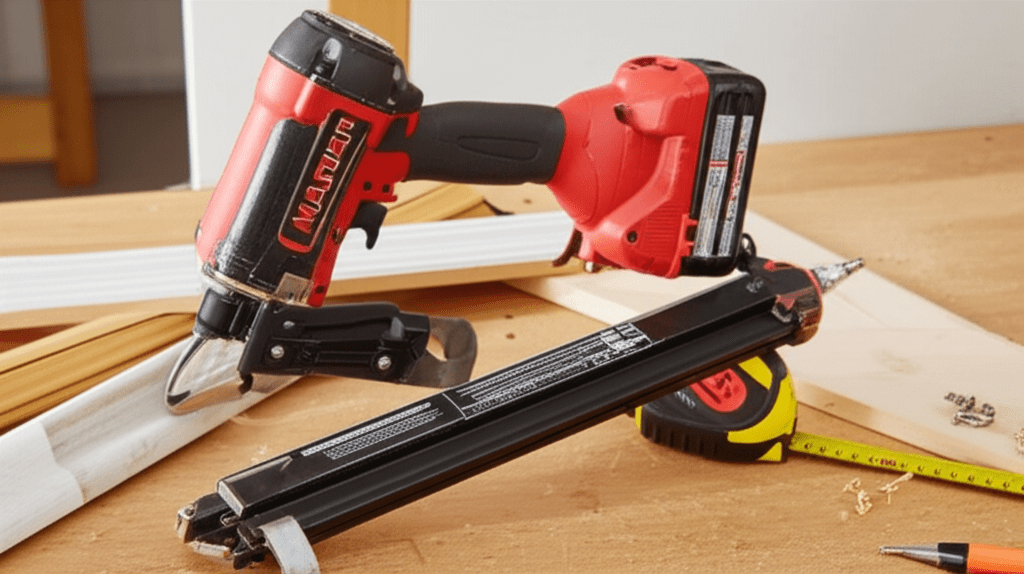
The Core Difference: The Magazine Angle
The fundamental distinction between an angled finish nailer and a straight finish nailer lies in the angle of the magazine that holds the nails.
Straight Finish Nailer: The magazine is parallel to the barrel of the nailer. The nails sit in a straight line.
Angled Finish Nailer: The magazine is set at an angle (commonly 20, 21, or 25 degrees) to the barrel. The nails are also arranged in an angled strip.
This seemingly small difference has significant implications for how and where you can use the tool.

Angled Finish Nailers: The Versatile Workhorse
Angled finish nailers have become the go-to choice for many woodworkers and DIYers, and for good reason. Their design offers significant advantages, particularly in challenging situations.
Key Advantages of Angled Finish Nailers
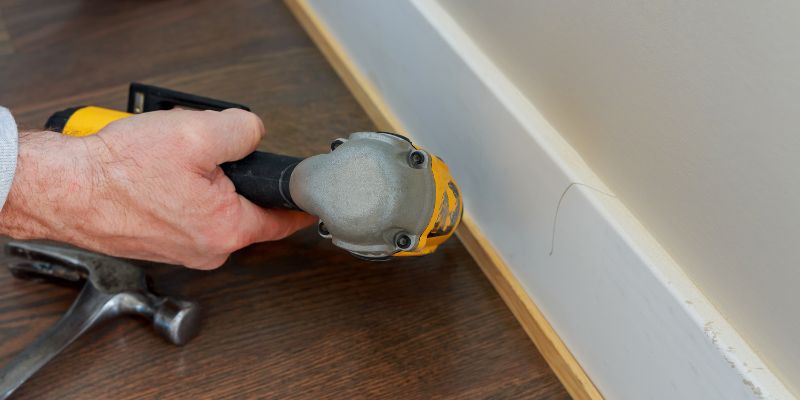
1. Superior Access to Tight Spaces: This is the biggest win for angled nailers. The angled magazine allows you to get the nose of the nailer into corners, between studs, or alongside existing trim much more easily. A straight nailer, with its bulkier magazine, often won’t fit into these tight spots without hitting adjacent surfaces. This means less awkward maneuvering and fewer scraped knuckles or damaged workpieces.
2. Greater Flexibility: You can often achieve a greater range of nailing angles with an angled nailer, allowing you to drive nails from different perspectives without sacrificing precision.
3. Reduced Risk of Damage: Because you can often position the nailer more comfortably and accurately in tight or awkward spots, you’re less likely to accidentally bump trim or walls with the tool’s body.
When to Choose an Angled Finish Nailer
Interior Trim Work: Baseboards, crown molding, window casings, door frames – these all involve corners and tight fits where an angled nailer shines.
Cabinetry: Attaching face frames, assembling drawers, or adding decorative elements often requires access to angled positions.
Anywhere Space is Limited: If your project involves working in confined areas, an angled nailer is almost certainly the better choice.
Common Angles and What They Mean
The angle of the magazine isn’t arbitrary. The most common angles you’ll find are:
20-degree: These often have a slightly slimmer magazine and are popular for very detailed trim work.
21-degree: A very common angle, offering a good balance of access and nail capacity.
25-degree: Often referred to as “25-degree offset” or “25-degree cordless,” these are designed for even better access in very tight corners.
The specific angle doesn’t drastically change the fundamental benefit of access, but it can influence the overall slimness of the tool’s profile.
Straight Finish Nailers: The Niche Player
While angled nailers dominate, straight finish nailers still have their place. They are often simpler in design and can be more cost-effective.
Key Advantages of Straight Finish Nailers
1. Simpler Design: Generally, straight nailers have fewer moving parts in the magazine mechanism, which can sometimes translate to greater durability or easier maintenance.
2. Potentially Wider Nail Range: Some straight nailers are designed to accept a slightly wider range of nail sizes within their gauge categories.
3. Cost-Effectiveness: Often, straight nailers can be found at a lower price point than their angled counterparts.
4. Easier to Find Nails: Historically, straight-collation nails were more prevalent, making them easier to source. However, this is less of an issue today with the widespread popularity of angled nailers.
When to Choose a Straight Finish Nailer
Open-Area Work: If your projects primarily involve nailing in open, flat surfaces where access isn’t a concern, a straight nailer can work perfectly fine.
Budget-Conscious Projects: If you’re on a very tight budget and your projects don’t require tight-corner access, a straight nailer might be a suitable option.
Specific Applications: In some very niche woodworking applications where a perfectly straight drive is preferred or where space is ample, a straight nailer might be specified.
Direct Comparison: Angled vs. Straight
Let’s put them side-by-side to highlight the key differences:
| Feature | Angled Finish Nailer | Straight Finish Nailer |
| :—————— | :————————————————- | :————————————————– |
| Magazine Angle | Angled (20, 21, 25 degrees) | Straight (parallel to barrel) |
| Access to Corners | Excellent | Limited |
| Access to Tight Spaces | Excellent | Poor |
| Versatility | High | Moderate |
| Common Use Cases| Trim, molding, cabinetry, tight spaces | Open-area work, simple assembly |
| Tool Profile | Can be slightly bulkier due to magazine angle | Generally slimmer |
| Cost | Often slightly higher | Often slightly lower |
| Nail Collation | Angled strips (e.g., 20°, 21°, 25°) | Straight strips |
Nail Collation Types: What to Look For
When buying nails for your finish nailer, you’ll notice they come in different “collation” types. This refers to how the nails are held together in strips.
Plastic Collated: The most common type. Nails are held together by plastic strips. For angled nailers, these plastic strips are cut at an angle to match the magazine.
Paper Collated: Nails are held together by a paper strip. These are common for framing nailers and some heavier-duty finish nailers, but less common for typical finish nailers.
Wire Collated: Nails are welded together in strips. Less common for finish nailers.
It’s crucial to buy the correct collation type and angle for your specific nailer. Using the wrong nails can cause jams, damage the tool, or lead to poor performance. Always check your nailer’s manual for the compatible collation. You can learn more about nail collation types from resources like This Guide on Nail Collation.
Choosing the Right Nailer for Your DIY Needs
As a beginner or an everyday DIYer, you’re likely tackling a variety of projects. This is where the versatility of the angled finish nailer truly shines.
Consider your typical projects:
If you do a lot of interior trim: Baseboards, window and door trim, crown molding – an angled finish nailer is almost essential. You’ll save yourself a lot of frustration trying to get into those corners.
If you build simple furniture or boxes: Straightforward assembly where you have plenty of room to maneuver might be fine with a straight finish nailer. However, even here, an angled nailer can be helpful for attaching cleats or internal bracing.
If you’re just starting and want one tool to do most things: The angled finish nailer is the more versatile choice. It will handle the vast majority of trim and light woodworking tasks you’ll encounter as a beginner.
Think about your workspace:
Tight spaces? Definitely angled.
Plenty of open room? Straight can work, but angled is still generally more flexible.
Budget considerations:
While straight nailers can be cheaper, the price difference is often not so significant that it outweighs the practical benefits of an angled nailer for most users. Investing a little more upfront in an angled nailer will likely pay off in ease of use and project quality.
Power Source: Pneumatic vs. Cordless
This is another decision point when choosing a finish nailer.
Pneumatic (Air-Powered): These require an air compressor and a hose.
Pros: Generally lighter, less expensive to buy the tool itself, consistent power, reliable.
Cons: Requires an air compressor and hose, which adds to the overall cost and setup complexity. The hose can be cumbersome.
Cordless (Battery-Powered): These have the motor and battery integrated into the tool.
Pros: Highly portable, no hoses or compressors needed, quick setup and cleanup.
Cons: Can be heavier, more expensive initially, battery life is a consideration, and sometimes the power can be slightly less consistent than pneumatic for very dense woods.
For beginners who want maximum convenience and portability, a cordless finish nailer (whether angled or straight) is often an attractive option. However, if you already have an air compressor or plan to invest in one for other tools, a pneumatic angled finish nailer is a fantastic, reliable choice.
Using Your Finish Nailer Safely and Effectively
No matter which type you choose, safety and proper technique are paramount.
Safety First!
Always wear safety glasses. Finish nailers are powerful tools, and ejected nails or flying debris can cause serious eye injury.
Never point the nailer at yourself or others. Treat it like a firearm – keep your finger off the trigger until you’re ready to fire.
Ensure the nailer is set to “contact trip” or “bump fire” mode only when you intend to fire. Many nailers have a safety selector. “Sequential trip” mode (where you must press the safety contact point against the wood before pulling the trigger) is generally safer for beginners as it prevents accidental firing.
Keep your hands and body clear of the nailing path.
Read your tool’s manual. Every nailer is slightly different. Familiarize yourself with its specific features and safety instructions. For general safety guidelines on nail guns, you can refer to resources from organizations like OSHA (Occupational Safety and Health Administration) on Nail Gun Safety.
Effective Nailing Techniques
1. Positioning: Place the nose of the nailer flush against the surface where you want to drive the nail. For angled nailers, ensure the magazine is angled to allow the nail to enter the workpiece at the desired depth and angle.
2. Depth Adjustment: Most finish nailers have a depth adjustment setting. Practice on scrap wood to set the correct depth so the nail head sits flush with or slightly below the surface of the wood, ready for filling if needed. Too deep, and you’ll sink the nail too far; too shallow, and the head will protrude.
3. Driving Nails:
Sequential Trip: Press the safety contact point firmly against the wood, then pull the trigger.
Contact Trip (Bump Fire): Hold the trigger down and bump the nose of the nailer against the wood. Use this mode with caution and only when you are deliberately placing nails.
4. Nail Spacing: For trim, aim for nails about 12-16 inches apart, and closer near the ends of trim pieces for better holding power.
5. Angle of Drive: For trim, you typically want to drive nails at a slight angle into the framing or substrate behind the trim. This provides better holding power than driving them straight through. This is where an angled nailer excels, as it naturally facilitates this angled drive.
Common Finish Nailer Problems and Solutions
Even with the right tool, you might encounter issues.
Nail Jam:
Cause: Often due to using the wrong size nails, a bent nail, or a faulty magazine.
Solution: Always disconnect the air supply or remove the battery first! Carefully follow your nailer’s manual to open the magazine and clear the jam. Most jams can be cleared by gently pulling the nails out.
Nails Not Driving Fully:
Cause: Insufficient air pressure (for pneumatic), low battery charge (for cordless), depth setting too high, or trying to drive into very dense hardwood.
Solution: Check air pressure/battery level. Adjust depth setting. For dense woods, consider using a higher gauge nail, a more powerful nailer, or pre-drilling pilot holes.
Nails Bending:
Cause: Driving nails at too extreme an angle, hitting knots or very dense grain, or using nails of too low a gauge.
Solution: Adjust your nailing angle. Ensure you’re using the correct nails for your nailer and project wood.
Tool Leaking Air:
Cause: Damaged O-rings, loose connections, or a faulty trigger valve.
Solution: Check all hose connections. Inspect the tool for visible damage. If the problem persists, it may require professional repair or replacement of parts.
Frequently Asked Questions (FAQs)
Q1: Can I use a straight finish nailer for baseboards?
Yes, you can use a straight finish nailer for baseboards, but it will be significantly more difficult in corners and tight spaces compared to an angled nailer. You’ll find yourself having to awkwardly position the nailer, increasing the risk of marring your trim or the wall.
Q2: Which type of finish nailer is better for crown molding?
An angled finish nailer is highly recommended for crown molding. The angles involved in fitting and attaching crown molding make the superior access provided by an angled nailer invaluable.
Q3: Do I need different nails for angled vs. straight finish nailers?
Yes, you absolutely do. You need nails that are collated (held together) at the correct angle to match your nailer’s magazine. Angled nailers use angled strips of nails, while straight nailers use straight strips. Always check your nailer’s specifications for the correct nail collation type and size.
Q4: How many nails can fit in a finish nailer magazine?
This varies greatly by model and the length of the nails. Typically, you can expect anywhere from 100 to 200 nails per magazine load. It’s always a good idea to check your tool’s manual for its specific capacity.
Q5: Can I use a 21-degree nailer with 20-degree nails?
It’s generally not recommended. While the angles are close, using nails not specifically designed for your nailer’s angle can lead to feeding issues, jams, and damage to the tool. Stick to the collation angle specified by the manufacturer.
Q6: Which is more powerful, an angled or straight finish nailer?
Power is more related to the air pressure (for pneumatic) or battery voltage and motor (for cordless) than the angle of the magazine. Both types can be powerful enough for most finishing tasks. The angle* primarily affects access and maneuverability.
Q7: How do I adjust the depth of the nails?
Most finish nailers have a depth adjustment dial or lever, usually located near the nose of the tool. Consult your specific tool’s manual for precise instructions on how to use this feature. Experiment on scrap wood to find the perfect setting.
Conclusion: Your Proven Choice
After breaking it all down, the choice between an angled and a straight finish nailer becomes much clearer. For the vast majority of DIYers and home improvement projects, the angled finish nailer is the proven, more versatile, and ultimately more practical choice. Its ability to access tight corners and awkward spaces significantly simplifies tasks like installing trim, baseboards, and crown molding, leading to cleaner results and less frustration.
While straight finish nailers have their place, the superior maneuverability and access offered by angled nailers make them a worthwhile investment for anyone serious about achieving professional-looking results in their woodworking and DIY endeavors. Whether you opt for a pneumatic or cordless model, an angled finish nailer will undoubtedly become one of your most frequently used and appreciated tools. So, grab your angled nailer, load it up with the correct nails, and get ready to tackle those finishing projects with confidence!