

Lampshades are generally not universal; they rely on specific fitting types (like harp, screw-on, or clip-on) that must match the lamp base. This guide offers easy fixes and sizing tips so you can confidently swap shades for a perfect, stable fit every time.
Ever bought a beautiful new lampshade only to find it wobbles, slides off, or just won’t connect to your favorite lamp base? You are definitely not alone! It’s one of the most common frustrations when decorating with lighting. The good news is that this isn’t a sign you need a whole new lamp. Most lampshade issues come down to simple hardware mismatches. As your friendly guide here, I’ll show you exactly how to identify your lamp’s fitting and apply easy, affordable fixes. We’ll make sure your new shade sits perfectly straight and secure. Let’s dive into making your lamps shine!
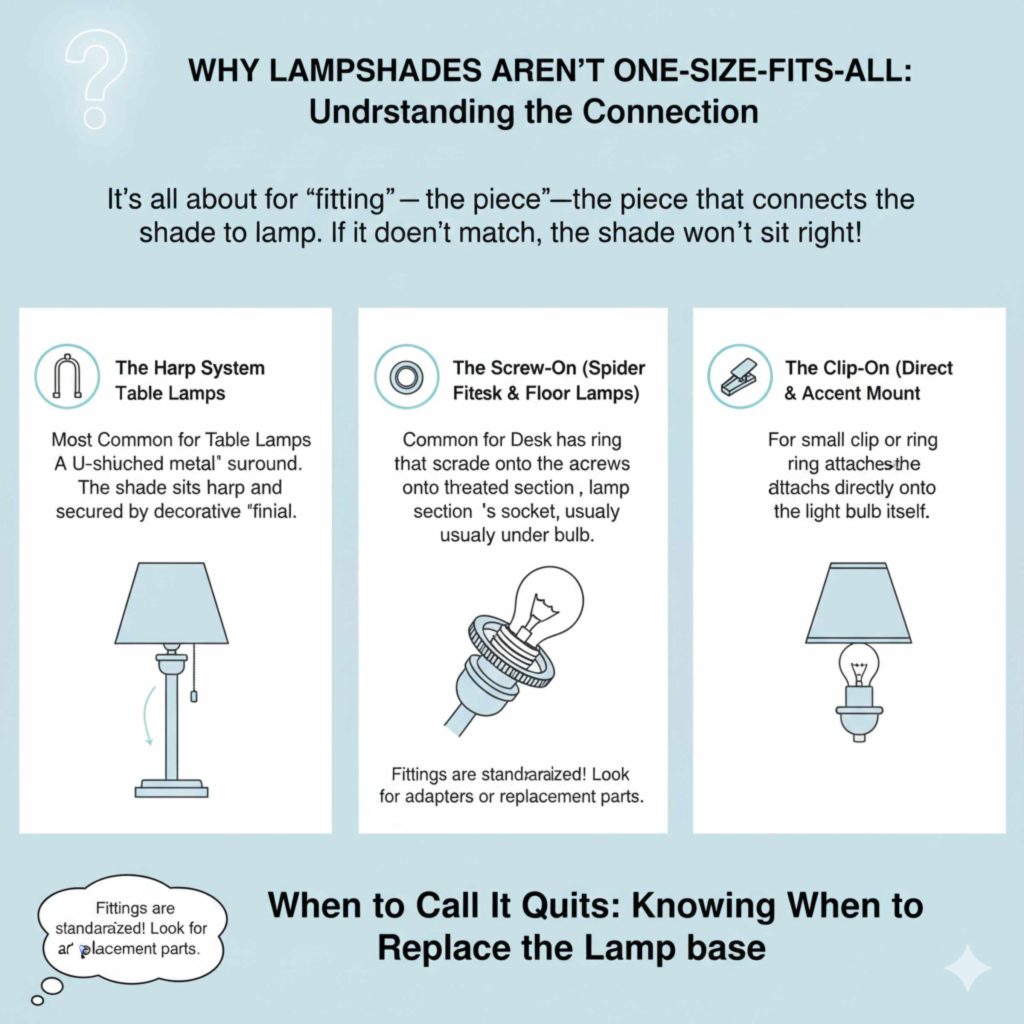
Why Lampshades Aren’t One-Size-Fits-All: Understanding the Connection
When we talk about lampshades being “universal,” we mean it in the broadest sense—they all cover a light bulb. But when it comes to installation, they are anything but universal. The piece that connects the shade to the lamp is called the “fitting,” and it’s the single most important factor determining compatibility. If the fitting doesn’t match, the shade will either fall off or sit too high or too low.
Think of it like shoes: you wouldn’t try to put a hiking boot sole onto a ballet slipper. Each lamp base was designed to accept a specific type of connection hardware. Fortunately, these connection types are standardized, which means you can easily find adapters or replacement parts.
The Three Main Lamp Shade Fittings You Must Know
To fix any fitting problem, you first need to know what you are working with. There are three primary ways a lampshade attaches to a lamp base. Recognizing these is the first step to a successful upgrade.
- The Harp System (Most Common for Table Lamps): This is probably the most traditional setup. It uses a U-shaped metal frame called a “harp” that sits over the light bulb socket. The lampshade sits on top of the harp and is secured by a decorative nut called a “finial” screwed onto the top post of the harp.
- The Screw-On (or Spider Fitter): This fitting is often found on smaller lamps, desk lamps, or certain floor lamps. The shade has a ring built into its bottom opening that screws directly onto a threaded section of the lamp’s socket hardware, often underneath the light bulb itself.
- The Clip-On (or Direct Mount): These are very common on candle-style lamps or smaller accent lamps where there is no room for a harp or extra hardware. The shade has a small ring or clip that physically snaps or clips directly onto the light bulb itself.
Step-by-Step Guide to Diagnosing Your Lamp Fitting
Before we start buying parts, let’s play detective. Grab your lamp, remove the old shade (if there is one), and look closely at the socket area. We need to identify exactly what hardware is present.
Step 1: Check for a Harp
Is there a U-shaped metal frame extending up from the base of the socket?
- Yes: You have a Harp System. You will need a shade with a “washer top” or “harp fitter” that can accommodate the finial.
- No: Move to Step 2.
Step 2: Examine the Socket Threads
If there is no harp, look at the very top of the socket where the light bulb screws in. Is there threading visible below where the bulb sits?
- Yes: You likely have a Screw-On (Spider) Fitter. You need a shade with a corresponding threaded ring.
- No: Move to Step 3.
Step 3: Inspect for Direct Bulb Contact
If the socket is smooth and there’s no harp, try gently placing the shade directly over the bulb. Does it sit snugly, or is there a small metal ring inside the shade opening that seems designed to grip the bulb?
- Yes: You have a Clip-On Fitter. These shades are the most restrictive in terms of size and shape.
- No (and nothing else fits): You might have a rare or older “Uno Fitter,” which screws directly onto the socket threads instead of using a separate ring. Don’t worry; we have fixes for that too!
Essential Fixes: Making the Wrong Shade Fit Right
Once you know what you have, you can choose the right fix. These solutions are inexpensive, require no special tools, and can usually be done in under five minutes. Safety first: always unplug the lamp before making any adjustments!
Fix 1: Converting from Harp to Screw-On (Or Vice Versa)
The biggest compatibility headache is when you have a harp system but bought a shade with a screw-on fitter (or vice versa). The solution lies in adapter kits.
If You Have a Harp, But Need a Screw-On Shade:
You need to remove the harp system completely and install a socket adapter.
- Unplug the lamp and unscrew the finial.
- Lift the harp off the lamp base.
- Look inside the socket area. Often, the base of the harp unscrews, revealing threads underneath.
- Purchase a “Socket Adapter Kit” (sometimes called a “Harp Reducer”). This kit usually includes a base that screws onto the existing socket threads, creating a new threaded platform for your screw-on shade.
If You Have a Screw-On Socket, But Need a Harp System:
This is easier! You need a “Harp and Finial Kit” designed to convert a standard socket.
- Unplug the lamp.
- Remove any old hardware on the socket.
- Install the new harp base, which is designed to screw securely onto the existing threads of your lamp socket.
- Attach the U-shaped harp and secure it with the provided finial. Now you can use any washer-top shade!
Fix 2: Dealing with Clip-On Shades (The Tricky One)
Clip-on shades are popular because they look sleek, but they are fussy. If you have a clip-on shade and need to use a harp lamp, you must convert the shade itself.
You need a “Clip-On to Washer Adapter.”
This small piece is a ring that snaps into the existing clip-on opening of your shade. It converts the interior opening into the standard “washer” size needed to sit securely on top of a harp and under a finial. These adapters are crucial because they ensure the shade sits level and doesn’t touch the hot bulb.
Fix 3: The Sizing Mismatch (Too Tall or Too Short)
Even if the fitting works, the shade might look wrong. A shade that is too short makes the lamp look stubby, and one that is too tall can look top-heavy. This is where the harp height comes into play.
For a perfectly balanced look, the shade should generally hide about two-thirds of the lamp’s total height, and the bottom of the shade should sit about 1 to 1.5 inches above the socket. If your shade is too high or too low, you need to adjust the harp height.
Harp Adjustment Guide:
| Problem | Solution | Result |
|---|---|---|
| Shade sits too high (finial touches the bulb) | Replace the existing harp with a shorter one, or use a shorter finial. | Lowers the shade position. |
| Shade sits too low (barely clears the socket) | Replace the existing harp with a taller one. | Raises the shade position. |
| The socket has a threaded ring (no harp) | Use a shade that has a spider fitter opening that matches the socket diameter (usually 1.5 inches). | Ensures the shade screws on securely. |
You can find standard harp sizes (e.g., 8-inch, 10-inch, 12-inch tall). When buying a new harp, measure the distance from the top of the saddle (where the harp sits on the base) to the top of the finial threads. This measurement dictates how high your shade will sit.
A Quick Guide to Lampshade Sizing: More Than Just the Fit
Compatibility is about the connection, but aesthetics depend on the size. An ill-fitting size can ruin the look, even if the connection is perfect. As a general rule of thumb in design, the shade should be about one-third to one-half the height of the lamp base itself.
Key Dimensions to Measure Before Buying Any Shade
Never rely only on the listed diameter. Always measure these three things on your existing setup or lamp base:
- Shade Diameter (Width): Measure the bottom diameter. A good starting point is that the shade diameter should be slightly wider than the widest part of the lamp base.
- Shade Height: Measure the vertical distance from the bottom edge to the top edge. This affects the visual balance.
- Harp/Socket Height: If using a harp, measure its height. The shade height should be roughly 75% of the harp height for a balanced look, ensuring the bulb is covered.
Understanding these dimensions helps you avoid the dreaded “too big” or “too small” problem. Remember, the shade should always be wider than the lamp base for stability and visual appeal.
Toolbox Talk: Simple Hardware You Might Need
The beauty of these fixes is that they require minimal specialized tools. You are mostly just screwing and unscrewing existing parts. Here are the common, inexpensive items you might need to purchase to make the conversion.
Essential Hardware List:
- Finial: The decorative knob on top. They come in various finishes (brass, chrome, antique bronze) and thread sizes (1/4-32 is standard).
- Harp Replacement: If your current harp is bent or the wrong size. Make sure to match the thread size where it connects to the lamp base.
- Spider Reducer Ring: If you have a screw-on socket but bought a shade with a washer fitter, this ring drops into the shade and converts it to screw-on.
- Clip-On Adapter: For converting a clip-on shade to a harp system.
- Basic Screwdriver/Pliers: Sometimes, old hardware gets stuck. A pair of needle-nose pliers or a flathead screwdriver can gently help loosen stubborn parts. (Always use gentle pressure to avoid cracking the socket housing.)
For more information on standard electrical components and safety guidelines, resources like the U.S. Department of Energy’s lighting basics can offer excellent context on why these components are standardized.
Troubleshooting Common Beginner Mistakes
Even with the right hardware, things can go wrong if you rush. Here are the top three mistakes I see beginners make and how to avoid them.
Mistake 1: Forgetting to Unplug the Lamp
This sounds obvious, but when you are focused on mechanics, you forget safety. Always unplug the lamp before you start taking the socket apart or swapping out the harp. Electricity is not something to mess around with.
Mistake 2: Mismatching Thread Sizes
Not all finials or adapter rings are the same size! While 1/4-32 inch is the most common thread size for finials, if you buy a generic harp and try to put your old finial on, it might wobble or not screw on at all. If you buy a new harp, check if it comes with a matching finial, or measure the thread size of your old finial first.
Mistake 3: Over-Tightening the Shade
When securing a screw-on shade or tightening the finial on a harp system, stop when you feel firm resistance. If you crank down too hard, you risk cracking the shade material (especially paper or silk shades) or damaging the delicate threads on the socket itself. A good fit is snug, not strained.
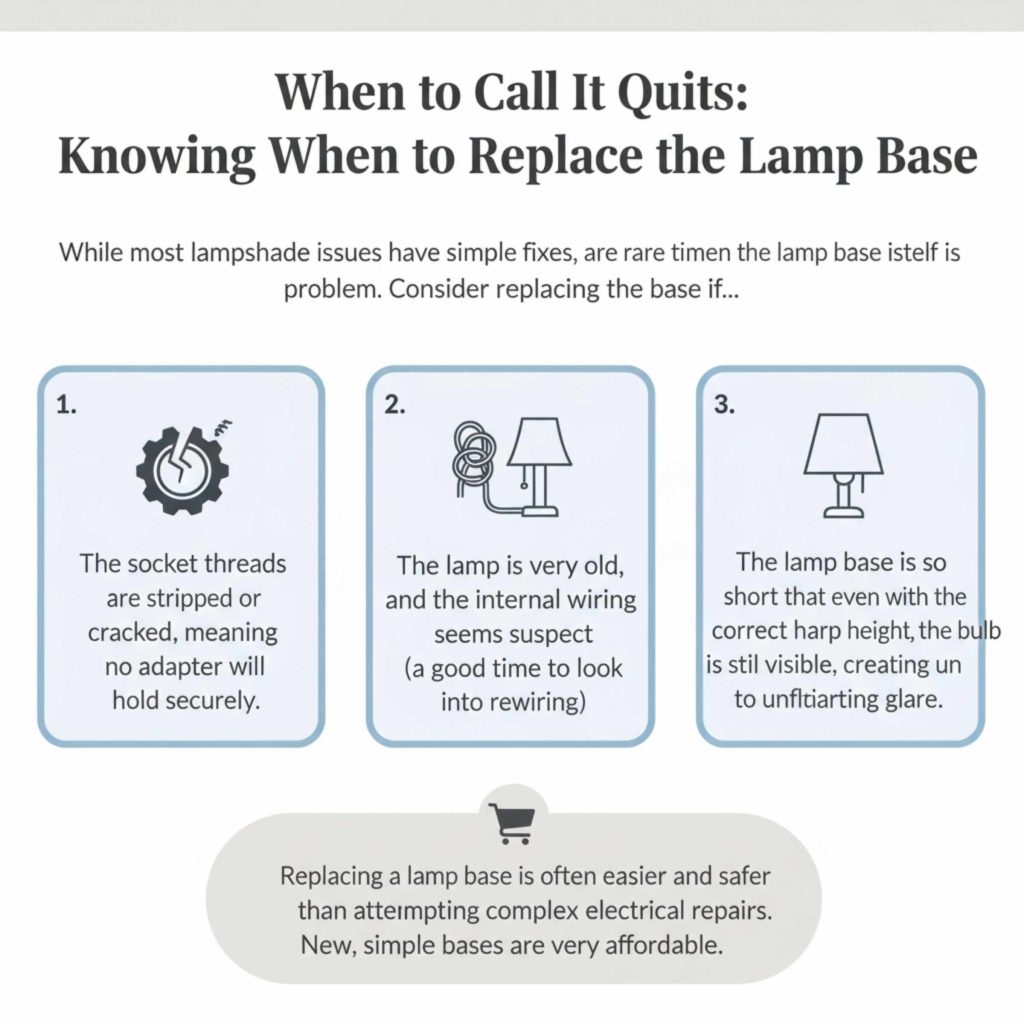
When to Call It Quits: Knowing When to Replace the Lamp Base
While most lampshade issues have simple fixes, there are rare times when the lamp base itself is the problem. If you find yourself constantly fighting the hardware, it might be time for an upgrade. Consider replacing the base if:
- The socket threads are stripped or cracked, meaning no adapter will hold securely.
- The lamp is very old, and the internal wiring seems suspect (a good time to look into rewiring).
- The lamp base is so short that even with the correct harp height, the bulb is still visible, creating an unflattering glare.
Replacing a lamp base is often easier and safer than attempting complex electrical repairs. New, simple bases are very affordable at most home goods stores.
Frequently Asked Questions (FAQ) for Lampshade Swapping
Q1: How do I know if my lampshade has a “washer fitter”?
A washer fitter means the bottom opening of the shade has a metal ring with a hole in the center. This ring is designed to sit directly on top of the lamp harp, and the finial screws through that center hole to hold the shade down.
Q2: My new shade is too wide. Can I just squash it?
No, please don’t squash it! If the shade is too wide, it will look unbalanced and might even touch the wall or furniture. The best fix is to find a shade where the bottom diameter is no more than 1.5 times the height of the lamp base. If you must keep it, try raising the shade height slightly by using a taller harp, which visually reduces the shade’s apparent width.
Q3: What is the standard size for a table lamp harp?
While there is no single “standard,” the most common height for a table lamp harp is between 8 and 10 inches. However, the critical measurement is the distance from the saddle (where it rests on the lamp) to the top thread—this determines the shade placement.
Q4: Can I use a floor lamp shade on a table lamp?
Usually not successfully. Floor lamps often use larger, heavier shades that require a very sturdy harp or a specific type of screw-on base to prevent tipping. Table lamp shades are generally too light or too small for the hardware found on large floor lamps.
Q5: My lamp has no harp, and the bulb screws in, but the shade won’t fit over the bulb. What is wrong?
This usually means you have a very low-profile socket or a chandelier-style lamp. You need a shade specifically designed for a “Spider Fitter” that has a spider ring opening matching your socket’s diameter (often 1.5 inches). If you have a harp adapter, you may need to remove it to expose the proper threads for the shade.
Q6: Are clip-on shades safe to use with high-wattage bulbs?
Clip-on shades can be risky with high heat. Because they sit very close to the bulb, it’s essential to use LED bulbs, which generate significantly less heat than traditional incandescent bulbs. Always check the maximum wattage rating printed near the socket.
Conclusion: Confidence in Your Lighting Upgrade
Finding the right lampshade fit might seem like a puzzle at first, but once you understand the language of harps, finials, and fitter rings, it becomes incredibly simple. Remember, the goal is always stability and balance. By unplugging your lamp, identifying your existing fitting (Harp, Screw-On, or Clip-On), and using the right adapter when necessary, you have the power to make any shade work beautifully.
Don’t let mismatched hardware stop you from updating your home décor. With these easy fixes in your toolbox, you’re now equipped to confidently tackle any lampshade swap. Go ahead, refresh those living room lamps—they’ll look fantastic!